What is an Android proximity sensor?
A proximity sensor is a small element of the device that is activated when the phone and any object are physically close.
Thanks to the correct operation of the proximity sensor during a conversation, the smartphone display turns off automatically as soon as the user brings it to the ear.
The Android proximity sensor is very useful and even necessary for at least two reasons, namely:
- When the screen is turned off during a call, you will definitely not accidentally press any button on the touch screen, for example, with your ear or cheek
- The Android proximity sensor allows you to save battery power. If the phone screen was turned on during a conversation, the battery charge would be consumed much faster, and this is extremely inconvenient for people who are used to or are forced to talk on the phone for a long time
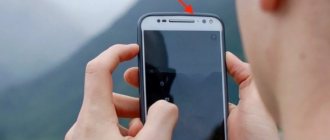
The proximity sensor is located at the top of the smartphone. As a rule, it is located next to the front camera lens. On some devices, the sensor is visible to the naked eye, while on others it is not so easy to detect. To locate the proximity sensor, simply remove the device from your ear during a call and place your finger next to the front camera. If the display goes dark, it means you have found the sensor.
How to properly calibrate the proximity sensor
If after making the settings the problem does not disappear, try calibrating. But first make sure it works:
- In the phone, instead of the number, dial the command *#*#6484#*#*, a special menu will open.
- Select “Single item Test” from the list of items.
- Next, go to “Proximity Sensor”.
- The word “Far” or a number will appear on the screen.
- Cover the sensor with your palm, the word “far” should transform into “close”, and the number will become zero. If numbers and words change, then everything works, then proceed to calibration.
On a note!
In some models, instead of the code *#*#6484#*#* you need to dial *#*#4636#*#*.
To calibrate, turn off the mobile phone. Press and hold the volume up and power buttons at the same time. After a light vibration signal, only the sound is pressed. A menu will appear on the screen. If necessary, change the language to English. Open the PCBA test menu item, then select Proximity Sensor.
For successful calibration, it is important that several conditions be met:
- the procedure is carried out on a flat horizontal surface;
- the surface is cleaned of dirt, dust, protective films and glass are removed;
- remove bright light sources.
To start calibration, press the Calibration button. To complete, click on Successfully. Exit the program, start the smartphone in normal mode and check its functionality. Calibration will also help fix a bug when the screen goes dark during a call and does not light up until the other person hangs up, even if the phone is removed from the ear.
How to set up a proximity sensor on Android?
If you have the proximity sensor turned on but not working, you need to calibrate it or, in simple words, configure it. The easiest and safest option to solve this problem is to download the free app “Proximity Sensor Reset” from the Play Market.
To set up a proximity sensor on Android using this program you need:
- Download and install the “Proximity Sensor Reset” application
- After starting the program, click Calibrate Sensor
- Close the proximity sensor with your hand and select Next
- Remove your hand and select Next again
- After that, click Calibrate and Confirm
- Give the program access to root rights. In the window that opens, click “Allow”
- Wait until the device reboots
- Check that the sensor is working properly
If these steps do not solve the problem, and your proximity sensor still does not work, then you may need to calibrate the display. For information on how to properly calibrate the display, read our article - Calibrating the screen and battery on Android. Reflashing the device can also improve the operation of the sensor. You can find out information and select the firmware specifically for your phone in the corresponding section of our website.
In some situations, a hardware failure occurs, and for the proximity sensor to work correctly, it must be replaced. In this case, we recommend contacting a service center for specialist help.
If you have any questions about how to set up the Android proximity sensor, write in the comments. We are always happy to help.
You may be interested in reading our article – Proximity sensor does not work after replacing the display.
Phone screen still goes blank - some proven tips
Some owners were helped by the option of cleaning the speaker mesh. Sometimes there is a motion sensor there. Take a small brush and carefully clean everything - maybe it will help you too
Judging by the reviews, most often the screen goes blank when making calls on a Sony z3 compact phone. Many people managed to solve this problem by pressing on the upper right corner (the sensor should be located there).
There are cases that on the Xperia Z3, when you press hard on the top of the screen, you can even hear a click inside and the problem disappears.
Some smartphones have an intelligent processing option in the call settings - try turning it off if you find it.
On Sony phones, very often the screen peels off from the body and this problem arises - careful gluing solves it.
You can also disable the incall ui application in the application settings. If this does not help, then in the notification settings, try turning on notifications for this application.
Of course, other reasons cannot be ruled out, but I’ll leave it at that. As they say, I helped as much as I could. Good luck.
When your iPhone receives an incoming call, its screen will usually light up, prompting you to answer or reject the call. For some users, after installing the new iOS 11 operating system, the screen does not light up when making a call; You can only hear sound or vibration, and the display itself is just black. In fact, this problem can appear on different iPhone models no matter what version of iOS is installed. But the ways to solve it will be the same.
Answers on questions
How to check the Android proximity sensor using the engineering menu?
To check the Android proximity sensor using the engineering menu, you need to enter the combination *#*#3646633#*#* in the dialing menu.
In the menu that opens, select the Hardware Testing tab, then select Sensor and click Light/Proximity Sensor. After that - PS Data Collection, and you will be taken to the proximity sensor testing window menu. You need to click Get One Data, and the number “0” should appear in the second line. Next, place your hand on the proximity sensor and press Get One Data again, the number “255” should appear. If everything is as in the above instructions, then the proximity sensor works correctly. Show answer
Hide
Causes of problems with a contactless sensor when the screen goes blank during a call
A problem with the sensor can occur either in software or in purely mechanical damage.
If the problem is software related, you can often fix it yourself.
For example, by recalibrating the sensor, by restoring the phone to factory settings, or by reinstalling the software.
If the problem was the result of, for example, a phone falling, then there was probably mechanical damage to the sensor.
This often also happens when there is a “film separation” from the top of the case to the bottom of the phone (particularly on Sony Xperia).
Of course, purely mechanical problems are best resolved by sending the equipment for service, because replacing the sensor is not easy.
Flashing a smartphone if the display does not fade during a call
In some cases, neither calibration nor resetting your smartphone helps. In this case, you can try another way to fix the problem when your phone’s touch screen does not turn off during a call. You can reflash the device by installing a custom version of the software. You can find the one you need, as well as all related tools, on the website https://4PDA.ru. On the forum you can find any firmware version for a mobile gadget. And detailed instructions, advice and guidance.
Home »NotepadTo try to alleviate this problem, we will move from the simplest solution to the most complex, hoping that you will avoid this energy problem in your phone in the first place, since the longer the screen is left on, the more we will see the battery itself begin to drain.
How to disable screen timeout using third-party software
I think it’s not worth going into too much detail about why the “Sleep mode” function is needed, or turning off the screen after a certain period of time (timeout from English - timeout). It is clear that if the smartphone is constantly in active mode, then the battery charge will begin to tend to zero too quickly.
In this case, the problem can be easily solved using special utilities.
Hold Screen On Demo
This program will not let the screen go dark while you are looking at it. Using the front camera, Hold Screen ON captures your gaze and prevents your smartphone from falling asleep. When you stop looking at the screen, it fades and, accordingly, resource consumption stops.
It is possible to bind the operation of the utility to a specific application, and then the phone screen will not go dark, identifying your eyes in this application, however, if your camera works in another application, the program will have to wait until it is free.
Owners of the Samsung Galaxy S3 use this function without installing the utility, since this model has it by default, and if you have a simpler device, then you just need to download Hold Screen ON:
KeepScreen (now free)
Another good application that does a great job of disabling timeout. Unlike the previous one, Keep Screen
controls the position of the device using the built-in gyroscope. Therefore, when you hold your gadget in your hands, the utility, taking into account its angle of inclination relative to the horizontal axis, will prevent the screen from going dark.
In addition, there is also the ability to block the screen from turning off on your Android device for selected applications. To do this, after specifying the desired program, click " Start/stop service"
“, and on the phone, in the screen darkening sensor (see the first screenshot), set the interval to 30 seconds.
Keep Screen takes care of your smartphone’s resources and works in the background; to do this, click “ On”
", and after that "
Save and restart app
".
Important! If you turn off (lock) the device using the power button while the program is running, then after thirty seconds the screen will turn on and will not go off. Therefore, before locking the gadget with the power button, you need to close the application or simply return to the main desktop.
We have nothing more to add on today’s topic, and, of course, you can judge how useful the information presented was. Good luck!
Spontaneous shutdown of a smartphone is a common problem that gadget owners regularly face. There are quite a few reasons why the phone suddenly turns off by itself. In this article we will look at the most popular of them.
When the phone turns off on its own, it creates some discomfort and interferes with normal work and communication. Most often, owners of old equipment encounter this situation, but in some cases problems can also occur with new devices.
If such a problem is one-time in nature, do not panic. The reason why Android turns off may be a simple glitch in the system. But, if it is of a regular nature, it is recommended to take the gadget to a service center.
However, some tasks can be dealt with at home. You will find complete instructions for problems of various origins below.
Power key doesn't work
Mechanical malfunctions of the power button often cause the phone to turn itself off.
It is impossible to replace the key yourself at home. If such a situation occurs with a new gadget, there is a manufacturing defect. When you contact the warranty service, the equipment will either be repaired or replaced with a new one.
But sometimes the breakdown of the power button is preceded by bumps and falls. Modern smartphones are quite fragile, and even a small impact on the ground can lead to malfunctions and malfunctions. The solution is the same - contact the service center to replace the power off key.
You can also diagnose the problem at home. You need to simultaneously hold down several combinations (for example, volume rocker and mute) and look at the result. If it does not respond properly, then repair is needed.
Software failure
Another option - the brightest for most equipment owners - is a failure in the operating system. Errors in its operation may result in the cell phone freezing when performing a certain task and the inability to turn it off (or reboot) in the standard way. You can try to manually remove the battery and turn it on again. However, this method should not be abused.
Battery
If the phone constantly turns itself off, does not hold a charge and charges slowly, there is only one way out - install another battery.
Of course, you can extend the life of an old battery by several days by controlling the background mode and downloading several special programs, but this will not fix the battery.
Moreover, a swollen or mechanically damaged battery can be life-threatening. There are cases when a faulty battery caught fire simply in the hands of users, or near their faces, causing serious burns.
Therefore, you should not delay replacing the battery. This will not only affect the comfort and performance of the device, but will also protect you from health risks.
Oxidation of contacts
Even those who carefully and carefully handle their smartphones are not immune from another type of mechanical damage - oxidation of contacts on the motherboard.
Moisture can get onto contacts and junctions as follows:
- When there is a sudden change in temperature (condensation occurs).
- Frequently carrying equipment in hands in hot weather.
- Getting caught in the rain.
- Falling into a container of water.
- And others.
Modern top models are already equipped with moisture resistance, but budget cell phones do not yet have such a function. Moisture penetrates the phone through connectors, seams and speakers, becoming a catalyst for oxidative processes.
As in previous cases, this problem cannot be dealt with manually, and it is recommended to have the phone repaired by specialists.
Removing unnecessary things from the system
Android is positioned as an open platform, so each user can personalize it to suit their tastes and needs. Most often this happens by downloading software from the Play Market.
Sometimes these are several applications, and sometimes their number reaches such proportions that the equipment simply cannot cope with the processor load and constantly turns off.
The solution in this case will be as follows:
- Check the authenticity of the operating system. Only installing a licensed Android OS guarantees that the smartphone will cope with the assigned tasks properly.
- Clear your storage of unnecessary programs. Optimal loading – up to 15 different applications.
- Check whether the installed utility conflicts with the OS. You can find out this on the forums, or in reviews directly under the program page in the Play Market.
Screen breakage
Sometimes a broken screen is mistakenly perceived as a cell phone refusing to turn on. It is caused by problems with the hardware, which are usually preceded by falls or contact of the device with water.
On most gadgets, a reboot is accompanied by a slight vibration response, which can be felt even if the screen does not show signs of life. It’s worth checking for a response; if not, take it to the specialist.
Mechanical damage
Various types of “flights” are a real disaster for fragile devices. In most cases, they are brought to the service center after a fall.
You can check the malfunction yourself by slightly bending the smartphone in your hands. If it turns off, then repairs cannot be avoided.
If after an impact the back cover in the area of the camera or battery begins to heat up, then most likely the root of the problem lies in the lag of the thermal pad. It is possible to give final conclusions only after disassembling the gadget.
Moral deterioration
The average service life of a cell phone is 3-5 years, provided there are no breakdowns and care is taken. But many people use them much longer, so over time they have to visit repair points more and more often.
Equipment needs to be regularly changed and updated, because it is already difficult to get spare parts for devices that were released 5-6 years ago. And some malfunctions of outdated models are even refused to be repaired.
Therefore, when purchasing, pay attention to the OS version - if it is lower than 4.4, then maintenance will be in question.
Working in the cold
It is not recommended to expose gadgets to temperature fluctuations - this affects the battery. When working in the cold, many devices refuse to work and turn off on their own - this is normal practice. The range of suitable temperatures is indicated in the User's Manual.
Memory card
If, when installing a memory card, the smartphone does not work well, is glitchy, or turns off completely, it must be removed and replaced with another one.
Let's look at the reasons why MicroSD may conflict with the OS:
- Speed class incompatibility.
- Factory defect in the memory card.
- Mechanical damage to the slot that slows down its operation.
Applications to solve screen backlight problems on Android
For Android devices there is a special tool in the Play Market. It's called "Proximity Sensor Reset Repair".
The developer focuses our attention on the fact that the application can only cope if there is a problem at the software level during a conversation. Once installed, it will help get rid of various problems that appear on a phone with a backlit display. The program will work on any device. But it is still recommended to use it on smartphones with Root rights.
The Proximity Sensor app can test your mobile device and determine if the sensor is working properly. This test can be run in the settings. It will take your device through several calibration steps and restore the functionality of the proximity sensor.
To start calibration, select this item in the menu.
Sequence of actions during verification:
- Select Calibrate Sensor from the menu;
- Then you need to close the area with the sensor with your hand and click on “Next”;
- Press the “Next” button again, but now remove your hand from the sensor;
- Click first Calibrate, then Confirm.
Smartphone display does not turn off when talking on iPhone
Proximity sensors in Android and iPhone smartphones are no different. Sometimes on an iPhone the sensor stops working because the owner decided to change the old film on the screen. If so, then you need to look for another one. It is not suitable for your device. If the screen on your device goes blank during a call, try resetting it to factory settings. Do this using iTunes without downloading a backup. If even after these steps the screen does not go dark during a call, the problem may lie deeper. And the device needs repair.
Let's look at the principle of resetting settings via iTunes. To do this, you need a USB cable to connect your smartphone to your computer. The PC can also be used with Windows.
But you will need the iTunes program, which can be downloaded here - https://www.apple.com/ru/itunes/download/.
Further procedure:
- Insert the cable into the iPhone;
- To turn on the desired mode on your phone when connected to a PC, press the Home and Power buttons together; Press the Power and Home buttons together
- The buttons must be held until the screen turns off;
- When the screen turns black, do not release the Home button. The power button can be released;
- A window should appear on the computer screen. It will say that iTunes detected the smartphone in recovery mode;
- Click the “Ok” button and select one of the “Update” or “Restore” items;
- Another message will appear on the screen, warning that the recovery will delete all data on the smartphone;
- Confirm your decision to update your iPhone.
The process of restoring your smartphone to its factory settings will begin immediately. When it completes, try calling again to check if the proximity sensor is working.


