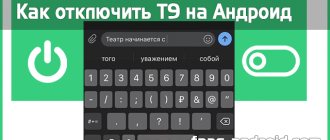
Why does the time on Honor and Huawei phones go wrong?
The operator's mobile tower is not a constant cause of time failure in a smartphone. Sometimes the problem lies in the gadget itself. View the cache. Perhaps it has not been cleaned for a long time and this has exposed the phone to a system failure. It is better to reset the device to factory settings to free up the internal memory.
So, in our material we looked at three ways to set the exact time on Honor and Huawei phones:
- via "Settings";
- via "Widgets";
- using a third party application.
Reasons for appearance
If the “Network time is not updated” error appears for Honor and Huawei, then the system probably has one of the synchronization problems. The fact is that time zone data requires constant updates, therefore, the smartphone must be connected to the mobile network and the Internet most of the time.
In other words, if the online connection is disrupted, then Android can display this notification. It often appears after rebooting the phone or changing the mode from “Flight” to any other. To hide the alert, just turn on location services.
Malware may also be the cause.
We set the most accurate time and exact date
Now you know how to change the date in Android - to do this, you need to visit the system settings and use the “Date and Time” item. Data installation is carried out in Android in manual or automatic modes. If you want to get the most accurate time, you should select automatic detection.
But what if the mobile network accuracy is not enough or your device cannot communicate with mobile networks? In order to get accurate data about the current time and current date, you need to use third-party applications. The most powerful application for automatic time synchronization is ClockSync from developer Sergey Baranov
. Despite its more than modest size, the utility has decent functionality.
Here we will find:
- Automatic time setting with root rights;
- Automatic time setting without root rights;
- High precision mode;
- Selecting a server for time synchronization;
- Setting the request interval exactly in time;
- Battery saving mode;
- Detailed statistics;
- Time zone database (will be useful for older smartphones);
- Automatic time zone detection;
- Function for updating system data about time zones.
Install the application and get the most accurate time on your watch. Also, you will not need to worry about setting the date if it goes wrong for some reason.
Despite the very simple interface of the operating system, many users cannot solve standard system problems: setting the date, text encoding, errors in applications, and others.
Due to an incorrectly set number, the following related problems may occur:
- The user cannot access the application store;
- Installation of programs is impossible due to date failure;
- Problems receiving calls and messages.
If you have identified one or more of the above problems on your device, it means that there is a time setting problem in the system.
By the way, you may be interested in other articles:
- Why the Play Market doesn't work - 12 ways to solve the problem
- How to recover deleted files on Android - Reliable methods
How to remove the “Network time has not been updated” notification on Huawei and Honor
There is a simple way to disable the notification on the “Network time has not been updated” screen on Huawei and Honor. You must manually set the time. Go to settings, and by clicking on “More”, open the “Date and Time” section. In the tab that opens, move the sliders to the “Off” position, which will disable automatic mode, and enter the data yourself based on your own location.
You can also fix synchronization problems using a third-party application. What do we have to do:
- Install the ClockSync program by downloading it from Google Play. Using the application, you can synchronize time via NTP.
- Run the utility and enable the “High Precision Mode” option, and also set the resolution to Wi-Fi only.
- Next, activate automatic setup, and at the end, reboot your smartphone.
Pairing fails when using wearable watch for the first time
1. You need to download the new version of “Huawei Health” using the application store.
- You need to bring the gadget you are wearing closer to your smartphone. With Bluetooth enabled:
- Go to the “Device Connection” menu.
- Then select “Bluetooth”.
- A list with valid devices will open, where you must select the wearable gadget.
3. On your smartphone you need to connect the “Location Service”:
- Go to "Settings".
- Then "Security and Privacy".
- After “access to geodata”.
- Next, you need to activate the “Access my location” option.
- Go to the “Advanced Settings” menu.
- Select the option “Search for Wi-Fi network” and “Search for Bluetooth devices.”
4. The Huawei Health app will need permission to access the “location service”.
- On your smartphone, select the “Settings” menu.
- Then go to Applications.
- After "Right".
- Next is “Location Data”.
- And go to the “Health” item.
5. A notification may appear on the smartphone display: “Device list update failed.” In this case, you need to check your network connection; the connection may be unstable. Gadgets are recommended to be used only on a wireless network. You also need to wait a while and then download both devices again.
6. If this problem occurs, it is recommended to restart the smartphone and the watch you are using.
How to set the time on Honor phones
There are several methods using which you can set the clock on your smartphone. Many users prefer to use auto-tuning (more on this below), but sometimes situations arise when you need to set the time manually. For example, if the owner of a smartphone wants the device to lag slightly behind official time zones.
To configure you need to do the following:
- Unlock your device.
- Find it on your desktop and open the “Settings” shortcut.
- Go to the “System” section.
- Select the “Date and Time” item in the menu that opens (the menu is quite large, you can simplify the search by entering “time” in the search bar).
- Disable the “Auto-configuration” option by moving the corresponding toggle switch (otherwise the phone will not allow you to set your own parameters).
- After disconnecting, the “Date” and “Time” fields will appear.
- Select the “Time” item, set the desired parameter, and click the “Ok” button. If necessary, do the same with the date.
- Exit menu.
After this, the time configured by the user will be displayed. You can set any parameters (on both points). To re-configure the settings, you must proceed in the same way.
Using auto-sync time and date
If you want to have a gadget with the exact time at hand, then you need to use synchronization. There are two ways to get the exact time on the screen of your smartphone - use standard capabilities or use smart synchronization applications.
Regular auto-sync is enabled in the settings. You need to activate an item with one of the names:
- automatic date and time;
- use network date and time;
- synchronize with the network.
But please note that after activating this option, you will not be able to manually change the date and time settings. This option is also not particularly accurate - the average error is about 500 milliseconds.
Smart time synchronization using your phone app
Smart synchronization is enabled using applications. To carry it out, it is necessary to interfere with the system settings, so such programs require “superuser” rights. They won't work without them. All smart sync apps have a similar interface. Let's look at the principle of managing them using ClockSync as an example. This application has received positive ratings from many users. You need to work with it according to the instructions:
- Download and launch the application.
- On the main screen you will see the current time set on your smartphone, as well as a more accurate value delivered from a special server. Typically, the difference in data can be more than 20 seconds.
- Using the buttons at the bottom of the screen, call up the context menu (usually the icon of several wands or windows located on the right is used for this).
- Click on the “Synchronize” menu item.
- The application will ask you for root access. Allow him to change system settings using the “Grant” button.
- After synchronization, there should be no discrepancies in the data on the main screen - the third line should contain the value “0”.
If you have regular firmware that does not provide superuser rights, you must change its settings before using the application. To do this, call the context menu and select “Settings”. The very first line in it will be to enable mode without Root. Place a marker next to this line.
Solution 1: Temporarily disable third-party firewall and security software
A third-party firewall is one of the most common reasons why a connection to the synchronization server cannot be established. Therefore, if you are using any type of third-party device, you should disable it or uninstall it and then see if that fixes the situation.
However, overly aggressive malware protection can also cause time synchronization failure with connection error to time.windows.com. Thus, try disabling your antivirus software and see if that helps. If this is the problem, add the server address to the exclusion list.
Changing the Date and Time (Auto Setup)
The method described above is convenient if the client knows what time he needs to specify. However, modern devices provide the ability to automatically configure this parameter. To activate it, you need:
- Go to settings.
- Select the “System” section.
- Go to "Date and Time".
- Move the Auto Configure toggle switch so that it changes color to blue.
By default, auto-tuning is enabled and you don’t have to do anything. It may be needed if the user manually made changes to the clock or date (both parameters are adjusted).
The essence of how autotuning works is quite simple. The device synchronizes with data on the server and, depending on the region where the phone is located, automatically sets the time and date that is current at the moment. The data is adjusted from time to time (if necessary). Also, modern smartphones are able to take into account the transition to winter and summer time.
Features of changing time on Honor
As with all phones based on Android OS, on Honor family phones you can easily set the required date and time.
Their installation is possible in two main options:
| Methods: | Description: |
| Set date and time automatically. | In this case, the phone usually takes data from the mobile operator. |
| Setting the date and time manually (manually). | In this case, you will need to go to your phone settings and independently set the time zone, current date and time on your gadget. |
Let's figure out how to set the time on Honor
As we mentioned above, incorrectly setting the date and time leads to problems when launching some programs on Honor, as well as when surfing the Internet. In the latter case, some sites may not open at all, and other web resources will be unstable.
Let's see what ways to change the time on mobile devices exist.
A way to change smartphone settings manually
The easiest way to set the clock correctly on Honor is as follows:
- Go to your phone's settings by clicking on the "Settings>" icon;
- In the list of settings, find the “System>” section;
- In this section, select “Date and time>”;
In this case, the automatic date and time option is activated.
After opening, we look to see if automatic date and time is used here (the “Network date and time” option is activated).
If not, then activate it, and after that the data from your operator will be automatically displayed.
If yes, then deactivate this option and set the parameters manually. To do this, first tap on the “Date” item and set the correct current date. Then tap on the “Time” item and set the value you need.
Set the correct display of Honor's time zone
It is also worth activating the “Network time zone” item to correctly set the time zone.
After this, setting the correct time on your Honor will be completed.
Where is the function to turn off and turn on the smartphone?
The shutdown timer for Honor and Huawei phones on the latest versions of Android and EMUI and Magic UI shells can be found in the device settings. To do this you should:
- Go to " Settings ".
- Accessibility item .
- In the window that opens, click on the section: “ Scheduled switching on and off ”.
Ready. In this menu item, you can configure automatic switching on/off of the smartphone.
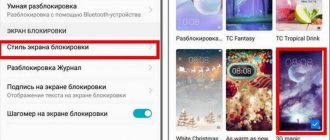
How to place a clock on your home screen
By default, time and date information on an Android phone is located in the upper left corner. This is not very convenient, since the font is too small due to its special location, and the parameters are not immediately obvious.
It is much more convenient if the clock is located on the main screen of the device. To display the time and date, you can use standard settings or special widgets from Google Play. Let's look at the first option first.
To make the clock appear on the main screen, you need to:
- Hold a free space on the desktop with your finger.
- Click on "Widgets".
- Select a watch from the standard set.
There is nothing difficult in performing such an operation. In addition, you can place the clock in any convenient place on the main screen. To do this, just click on the widget and move it to the side.
Clock widgets
Let us next consider the best programs with graphic modules for the main screen of the gadget from those presented in the official application store. Basically, in addition to displaying the time, they also provide a lot of other information, for example, the weather directly at the user’s location according to data received by the utility via GPS.
Transparent clock and weather
This is one of the most popular free clock widgets with more than 10 million installations. The small program has very flexible settings, as a result of which the owner of the gadget can set the display on the display the way he needs it. Utility features:
the presence of various beautiful and informative widgets in sizes 2×1, 4×1-3, 5×3; wide selection of design themes, covers, fonts; displaying, in addition to the exact time, other important information - about the weather, wind direction, humidity and pressure, battery charge, calendar events, etc... If the device owner does not need all this data provided by the default utility, he can delete it in the settings and leave just a watch
For this:
If the owner of the device does not need all this data provided by the utility by default, he can delete it in the settings and leave just the clock. For this:
- Tap your finger on the time display on the screen, which will open the settings window.
- Go to the "Appearance" section, then to "Advanced Settings".
- Uncheck the boxes next to the items displaying information about the current location, system information, battery charge and check the box next to the line “Hide weather”.
After this, a minimalistic widget with a clock will appear on the screen, the appearance of which you can also change in accordance with your own preferences.
Sense Flip Clock & Weather
This clock widget displaying time and date is suitable for users who like Flip Clock style clocks with turning pages. Features of the utility:
- selection of widgets of different sizes - 4×1, 4×2 and 5×2;
- Flipping animation implemented;
- selection of different skins and icon display;
- the location is determined automatically, which allows the user to be informed of the most accurate forecast.
The weather display here can also be turned off if necessary, after which only a beautiful retro clock will appear on the screen. You can also test other similar utilities:
How to add hours for other cities
For people who work in business, it is very important to know the time information in different parts of the world in order to choose the best moment to negotiate. Also, anyone may need such a function as an interesting feature.
The same standard widgets will help you display information in several locations at once. The fact is that the user has several types of icons to choose from. The most popular is the single watch. However, there is no difficulty in choosing a dual widget. We move it to a convenient place on the main screen and see the time in different parts of the world. To select another city to display, you need to click on the widget and specify another location.
The algorithm of actions is as follows:
- On your phone, open the Clock app Clock.
- Select Clock.
- At the bottom of the screen, tap the World Clock icon
- In the search bar, enter the name of the city, then click on the one you want to add.
- To change the order of cities in the list, touch and hold the city name line, then move it up or down.
- To remove a city from the list, touch and hold the city's name, then drag it to the bottom of the screen.
If standard widgets do not allow you to place all the necessary cities, it is recommended to use third-party applications from Google Play.
How to set the time as accurately as possible
Every person is interested in his smartphone showing current clock readings. Knowing the exact time allows you to minimize the risk of delays and long waits for certain events.
The most accurate time is shown if the owner of the gadget has automatic detection of parameters set. In this situation, the clock is synchronized with global indicators, resulting in incredibly accurate results.
If for some reason auto-detection does not work as well as you would like, you can try to set the exact time manually. For this you will need:
- Open phone settings.
- Go to the section with date and time.
- Set your time zone and date.
- Find the exact parameters using a search engine.
- Specify the parameters at the same time as the clock hand starts counting the next minute.
Knowing these tricks, you will always receive information about the current time anywhere in the world. Do not forget to monitor the accuracy of the clock on your phone so as not to be late for work or a meeting with friends.
Setting the time and today's date using the system
To change the date and time settings, launch the system settings management tool - the Settings
».
Let's go to the " Date and time"
" The options that interest us are here. Namely:
- Automatic time and date settings.
- Automatic time zone setting.
- Setting the date manually.
- Manual time zone selection.
If you want the phone to set the current time and date itself, tap the top button shown in the screenshot above. Choose one of two synchronization methods - via network or via GPS.
For the feature to work, the device must periodically connect to the Internet or cellular operator. Otherwise, it will have nothing to synchronize with.
If the data is displayed incorrectly, change the time zone in the settings of the same section. Click the Select Time Zone
» and indicate the region you are currently in.
Or enable " Automatic time zone synchronization over the network"
", as shown in the screenshot below.
When auto-tuning of the current time and date is enabled, the buttons for manually changing these parameters become inactive. To make them available again, synchronization must be turned off:
After that, go to the “ Setting the date”
»:
And mark today's date on your calendar. Or any other. To save, click " Install"
».
If necessary, do the same operation over time.
Using Third Party Applications
By default, all Honor devices use a standard widget to display the time. This is enough to know what the current time is, as well as to easily set the clock. However, third-party developers have created a number of applications that significantly expand the functionality of such widgets.
ClockSync
ClockSync application is very popular among users , which is confirmed by high ratings in the Play Store service.
Why develop a third-party application, much less install it on your phone, if there are standard settings? The fact is that several significant nuances distinguish this program from a standard widget:
- Determining and setting the time is carried out through communication with servers via the NTP protocol, which ensures the most accurate setting of this parameter. This option will be especially useful for those citizens whose operators do not support automatic time synchronization.
- As with a standard clock, you can set the time manually or automatically. However, automatic adjustment of the parameter allows you to set the accuracy of the clock with a lag of no more than 20 milliseconds.
- Displays the time of the last synchronization. This option is not available with standard clocks. Thanks to it, the user can always find out when the application last contacted the servers and synchronized data.
- Obtaining detailed information about the server with which synchronization took place. Most average users don't need this feature, so it's missing from the base watch, but the app allows you to get this information as well.
There is no need to pay to use the application. The only drawback of the program is that it can show advertisements.
Date And Time Settings Shortcut
Another application for precise time adjustment. However, unlike the previous program, it does not bring anything new. In fact, the only purpose of this software is to provide quick access to the settings of a standard widget (as the name of the software directly indicates).
After downloading and installing the application, the user just needs to open it on the desktop, then click “Open!” This action will automatically go to the standard date and time settings menu of the phone.
How does the NTP protocol work?
The NTP protocol is based on a hierarchical time server structure, where different levels are distinguished. Level zero, at which NTP servers do not operate, includes the so-called reference clock.
Level 1 NTP servers, which are sources for level 2 servers, are synchronized with them. Second level servers are synchronized with first level servers, but can also synchronize with each other. Servers of the third level and below function in the same way. In total, about 256 levels are supported.
NTP's hierarchical structure is fault-tolerant and redundant. Thus, backup servers take over synchronization when it comes to connection failures with upstream servers. To calculate the exact time, NTP takes data from all sources, synchronizing with several servers.
Placing the clock on the lock screen
Having a clock on the lock screen is a very useful option. When using it, the phone owner does not have to unlock the device to find out the current time. It will be enough to press the power button once or tap on the monitor several times. This can significantly save time, especially when unlocking the device is difficult.
To display the clock on the lock screen, do the following:
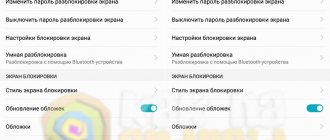
- Open device settings.
- Select the “Screen” item.
- In the menu, use the functions of turning on the screensaver, and then open its settings.
- Activate the toggle switch located near the “Clock” item.
After these steps, the time will be displayed on the lock screen. It should be noted that in most cases the feature is enabled by default, although it may be disabled after a crash or update.
Installation
Call up the menu by pressing your finger on an empty space on the screen. A hidden functionality will appear, where select the “Widgets” section.
Change of location
The location of the time on the screen changes with one movement of the hand. You just need to clamp the watch and move it to another place.
The widget is deleted in a similar way. While holding it, drag it up to the “Delete” button.
Setting the timer
To get started, you must activate the “Scheduled on/off” function. This is done by dragging the slider to the right position (it should light up blue).
Several additional items will appear on the screen that will allow you to configure the phone to turn off on a schedule.
In this menu, the user can set the time when the smartphone starts working and when it stops. You can set the time with an accuracy of 1 minute, which can be very useful in different situations.
Also, in this menu item you can set the days of the week on which this option will work. For example, on weekdays you can set one time, but on weekends, when the owner of the phone goes to bed at a different time, it is completely different.
There are 4 operating options available:
- Never – this option allows you to disable the timer on Honor and Huawei.
- Mon-Fri – allows the function to operate only on weekdays.
- Every day will work all week.
- Configure – allows you to specify specific days of the week, for example, weekends.
After this you can exit the menu. The function is activated and the phone will turn off at the specified hour.
Setting up the clock using the widget
Here we will see how to set the time on Huawei and Honor phones using the widget.
- Click on it, a window will open.
- At the bottom of the screen, select the icon that says Settings.
- The page that opens allows you to configure some options, such as the style of the clock or the melody for the alarm clock.
- Select "Date and Time".
- This line takes you to an already familiar page - repeat the steps described above.
How to put a photo on a contact in Huawei and Honor phones during a call
For example, return automatic time adjustment, which does not guarantee accuracy due to frequent interruptions on the mobile tower.
Automatic time adjustment problem
Now that we know how to set the clock, let’s explain why a Huawei phone running Android OS may mistakenly detect the time zone and, accordingly, the time. Information about the current time on the device comes from the mobile towers of the cellular operator.
It would be more effective to synchronize the smartphone's internal clock using NTP technology. But this requires root rights.
From this it turns out that a time shift occurs every time an error occurs in the mobile operator’s network, disrupting the signal from the tower. Therefore, it is recommended to configure the function manually in order to avoid unpleasant situations associated with a lagging clock.