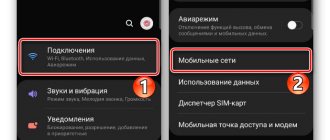
It is impossible to imagine the modern world without selfies. Almost every modern user takes photographs of themselves regularly. Over time, you may get bored with ordinary photographs and want to create unique shots. A monopod will help with this. However, its connection often raises many questions. Various errors are also common. To connect a monopod to your phone, you need to take into account some subtleties. How to set up a selfie stick on Android with a button on the stick? The following instructions will help you with this.
Connecting and setting up a monopod on Android
In this article, we will not consider the capabilities of different applications that provide certain advantages when using a selfie stick. However, if you are interested in this, you can read other material on our website. Next, we will talk specifically about connection and initial setup involving one single application.
Step 1: Connecting the Monopod
The procedure for connecting a selfie stick can be divided into two options depending on its type and the method of connection with the Android device. In both cases, a minimum of actions are required from you, which, moreover, often have to be performed regardless of the monopod model.
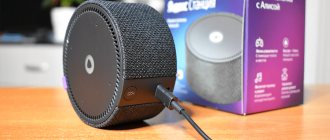
If you are using a wired selfie stick without Bluetooth, you only have to do one thing: connect the plug coming from the monopod to the headphone jack. This is shown more accurately in the picture below.
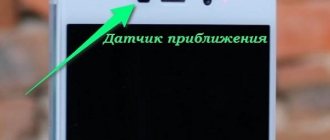
- If you have a selfie stick with Bluetooth, the procedure becomes somewhat more complicated. To begin, find and press the power button on the handle of the device.
Sometimes a miniature remote control is supplied with the monopod, serving as an alternative means of switching on. After making sure that the built-in indicator is activated, open the “Settings” section on your smartphone and select “Bluetooth”. Next you need to turn it on and start searching for devices.
If detected, select a selfie stick from the list and confirm pairing. You can find out about completion by the indicator on the device and notifications on the smartphone.
At this point the procedure can be considered complete.
Step 2: Setup in Selfishop Camera
This step is essentially individual for each individual situation, since different applications find and connect to the selfie stick in their own way. As an example, we will take as a basis the most popular application for a monopod - Selfishop Camera. Further steps are identical for any Android devices, regardless of OS version.
- After opening the application, in the upper right corner of the screen, click on the menu icon. Once on the settings page, find the “Selfie Button Actions” block and click on the “Selfie Button Manager” line.
Check out the available buttons in the list provided. To change the action, select any of them to open the menu.
From the list that opens, select one of the desired actions, after which the window will automatically close.
When the setup is complete, simply exit the section.
This is the only option for adjusting the monopod through this application, and therefore we are completing this article. At the same time, do not forget to use the software settings aimed at creating photos.
Thank the author and share the article on social networks.
The monopod has become a popular tool for all mobile device lovers. It greatly simplifies the process of taking photos or videos together without involving strangers. The only question that may arise is how to set up a monopod on Android for your device. Much depends on the phone model and the type of selfie stick.
How does a selfie stick work?
To understand how to use a selfie stick, you need to understand how it works. All monopods have the same design - a smartphone holder and a telescopic handle. Models differ in how you activate the “take photo” button on your phone. There are three main options:
- Sticks without controls. In this case, after installing the phone, the user must turn on the timer on it for the required time and wait for the snapshot to fire. The main advantage of such monopods is that they are inexpensive.
- Wired monopod. The most popular type of selfie sticks because they have a low price, easy connection and setup. They are equally often used for both Android devices and iPhones. The connection is made using a regular 3.5 mm plug to the headphone jack. No charging required for the monopod or additional setup.
- Bluetooth monopods. This is a wireless control device. The device is synchronized with a smartphone using Bluetooth connection. The price of such monopods is usually higher than others, but truly reliable models will cost a decent amount. Most users have problems with this type of connection.
Selfie poses - selection for home
You can take a full-length photo of yourself. In this case, remove a little from above. When using this angle, the figure looks slimmer. To make the photo more impressive, this shooting can be done in front of a mirror.
Full length photo
Creating a portrait requires good lighting, but bright light shining into the eyes is unacceptable. The phone is placed approximately at eye level. In this genre, it is very important to choose the most expressive angle.
Portrait selfie
Photos with animals will add new shades to the image. At the same time, you need to choose a favorable angle not only for yourself, but also for your shooting partner.
You can choose an unusual pose for filming. For example, you can take a photo of yourself lying in the grass. An original author's story, done in good taste, can attract a lot of attention.
Photo in an unusual pose
Using unusual poses and environments, you can thus hide flaws in your appearance. For example, this can be done by focusing attention on the face, diverting attention from a slightly fuller figure.
Sometimes a photo taken from the bottom up looks impressive. Sometimes girls are afraid that from this angle a double chin may be visible. However, if you keep your head straight, you will get a spectacular photo.
Photo taken slightly from bottom to top
Selfie stick app for Android
In some cases, the user will need to download additional programs to control the monopod. This is due to the problem of assigning keys for shooting. For example, Samsung phones have preset settings by default; the owner simply connects the monopod and can use it right away. In some models, this option is not provided and applications help you perform the necessary steps to conveniently take a selfie. In addition, the programs will help you immediately perform the initial processing of photos for uploading to the Internet.
Program for selfie stick for Android
You can take selfies without special applications, but using them can significantly simplify the process and open up additional opportunities. Here are a few examples that are popular among users:
- B612 is a utility designed specifically for creating selfies. You can apply additional effects directly while shooting a video or photo. The application has a built-in auto-timer, a large set of filters, a function for creating collages and the ability to post the result on any popular social network.
- SelfieShop Camera - will help you connect correctly both wireless Bluetooth monopods and wired models. Suitable for most popular selfie sticks, pairs them with a smartphone without any problems. You need to download the utility from the Play Market for free, but there will be advertising in the application. You can remove it by paying 99 rubles.
- Retrica is another selfie app option that is especially popular with owners of devices with a front-facing camera. The utility offers a choice of more than 100 filters, which are applied even before taking a picture. You can perform initial photo processing directly in the program.
Portrait photographs of animals and non-living objects
iPhone 11 and iPhone 11 Pro support portrait photography of inanimate objects and animals. On older smartphones, you can force portraiture of animals to be enabled, but now more serious optimization is offered. This allows you to get better quality pictures. Launch portrait mode and point the camera at the desired subject. It is possible to apply various portrait effects.
How to connect a monopod with a wire to Android
In most cases, users do not have problems with how to connect a monopod to Android. The easiest way to set up is with models that use wire, for example:
- Secure your smartphone in the holder on the stick.
- Insert the plug into the headphone jack.
- Launch the standard application for taking photos and videos.
- Extend as many sections of the monopod as needed to get the desired shot.
- Press the button on the handle of the device.
In some cases, the algorithm for connecting a selfie stick to Android does not work. There may be several reasons for this, so you should conduct an initial “diagnosis” yourself:
- Check whether the plug is firmly seated in the connector.
- The volume buttons may not be prepared to work with a monopod. To assign, go to the camera settings, change the key settings, save the changes. Try to see if the settings are saved and connect the monopod again.
- Some phones do not support key remapping. In these cases, you should use the applications described above. Downloading them will not be a problem in the official Google store on Andro >Device options with a Bluetooth connection will cost a little more, but eliminate the need to use wires. The main problem with Bluetooth is pairing devices. This often leaves users searching for an answer on how to install a selfie stick over a wireless connection. The connection algorithm is as follows:
- Make sure your monopod is charged or has fresh batteries. If they have been used for a long time or you are not sure about them, then take spare ones with you or replace them immediately.
- Enable Bluetooth connectivity on your smartphone.
- Turn on the selfie stick to connect to Android.
- Go to the phone menu, where found devices are displayed.
- Find the name of your selfie stick (may be called the manufacturer or model of the monopod), establish a connection. After a few seconds, the devices will pair.
- Go to the photo app and take pictures with the press of a button on the handle.
- If pairing has occurred, but the photo is not taken when you press a key, try using a third-party application for Android, which were described above.
There are probably no people left who have not yet heard about a monopod or selfie stick. This handy device once revolutionized the world's view of photographing oneself and friends and could not have come at a better time in the era of photography as a way to share every moment of life with the public. And if earlier it was necessary to ask someone to help with taking a picture, then with a monopod you can successfully do this yourself. The article describes in detail how to connect and configure a selfie stick to an Android device, applications for it, as well as possible problems and their resolution.
What is a monopod (selfie stick)
To be specific, a monopod is a retractable long device, the handle of which is made on the principle of a telescope - that is, it is extended if necessary and compactly pushed back. At the end of the handle there is a holder for a smartphone. The handle itself may also have a leather or wicker loop for easy holding.
The stick is usually held in one hand by a person who wants to photograph himself from a further distance than the length of his arms allows. By adjusting the size of the handle extension, you can take pictures at different distances from the subject. With a well-chosen angle, a photo from a monopod cannot be distinguished from a photo taken by another person from a distance. This does not require the help of third parties or spending time on preliminary training in how to use your camera. The folded stick has a small size and weight, which allows it to be convenient for various hikes and trips.
Monopods are divided into two types: wired and wireless.
- Wireless ones connect to a smartphone via Bluetooth. The photographing distance in this case will be limited by the length of the monopod handle.
- Wired selfie sticks have a connector where the wires connecting the stick and the smartphone are connected. Phones usually use headphone jacks to connect wires. This method of photography allows you to take photos without additional recharging.
Some monopods, for example, z07 5 Kjstar, are equipped with an additional mirror, which allows you to take pictures not with the front camera, which often has less good quality, but with the rear one.
General recommendations
To ensure that a photo you take yourself does not show an image of an outstretched arm, you can use:
- A telephone headset as a shutter release. To turn the headset into a remote control, you need to connect it to your mobile phone, open the “camera” application and press the “+” key (the camera will take a photo).
- The original NanoHold holder, the adhesive pad of which easily sticks to the back cover of the mobile device and allows you to securely attach it to any smooth flat surface (glass, wall, mirror, cabinet door, car control panel, etc.). After this, you can start taking “hands-free” selfies using the special CamMe application (we’ll talk about it a little later), the aforementioned headset, or the self-timer. Manufacturers warn that this holder is not intended for holding a cell phone for many hours, but with its help you can take a large number of high-quality photographs in one photo session.
- A shutter timer and a makeshift tripod whipped up from an old plastic card. To do this, the card is folded in three places, giving it a resemblance to the Latin letter W, and a mobile device is installed on one of the folds. To take a photograph from a distance, you can equally well use the self-timer option or a telephone headset.
How to connect and configure a monopod for an Android smartphone
Before purchasing a selfie stick, you should make sure that it is suitable for your phone. Despite the apparent simplicity of this device, not all of them are compatible with Android devices and not all of them are suitable for the shooting style to which the amateur photographer is accustomed. For example, some may find it inconvenient to take photographs without pressing a button on the monopod, but through the option of holding the shutter and pre-setting the timer each time you need to take a photo. You should definitely try the convenience of the stick and its extension in the store by seeking help from a qualified sales consultant.
Video: about the features of different types of monopods
When the process of choosing the most suitable monopod model from the many offered by stores is finally completed, you need to carefully read the instructions for connecting and setting it up. This must be done in order to accurately understand all the details of the functioning of the monopod, as well as the expected difficulties in its use. Otherwise, a pleasant and easy trip with the intention of photographing yourself and your company may result in unnecessary inconvenience with the camera equipment.
Connecting a monopod consists of three main stages: assembly, configuration, connection.
Monopod assembly
For ease of further handling of this device and getting good pictures, you should devote time to the initial stage of assembling the monopod. This step will ensure the smartphone remains stationary and prevents it from falling out of the mount.
- Choose the most suitable mount size for your smartphone.
- Place the mount on the end of the monopod.
- Place the phone inside the mount and secure it well. Carefully move the monopod in different directions with an inclination to check the quality of the fastening. You should not neglect this method if you value your smartphone, because when taking photographs in a crowd you may be accidentally pushed or hit, and then a strong hold will protect your phone from falling.
Setting up the selfie stick
After selecting a good mounting position, it's time to configure the smartphone to interact with the monopod.
- Turn on your smartphone camera and go to its settings.
- In settings, find the volume key option, then assign the camera function to that key.
Connecting a monopod to a phone
Now the most important part is to “make friends” with the monopod and your smartphone.
To connect a wireless selfie stick, you will need to activate Bluetooth on your smartphone and search for nearby devices. In the search, you need to select the detected selfie stick model and establish interaction. You can then take pictures by pressing a button on the monopod.
Wired monopods connect a little differently. You need to connect the wire supplied with the monopod to the headphone jack of your smartphone. Insert the second end of the wire into the corresponding hole in the selfie stick. This will ensure that the monopod recognizes the phone.
Record more than you see
You can activate a new mode that will record areas outside the frame when photographing with a standard camera. When you record with a wide-angle camera, the ultra-wide-angle camera expands the image or video to include something or someone in the frame. If you do not edit or use additional images, they will be deleted after 30 days.
Possible problems with filming: their causes and solutions
Even after carefully selecting a device and testing it in different situations, you may encounter unexpected problems during operation. It’s better to understand in advance how to quickly deal with them, so that a pleasant moment of photographing does not turn into dissatisfaction with the manufacturers and a ruined trip without pictures.
The button does not work: connecting a smartphone via wire or bluetooth
So, you got ready to shoot, got into a beautiful pose and are trying to press the monopod button, but nothing happens. A very offensive situation. This can happen if you didn’t take the choice of a stick seriously enough, or maybe you just got it as a gift. The reason is that there are a great variety of devices based on the Android OS, as well as the number of monopod models. There are incompatible combinations - that is, the smartphone incorrectly receives the signal sent by the monopod. Often this problem can be solved by installing a special application called SelfieShop Camera, available in the Play Market application store.
To correct the situation:
- Install the above SelfieShop Camera application
- We connect the monopod to the smartphone according to the instructions above (via wire or via Bluetooth).
- Launch the application and go to its settings, there you need to find the “Selfie Button Test” item.
- Now you need to press the photo button on the selfie stick, at this moment the code for the selfie stick button will be displayed in the application in the onKeyUp parameter. You need to remember this code, it will be useful later.
- Go back to the application settings and select the “Other button code” section.
- In this section, enter the code that was displayed when taking photographs and save the settings.
Doesn’t take photos, but turns up the sound/There is a photo signal, but the device doesn’t take photos
The next common problem is changing the volume instead of taking photos.
- Go to the camera settings on your smartphone (via the standard camera application).
- We find the item “Action on the volume key” (Volume Key), then change its function to “Shooting”.
- Testing the operation of the monopod
Other common problems and what to do about them
Why the monopod does not work with a smartphone: software incompatibility
There are other difficulties when using a monopod. For example, it is simply incompatible with your smartphone model. Most often, incompatibility may occur with Alcatel, Sony phones and wired monopods.
This problem is a consequence of an unsuitable headphone jack in the smartphone. To be precise, the connector is a combined one and is intended for a headset, that is, for headphones with a microphone, so the plug of such a connector should have four contacts, not three. And manufacturers of selfie sticks often save on plugs by using three-pin ones.
There can be two solutions here:
- For incompatible phones (except Sony brand), a regular adapter from three to four pins is suitable.
- Owners of Sony smartphones will have to try, as phone manufacturers have resorted to a trick designed to encourage buyers to purchase only “native” headsets of the same brand. They changed the order of the wires in the gadget connector, that is, a regular adapter will not solve the problem, you need to look for another one. Thus, if your monopod is equipped with a high-quality plug with four contacts, but the phone does not see it, then the problem is in the order of the wires. Just to be sure, try connecting the monopod to a smartphone of a different brand; if the shooting is normal, then the problem is in the order of the wires. In this case, you will have to buy a 4 to 4 pin adapter with a different pinout (pin order).
Failure of the monopod photograph button
Yes, this can also be a common reason for the monopod not responding to pressing the shooting button. Poor quality buttons break quickly. You can take the monopod in for repairs, but this will take time. In this case, the problem can be completely solved in a faster way, which, however, is not convenient for everyone and can only be considered as a temporary solution.
Both options are available through the settings of the regular camera application on your smartphone.
- Timer shooting is a delayed release function, when the timer on the smartphone is set for a time sufficient to move the monopod to a distance and take a beautiful pose.
- Continuous shooting - the smartphone automatically takes several pictures in a row, without having to press a button before each one.
How to enable front, second or wide-angle camera on Xiaomi (Redmi)
Modern Xiaomi (Redmi) phones have several cameras with different optics, which are used for different types of photography.
You need to know the theory in order to turn on the right camera for suitable shooting conditions, and also practice this, otherwise it will be of little use.
In this article, we'll look at the basics: how to turn on cameras and switch between them on Xiaomi.
Launch the standard Camera .
Make sure you are in
Photo . Look at the 1x and film , as well as the Closed Arrow .
These are three commands to turn on the television camera, for 2x optical zoom (this is a separate sensor and optics) and the front camera, respectively. In order to turn on the front camera , click on the “Closed arrows” ; note that when it is activated, the previous icons will disappear, because they have nothing to do with the photo module located on the front side of the smartphone.
A camera with an honest 2x optical zoom is needed when you need to photograph a distant object, but remember that this mode does not use the main 48 megapixel sensor with the highest quality, but a much more modest one, which you can find in the instructions for your smartphone model.
A wide-angle lens (or it is also called “Telephoto”) has a very wide viewing angle, it is convenient to shoot something close, or some event, so that you can see what is happening around. Don't forget that the sensor here is also different, it is of worse quality than the main one, so don't expect excellent image quality.
I think it is clear that it is impossible to activate two or more sensors at the same time; you always need to choose one that is most suitable for the shooting conditions. Most often, the main sensor performs better; it contains up to 48 megapixels, and it is also equipped with the best optics for optimal performance even in low light.
How to enable age recognition by face in Xiaomi camera?
I have to report that in firmware with MIUI 10 this function has disappeared from the camera settings. Administrators of the official Xiaomi community confirmed this information, and they also added that this function will not return in future firmware, it will not exist.
This might be interesting:
What apps are there for the selfie stick?
If the standard camera options are not enough, you can install additional applications on your smartphone, available in the Play Market application store.
SelfieShop Camera
The application is not only convenient for taking photographs, but also helps to troubleshoot some problems, such as the lack of connection between the monopod and the smartphone. Through this application, you can take photographs using both a wired and Bluetooth monopod. The application is very simple and easy to understand, but this is also its main drawback. It does not have video shooting, there is no photo editor, but the application weight is only about two megabytes.
To take a photo, connect your smartphone to the monopod via cable or set up interaction via Bluetooth, launch the application, point at the subject and press the button on your monopod responsible for taking a photo. If necessary, you can change the photo parameters in the left side menu - such as brightness/contrast, frame size, exposure value and others.
How to use Retrica
One of the most popular applications, loved by many owners of a monopod and just a smartphone thanks to an extensive collection of filters (more than 100 pieces), which can be applied in real time even before pressing the shutter button on the camera. In addition to the ability to add effects to a photo, the application has a photo editor in which you can change the parameters of the resulting photo in more detail.
Before connecting the monopod to your smartphone, you should understand the application settings and its capabilities.
Click on the gear icon in the upper left corner of the screen after launching the application. This will take you to its settings.
The first settings block “Save to” is responsible for the location where the photographs taken will be saved. “Camera Roll” - saving to the phone’s image gallery. “Retrica Album” is an album of Retrica images that will be created automatically.
More useful options:
- “Touch Sound” - disable touch sound;
- “Add Geo Tag” - adding a geotag to a photo;
- “Watermark” - erasing Retrika’s watermark from a photo.
After launching the application, the object being photographed is displayed, to which the selected filter is instantly applied, even before pressing the shooting button.
Of the tools located on the orange stripe, there are:
- Changing the frame size (you can take more than one photo, but a collage at once, the function is implemented very conveniently - after releasing the camera shutter, the camera will take a number of pictures equal to the number of squares in the collage);
- The button with a circle in a square adds a vignette to the photo (makes the edges darker);
- The drop icon activates the blur mode for the entire area except for the one selected by touching the desired place in the photo;
- The square image on the next button is responsible for selecting a frame for the photo;
- The timer icon controls the automatic shutter release time and allows you to set the interval between photos.
A number of tools are also available in the gray bar at the very bottom of the application.
- The film icon allows you to view the photos you have taken in the album and proceed to editing the photo;
- Crossed arrows represent sequential filter selection (that is, the filter changes after each click on the arrow icon).
- Three circles - manual selection of the effect.
The basic functions of the application are free, but for the ability to edit photos after shooting, you will have to pay, that is, upgrade the application to the PRO version. Moreover, you can discover that the function is paid quite by accident - the editor itself allows you to process a photo, but you can save the resulting processed photo only in the PRO version.
After you try all the features of the application, you can safely connect the monopod to your smartphone and take pictures by pressing the button on its handle.
How to improve the quality of your photos
To fully understand how the camera works on Huawei smartphones, you need to adopt several rules that will help improve the quality of your photos.
To obtain high-quality images you must:
- Refuse zoom - do not use the camera's software zoom to take a picture of an object in the distance. Use physical zoom - just walk up.
- Maintain the proportions of light and shadow , minor errors can be corrected programmatically, but significant differences will result in overexposure in the photo or a large amount of noise.
- Take black and white photos only with a monochrome lens , it is more accurate in identifying objects. On the P20 and P30 series phones, the monochrome lens works well day and night.
- Shoot on a tripod , especially in “Pro” and “Night” modes.
- Use focus yourself ; autofocus does not always cope with its task efficiently.
Following all the rules of photography does not always help to obtain high-quality photographs. Budget phones are simply not capable of producing photos equal in quality to those from a flagship.
Google Pixel 2 Camera (APK)
The ported Google Pixel 2 and 3 application is a port of the camera application of the smartphones of the same name. It can be installed on your phone and used instead of the standard application, it allows you to improve the quality of your photos through software.
Pixel Camera does not work well on all phones; on some smartphones it does not launch or spoils the quality of images.
How and where to download
You can download the apk file from the XDA-Developers website; we recommend using this page (click on the XDA name), since the files are constantly updated there. If everything is bad with the English language, go through Google Chrome and turn on the translation of the page.
At the end of the article you will find 2 red buttons for downloading ports, you need: Google Camera Port with Portrait Mode for Non-Google Devices.
Features of work
Photos are taken exactly the same as in the standard application. Application features:
- Change the image format without having to go into settings.
- Change brightness.
- Application of various filters.
- Switch to selfie.
- View photos in the gallery.
This application has fewer photo capabilities than the standard one, but can help improve the quality of your photos.
Google Camera
Google Camera is another photo application that can be installed instead of the standard one. This application can only be installed by following complex instructions, which you can find in a separate article. But there is another application, it is called Open Camera and is available for download on Google Play. The functionality is reduced, but most of the functions are very similar.
The application has the following features:
- Displays real time and the amount of free disk space.
- Exposure lock.
- Scaling.
- Manual exposure adjustment, which is activated by the “+/-” icon.
- Several photo modes.
- General settings of the application, there you can configure photo settings, disable the camera click or set the quality of the pictures.
- Use in main, front and video camera .
Error “PIN or password entered incorrectly” when connecting a monopod
Another problem that a monopod owner may encounter is the appearance of a pin code or password error. This most often occurs with monopods connected via Bluetooth.
Here are some ways to solve the problem:
- If this error appears, disconnect the monopod from the smartphone, turn off bluetooth and restart the smartphone. In most cases, this solves the problem.
- The error may also occur if the latest operating system updates are not installed on your phone. Check your smartphone for updates, then reconnect the monopod to it.
Now, when you go on a trip with a monopod, you can be sure that all the best moments will be captured. No problems or system errors can prevent your friends from sharing the joy of photography with you.
Record video while taking photos
If you've been taking photos and think it might be a good idea to take a video, hold down the shutter button. As a result, the camera switches to video mode. You can then swipe up or right to unlock video mode.
This can come in handy when you're photographing children, animals, or sporting events. The camera app records video before you even switch to video mode.