The appearance of an error message 401 Unauthorized Error (“access denied”) when opening a website page means incorrect authorization or authentication of the user on the server side when accessing a specific URL. Most often, it occurs when a resource visitor enters an incorrect name and/or password when logging into his account. Another reason is incorrect settings made when administering the web resource. This error is displayed in the browser as a separate page with an appropriate description. Some developers of Internet resources, especially large portals, introduce their own additional coding for this failure:
- 401 Unauthorized;
- Authorization Required;
- HTTP Error 401 – Authorization error.
Let's try to understand the most common causes of this HTTP connection code error and discuss ways to solve them.
Reasons for the 401 server error and how to resolve it on the user side
When accessing some sites (or individual pages of these sites), the visitor must go through certain stages of obtaining rights:
- Identification – obtaining your account (“identity”) by username/login or email.
- Authentication – checking that you know the password for this account.
- Authorization is a check of your role (status) in the system and a decision to provide access to the requested page or resource under certain conditions.
Most users save their data by default in their browser history, which allows them to quickly identify themselves on the most frequently visited pages and sync settings between devices. This method is convenient for surfing the Internet, but can lead to problems with the security of access to confidential information. If you have a large number of authorized registration data for various sites, use a strong master password that blocks access to information stored in the browser.
The most common reason for an error code 401 for the average user is entering incorrect data when visiting a certain resource. In this and other cases, you should try the following:
- Check that the URL is spelled correctly in the address bar. This is especially true for navigating to subpages of the site that require authorization. Please enter the correct address. If you accessed the page after logging into your account, log out, return to the main page and log in again with the correct credentials.
- If you log in with saved user data and a 401 server error appears, check their correctness in the appropriate settings of this browser. You may have changed your login information in another browser. You can also clear the cache, delete cookies and try to log in again. When deleting browser history or clearing the cache, you will need to manually enter your login and password to gain access. If you don't remember your password, go through the recovery procedure by following the instructions.
- If you believe that you are entering the correct registration information, but cannot access the site, contact the resource administrator. In this case, it is best to take a screenshot of the problematic page.
- Sometimes blocking occurs on the provider’s side, which also leads to a denial of access and a message with 401 encoding. To check, you can try to log in to the same resource from an alternative IP address (for example, using a VPN). If you confirm that your traffic is blocked, contact your provider and follow their instructions.
Some large Internet resources with a large number of subscribers use additional settings to ensure access security. For example, your account may be blocked if you repeatedly attempt unsuccessful authorization. Too frequent attempts to connect may be perceived as the actions of a bot. In this case, you will see a corresponding message, but may simply be redirected to a page with a 401 code. Contact the site administrator and resolve the problem.
Sometimes simply reloading the problematic page, logging out of the current session, or using a different web browser completely solves the 401 login error problem.
Error 401. What does this code mean? Elimination methods
Error 401 or Error 401 Unauthorized - How to understand this code? What does this mean for the average user and webmaster? How to resolve 401 error?
Any Internet user has encountered various errors at least once. Each of them occurs for different reasons and sometimes it is very frustrating and interferes with normal work. To make it easier to understand what exactly the problem is, they all have their own special code. This code, in turn, consists of three numbers, which carry some important information.
Resolving error 401 by the web resource administrator
For website owners who are faced with a 401 access denied error, solving it is sometimes much more difficult than for an ordinary resource visitor. There are several recommendations that will help with this:
- Contacting website hosting support. As in the case of problems with the provider, it is best to describe in detail the sequence of actions that led to the appearance of the 401 error and attach a screenshot.
- If there are no problems on the hosting provider's side, you can make the following changes to the site settings using the line Disallow:/address of the problematic page . Prevent indexing of pages with errors in “robots.txt”, then add a line like this to the “.htaccess” file:
Redirect 301 /oldpage.html https://site.com/newpage.html.
Where in the field /oldpage.html the address of the problem page is written, and in https://site.com/newpage.html the address of the authorization page .
This way you will redirect users from all pages that generate a 401 error to the initial login page.
- If, after following the previous recommendations, users still see a 401 error when attempting to log in, then find the “ php.ini ” file on the server and increase the session lifetime by changing the values of the following parameters: “session.gc_maxlifetime” and “session.cookie_lifetime” to 1440 and 0 accordingly.
- Web resource developers can use more sophisticated authorization and access authentication methods to create additional security over the HTTP protocol. If you cannot resolve the failure using simple administration methods, you should contact the specialists who created the site to make appropriate changes to the code.
While a 401 error is a client-side issue, user error on the server side can result in a false login requirement. For example, a network administrator will allow login authentication for all users, even if it is not required. In this case, an unauthorized access message will be displayed to everyone who visits the site. The bug can be resolved by making appropriate changes to the settings.
Types of errors
When unlocking, there is a possibility of the following bugs:
- The utility stops downloading at 50%.
- After 50% of the installation, the following message appears: “Not connected Mi-Phone”.
- Freezes during setup process.
- SMS with confirmation code does not arrive.
- The notification “Your device isn`t supported by Mi Unlock” is displayed.
- Can't press the green button.
- I can’t log into my Mi account or “mi unlock doesn’t work.”
- After authorization, you will be prompted to enter a permanent nickname.
Account verification error
After approval has been received from the manufacturer, the first thing that is recommended is to see if the mobile is synchronized. device with Mi profile. This is definitely worth doing. To do this, go to the “Mi Unlock status” subsection and check if the bootloader is unlocked.
To link your profile, click “Add account and device”. After a couple of minutes, the phrase “Added successfully” should be displayed.
If you do not carry out this manipulation, then when you try to log in, a lag will be displayed, accompanied by the inscription “Current account is not bound to this phone.”
Code 10008 will also likely appear. This happens if the connection to the server is not stable. In this case, use the DNS changer utility. Its operating principle is intuitively simple: after downloading and installation, you need to enter DNS1 and DNS2 (see screenshot), click “Start”.
The application will ask you to establish a VPN connection, we agree. The program will change color to green. This means that the procedure was successful. Next, we perform the manipulation with “Add account and device” again. The bug should be fixed. The success of the process is determined by the “Added successfully” notification.
Error 1
There are many reasons for error 1 Mi Unlock. The easiest way to solve this is to try opening the software on another PC. Because the code means that the problem is unknown, you must use all available solution methods.
Perhaps the manufacturer has not yet given permission to unlock the smartphone. It is recommended to download the application again. If the problem persists, reflash the device.
Account verification error
If a mi unlock account verification error appears, and the method described above does not work, you need to reflash the phone. You need to download the Chinese version, called developer. Next, you need to launch the application, visit the “For Developers” section and see the status of the utility here.
If there is no profile, add it. This innovation appeared recently. The innovation is associated with increased device protection.
Unknown error
The difficulty with an unknown problem is that it can have many causes. Check everything in order:
- The problem may lie on the Xiaomi servers.
- You may need to update drivers or install them.
- The problem may also occur due to an old version of the gadget's software. In this case, it is recommended to download a fresh one.
- The developer has not yet given permission to unlock the device. You need to wait.
- If the problem is in the location, then change the country in the settings or through programs: VPN or
Error by 50
If the download stops at 50% and the program writes “couldn`t verify device” or “not connected to mi phone”, then the reason is usually that less than 10 days have passed since the procedure was approved.
However, if the allotted time has passed and the problem still exists, then the problem is this: when you switch the gadget to fastboot in the device manager on your PC, it appears as an unknown Android device.
In this case, it is recommended to update the drivers and name the folder xiaomi_usb_driver. After successful installation of the driver, the download will be complete. Without installing it, mobile. The device will be connected to the PC in fastboot mode. After a few seconds, you will be automatically logged out. If the driver is present, a manual reboot is required.
Error 90000
One of the reasons for this problem is that more than 5 mobile phones were unlocked on one PC. devices. The simplest solution is to try downloading the Russian version of Mi Unlock. This helped many users.
It is also possible that the account or device was registered incorrectly or was not registered at all. Check if you have done the following:
- On mobile In the device settings, find the “About phone” item, click on the line where the current firmware version is written at least 7 times.
- Next, we return to the main menu and find the “For Developers” sub-item. It is located in extra. settings.
- Here we open Mi Unlock Status and be sure to enter the mi-profile and smartphone data. To do this, click “Add account and device”.
If you skip this step, “unknown error – 90000” may appear when loading.
Error 401
This code means that an unlock attempt is being made without the appropriate rights. To fix the bug, immediately before the installation procedure, obtain permission from the developer to make changes to the device.
Open the official MIUI website, here we find the “Unlock my device” subsection, and fill out the form.
Attention! The fields should be filled out in the language of the page that opened. If it is presented in Chinese characters, then the request must be sent in Chinese. To do this, it is recommended to use a translator.
Once you have received approval from Xiaomi and the data that needs to be entered in the appropriate fields, you can safely begin the installation procedure. The problem will disappear.
Unknown error 1
There are many reasons for this bug. The problem may lie on the Xiaomi servers. You may need to update drivers or install them. The problem may also occur due to an old version of the gadget's software. In this case, it is recommended to reflash the device.
The developer may not have given permission to unlock your device yet. Then just wait. If the problem is location, then change the country in the settings or through programs: VPN or DNS.
Couldn't unlock xiaomi
If, when you try to link your account, the message “couldn`t xiaomi unlock” appears, then it is recommended to change the IP address to Chinese. For this:
- Load any program from
- Select China from the list of addresses. It is signed "China-Shangai".
- We return to the “For Developers” sub-item, find “Mi unlock status”, click “Link device to account”.
- After some time, the message “Process completed” should be displayed.
- Open the utility and run the procedure again. You will most likely receive a notification that you need to wait 72 hours for further action.
- After the time has passed, we launch the software and begin the unlocking process again. Bug fixed.
What to do if an error does occur?
Do not panic! Most errors can be resolved on your own at home; the main thing is to carefully inspect the device and understand what exactly caused the problem.
All Xiaomi robot vacuum cleaner models have the same error codes. Find the code that appears on your device's screen in the table below and follow the instructions carefully.
Sometimes a simple reboot of the vacuum cleaner helps solve many errors.
All errors on the Xiaomi smart vacuum cleaner and how to fix them
Simple device maintenance rules can help prevent some malfunctions. These include: removing dust from navigation sensors, replacing worn brushes and filters.
Xiaomi vacuum cleaner laser distance measurement sensor has encountered an error and don’t know how to solve the problem? Our experts have compiled a list of common problems along with tips on how to fix them.
Possible errors and tips for eliminating them:
- Error 1 of the Xiaomi vacuum cleaner occurs when the lidar is faulty. The cause may be dust or foreign objects getting into the sensor. Reconnect the laser rangefinder, remove the obstacle or object that is interfering with its operation. If the robot is in a confined space, move it to another location.
- The second error of the Xiaomi robot vacuum cleaner occurs when the sensor built into the spring bumper malfunctions. Clean the sensor from dirt, lightly press the bumper several times, move the car to another place on the floor.
- Error 3 The Xiaomi vacuum cleaner turns off when there is no contact between one wheel and the floor. Check its position and move the machine to a stable surface.
- Error 4 means that the elevation detection system has activated. This malfunction, like the obstacle sensor error of the Xiaomi robot vacuum cleaner, can occur when the sensors are dirty. Move the device away from the edge of steps or other elevated areas that it might react to. If necessary, clean the sensors on the bottom of the device.
- Xiaomi vacuum cleaner error 5 is often thought of as a gadget for cleaning a house with pets. This occurs when the central electric brush is faulty. Wool and hair wrap around the extractor and its axis, preventing the normal operation of the mechanism. Remove the roller following the instructions and clean it using the special tool.
- Error No. 6 occurs if the end brush mechanism is jammed. This can happen due to threads, hair, fur, and other objects getting wrapped around the brushes and brush caps. Unplug the brooms according to the instructions and clear them of any debris.
- The seventh error occurs when the drive wheel is blocked. The cause of the breakdown may be foreign objects caught in the wheel mechanism. To resolve this, clean the rollers and restart the machine.
- Error 8 The Xiaomi robot vacuum cleaner gives up when it gets stuck between objects or gets tangled in wires. Remove any obstructions or move the device to another location.
- Error 9 of the Xiaomi robot vacuum cleaner occurs when the dust collector or filter is not installed correctly or is missing. Check for accessories and make sure they are installed correctly.
- The problem with the filter of the Xiaomi robot vacuum cleaner indicates error 10. Possible reasons: the consumables are dirty, they are not dry enough after washing, hair and dandruff have gotten into them. If necessary, dry or clean the filter. If the problem persists, replace it with a new one.
- When you turn on the device in close proximity to a virtual wall or magnetic tape, Xiaomi models display error #11. Move the device 1-2 meters away from the holding devices and start cleaning again.
- Error 12 of the Xiaomi robot vacuum cleaner appears when the charge level drops to a critical level. Place the device on the docking station to replenish energy.
- If there are charging problems, you may see Xiaomi Robot Vacuum Cleaner Error 13 on the display or mobile app. To resolve the problem, check the docking of the device and the docking station, wipe the contact pads on the base and body of the robot with a dry cloth.
- The device's battery may overheat or fail during operation. If the battery temperature critically increases or decreases, error 14 of the Xiaomi robot vacuum cleaner will appear. Wait until the battery cools down and begin cleaning again.
- A malfunction of the sensor that determines the distance to walls and vertical objects is indicated by error #15. Keep all robot sensors clean and free of dust to avoid problems with their operation.
- Error #16 indicates that the vacuum cleaner is tilted. Move it to a flat surface, start after restart.
- The failure of end brush modules in Xiaomi models is indicated by error #17. Reboot your gadget or restore factory settings.
- The fan error of the Xiaomi robot vacuum cleaner is indicated by notification No. 18. Reboot the device system and try to start cleaning again.
- Error 19 indicates that there is no power to the charging base. Check the connection of the docking station to the outlet, wipe the contact terminals on the robot and base.
- When an internal error occurs, the device stops and displays notification 20. Resetting the device may help resolve the problem.
Remember that a reset may be useful for some faults. Use this method if an error occurs in the laser sensor of the Xiaomi robot vacuum cleaner when other actions do not help. If this does not help, contact your nearest service center to diagnose and repair the device.
Error 10
The removable filter must be checked carefully. You may feel foreign objects inside. Remove the filter itself and wash it. If the error occurs again, replace the component.
Failure 21
Make sure that there are no objects blocking the laser rangefinder. If not, wipe the sensor with a cloth. If the problem persists, contact your service representative.
The error of the laser distance measurement sensor of the Xiaomi robot vacuum cleaner is mainly due to dust settling on the rangefinder. It is recommended to wipe the sensor after each cleaning to avoid various failures. In addition, if an error occurs, it is better to perform a forced reboot. In most cases, restarting helps get rid of many problems.
Battery error (code 13)
If the standard method of removing the failure did not help, then we suggest that you consider an alternative method of solving the problem. Please note that you will need the following tools: a Phillips and flathead screwdriver, a multimeter, a soldering iron (preferably with a small tip) and several 18650 batteries. As for batteries, those installed in portable chargers (PowerBanks) are great. Ideally, their capacity should be 2600 mAh, but small deviations are acceptable.
So be patient and follow the instructions:
- Unscrew the 6 screws on the housing, then disconnect the small and main brushes.
- Remove the battery, which is orange by default.
Remove the battery from the cleaner
- Measure the output voltage. It should be around 15-16 V, but may be completely absent.
- Remove the battery by pressing lightly with a spatula or the tip of a screwdriver. The board (BMS) is on top, so slowly remove all the cans. They are glued to the sealant, which can cause some difficulties.
- Using a multimeter, measure the voltage across all batteries. It should be between 3.7 and 4.2 volts. If there are abnormalities in the banks, be sure to find them.
Measure the voltage on the banks
- Trim the damaged cans, but leave some space for future soldering.
- Solder the new cans, paying attention to their polarity.
- Measure the total battery voltage. If it is between 15-16 volts, install the battery into the vacuum cleaner and tighten the screws.
Finally, turn on the robot vacuum cleaner to charge and make sure that the error no longer occurs.
How to remove error 1 of the Xiaomi robot vacuum cleaner yourself
To get to the lidar motor, you need to perform several steps to remove the housing:
First, turn off the robot vacuum cleaner's power (press and hold the power button on the robot vacuum cleaner body).
Carefully lift the plastic cover that contains the robot's controls;
Unscrew the screws securing the hinges of the hopper lid;
Then, after removing the rubber plugs, remove the 5 screws covering the lidar;
It remains to unscrew 4 screws to remove the lidar;
You have the lidar in your hands along with the motor unit. Next, find at home either an unnecessary USB cable with an external battery or a wall charger for your smartphone. We need to apply 5 volts to the motor contacts. Do not be afraid! It's not difficult: cut the USB cable, find the black and white (sometimes red) wires, strip them and connect them to the pins (black to black and white (or red) to red).
If the engine starts to rotate, let it run for 15 seconds. After that, install everything back and the Xiaomi robot vacuum cleaner is ready to go!
If the engine does not rotate, then below we will tell you where to buy it and which model to choose.
How to deal with errors in this model
First of all, as mentioned above, it is necessary to ensure the timely replacement of filters and brushes.
Periodically wipe the sensors from dust. Also make sure that there are no foreign objects on the floor during cleaning.
Error 401 - what does it mean and how to fix it
Error 401 is an HTTP status code that means the page you were trying to access cannot be loaded until you are logged in with a valid user ID and password.
If you just logged in and received a 401 error, it means that the credentials you entered were invalid for some reason.
401 Unauthorized error messages are often customized by each website, so be aware that this error can appear in more spelling variations, the most common being:
- 401 Unauthorized access
- Authorization required
- HTTP Error 401 unauthorized access denied
A 401 authorization error is displayed in the web browser window. Like most of these errors, you can encounter them in all browsers running on any operating system.
Error Codes 401: Basic Internal Server Errors
Web servers running Microsoft IIS may provide additional information about the 401 Unauthorized error, such as:
| Microsoft IIS Error Codes 401 | |
| error | explanation |
| 401,1 | Failed to login. |
| 401,2 | Login failed due to server configuration. |
| 401,3 | Unauthorized due to ACL on the resource. |
| 401,4 | Authorization was not passed by the filter. |
| 401,5 | ISAPI/CGI application authorization error. |
| 401,501 | Access denied: too many requests from the same client IP; Dynamic IP Limit The concurrent request limit has been reached. |
| 401,502 | Prohibited: too many requests from one client IP address; Dynamic IP address limit The maximum request rate limit has been reached. |
| 401,503 | Access denied: IP address included in Deny IP Restriction list |
| 401,504 | Access Denied: Hostname is included in the Deny IP Restriction list |
What does a 401 error mean?
It is worth noting that errors are divided into special groups (for example, 400-499 tell us about problems executing the request, and 500-599 about problems on the server itself). Everything about 5xx errors can be found on our website, which is dedicated to this topic.
Today we will talk about error 401, or Error 401 Unauthorized, which translates as “no access”, the reasons for its occurrence and methods for fixing it. This problem is encountered quite often, but it does not carry anything frightening as it seems at first glance. And yes, if you are a webmaster, you can breathe a sigh of relief because this error, unlike other errors, does not carry anything painful for your site. And if you know what to do in such a situation, then literally in a matter of minutes your work on the Internet will improve.
Error 401 only occurs when there are some problems with authorization.
What are the causes of the 401 error?
- An invalid request was received from the user;
- Incorrect operation of the server itself;
- The user entered incorrect authorization data.
How to resolve the 401 error for a regular user?
You must try to log in again by filling out the login and password fields again. Please double check that the information is correct. This should solve your problem. If the error persists, you need to write to the administration of the resource that you are not allowed to access. It is quite possible that you are not welcome on the site and your account has been blocked.
You can also contact your provider for help if you have a 401 error. They will explain your rights and responsibilities to you. To check whether your provider is blocking traffic, download a VPN service and try logging in through it. If everything is fine, call your provider.
How can owners of their own websites resolve the 401 error?
- First, notify your hosting support service; it is best to send them a screenshot of your error message. They will help to identify in which segment the 401 error occurs.
- If your hosting provider is okay, you need to make some changes using the line:
- Disallow:/page address
- Prevent indexing of pages with errors in “robots. txt", then add this game to ".htaccess": Redіrest 301/oldpage. html
- Perhaps the error lies in the site code. Solving the problem in this case is more difficult, because you need to contact the company that developed your resource.
So now you know how to fix the 401 Unauthorized error. As you have already seen, this will not be difficult for an ordinary user, it will take a matter of seconds. Of course, the site owner will have to tinker a little more, but the problem is still solved. We wish you success and fewer bad mistakes.
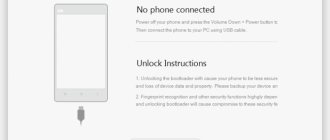
How to unlock bootloader
Users can access the locked bootloader on the device using the official method, which is recognized as secure.
Checking status
- download and unpack the package with ADB and Fastboot;
- install Fastboot drivers;
- switch the device to this mode;
- connect the smartphone to the computer;
- launch the Windows command line.
Enter the following data in this field:
- cd path to the directory with adb and fastboot - go to the folder with Fastboot;
- fastboot devices - the system correctly searches for a smartphone;
- fastboot oem device-info - view bootloader status.
There are 2 options here:
- “Device unlocked: true” - protection has been removed;
- “Device unlocked: false” - the bootloader cannot be unlocked.
Checking bootloader status.
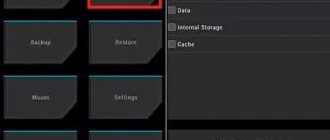
Not enough space in cache partition…
It may happen that when you try to install the MIUI 12 update, you will receive the following cache error when there is not enough free space in it for the update:
Not enough space in cache partition. There isn't enough free space for an update in the cache partition of your device's storage. Tap “Reboot” to clear the cache partition and reboot your device. Your data won't be affected by this action.
Translation : There is not enough free space in the cache partition to update. Click Restart to clear your device's cache. This action will not affect your data.
It is necessary to clear the device cache, for which you should do the following:
- Turn off the device;
- Press and hold the power and volume up buttons at the same time until the device enters Recovery mode;
- Use the Volume buttons to navigate to Wipe Data, then press the Power button to confirm;
- After cleaning, go to the Restart section and restart your smartphone;
- Proceed to update the system.
Before clearing the cache, be sure to back up all your data!
How to fix 401 error
Check the spelling of the URL for errors. A 401 Unauthorized error may have occurred because the URL was entered incorrectly or the selected link points to an incorrect URL - authorized users only.
If you are sure the URL is correct, visit the website's home page and look for a link that says Login or Secure Access . Enter your credentials here and then try loading the page again.
If you don't have your login credentials or have forgotten them, follow the instructions on the website to set up your account or change your password.