What do you need
Before you start flashing your phone via Fastboot, you need to prepare a little:
- Check that the phone works successfully with the computer via a USB cable, install all the necessary drivers if this is not the case.
- Install a special MiFlash program, also called MIUI ROM Flashing (there will be a link throughout the article).
- And, of course, you can’t do without the firmware file itself. You need to select either the global version or the version for firmware in Fastboot mode. The download should only occur from the MIUI website and only for your specific model! The required file extension is “.tgz”. If you come across “.gz” , just rename it.
- Do not forget that for a successful operation we need an unlocked bootloader. Bootloader inactive? Then use our separate article on this topic.
What is the difference between Fastboot and ADB?
ADB is short for Android Dubug Bridge. It allows you to access system folders, open hidden files and make changes to them. For this procedure, you will have to root your device.
Fastboot is used if the Android system suddenly stops working on the device.
To use the commands, you just need to boot your phone into fastboot mode. This will help you access the system partitions of the operating system and make changes to them.
Step-by-step instructions on how to flash Xiaomi via Fastboot
Now let’s proceed directly to the firmware of the Xiaomi smartphone itself, which will take place via a computer. The phone should have at least 60-70% charge .
Step 1: Install MiFlash and Drivers
Before installing the MIUI ROM Flashing Tool on your PC or laptop, you had to disable digital driver signature verification, but this requirement is no longer relevant.
MiFlashSetup_eng.msi
- Download the MiFlashSetup_eng.msi file.
- Run the file and begin installing the program. Select the installation path to system drive C (if you are prompted for an installation location), wait until it finishes.
- Now we activate the XiaoMiFlash.exe utility using the icon on the desktop.
- Check if all drivers are installed again. An example in the screenshot below.
- We reboot the computers so that all the actions taken have an effect.
A quick note: this article uses MiFlash version 2021.04.25. The developer website xiaomiflash.com has a version dated 2021.11.15, but there are some problems with it. The new version also does not require installation or rebooting of the PC, it is portable and works right out of the box.
Step 2: Unlock Bootloader
Recently, unlocking the bootloader has been significantly simplified. There is no need to submit an application to the official Xiaomi service and wait several days for a positive decision, which, otherwise, might not have happened. Now users can immediately begin activating the bootloader. Let's describe the brief instructions:
- The first and most important thing to do is to link your phone to your Mi account. The screenshots below show everything in detail.
- Now we just have to wait until 360 hours have passed and then we can continue.
- After this, we will need another utility, namely Mi Flash Unlock. You can find it on w3bsit3-dns.com or on the official Xiaomi website.
- Afterwards, open the program as an administrator, put the device into Fastboot mode (turn off the phone, wait about a minute and hold down the volume minus button with the power off button) and connect it to the computer. Reading of information will begin.
At the end of the procedure, three green dots should appear - a sign that Bootloader has been successfully unlocked. Made. Don’t forget that on our website you can read detailed instructions.
Step 3: Selecting the correct firmware
Now I pay special attention to choosing the right archive with firmware for your Xiaomi model. To flash firmware in Fastboot mode, you need a special archive; it is suitable for both the method of installing new firmware via Mi Flash and ADB Platform-tools.
Download the archive with the firmware from the MIUI forum. If your model is not on this page, then you need to go to 4PDA, and there, in the topic header of your model, find a link to download an archive with firmware for Fastboot mode from the official source.
Step 4: Put your phone in Fastboot mode and connect to your PC
When the preparation is complete, take the mobile device, turn it off and wait about a minute for all processes in the smartphone to completely stop. Now we launch Fastboot mode on the phone.
This is done as follows: hold down the power key and the volume down rocker. We hold it until a hare with earflaps appears, repairing the Android. Now the device can be connected to the PC.
We connect the phone to the PC only after activating Fastboot mode, otherwise there will be an error!
Step 5: Launch Mi Flash program and flash Xiaomi firmware
Now a few important steps.
- Let's unzip the archive with the firmware using any available archiver. The archive will need to be unpacked 1-2 times ! Then move the folder with all the firmware files to the “flash” folder so that the path is shorter.
- Transfer the files to the root of the system disk into the Flash folder (you need to create it). There should be no Russian letters along the path to the firmware files (example: C:\flash).
Unpacking firmware files
Enabling the MiFlash program
Next, launch the MiFlash shortcut from the desktop. Click on the “Select” located in the upper left corner and indicate the path to the firmware. Confirm with “OK”. We update the list of connected devices using the “Refresh” button. We go down below, where we see the points:
- Clean all – deletes all files from the device without the possibility of recovery;
- Save user data – does not touch user data;
- Clean all and lock – completely cleans the smartphone and locks the bootloader.
Specify the path to the files
Launching the firmware
Be extremely careful here! It is best to choose the first option so that nothing interferes with the process. Also, be sure to make a backup before starting the operation. Reset the backup files to your computer , as the SD card also has the risk of being suddenly cleared during an incorrect flashing process.
We carry out the final action - click “ Flash ” . Flashing begins. You cannot disconnect your smartphone from your computer until “ Success appears “ Result ” .
The procedure may take some time, and during this period any actions with the phone are strictly prohibited.
At the end of the operation, the mobile device will reboot and start on the new version itself.
Detailed list of ADB and Fastboot commands for Android when working with a PC (Windows / Mac / Linux)
- adb reboot bootloader : You can enter this command to enter fastboot or bootloader mode. This command line allows you to go into the phone's bootloader, booting it into this mode. It is more convenient to put your phone into bootloader mode on your computer using the command line.
- adb reboot recovery: This command is usually used by developers to install updates to a phone that has not yet been officially released. Some features, such as flashing ROM on your device, require booting into recovery mode. You need to hold down certain key combinations or buttons on your phone for a few seconds. The following commands are available in recovery mode.
- fastboot reboot bootloader: Reboots the device to make additional changes to the backend. In any case, you will then have to reboot back into fastboot.
- fastboot flash recovery XYZ.img : Flashes the recovery image file into a custom recovery.
- fastboot flash XYZ.zip: The ZIP file can be flashed in fastboot mode.
- adb reboot: Reboot the device in normal mode. This command is used after flashing the APK file on the system. Or during the procedure for restoring an old version of the OS.
- adb device: With this command you can test the connection and get information about the devices connected to the computer.
- fastboot device: This will let you know about all connected devices.
- adb install (specify path to file): Typically used in professional debugging, as well as by application developers. Allows you to install a zip file or APK file on your Android device. Using this command, you can install a specific application on your phone without using Google Play Store.
- adb uninstall: If you think it's time to remove any applications from RAM, you can do so by entering the full package name. This will make the application disappear completely.
- adb shell wm density (dpi): with this line you can change the pixel density on the screen of your smartphone.
- adb shell: With this line you can open or run commands through the terminal on your Android phone or tablet.
- adb shell (path to update.zip file): Developers specifically use this line to install an update for a smartphone that has not yet been officially released. Along with the custom recovery, you can download the firmware update.zip. You can also upload zip files from your computer.
- adb backup: Creates a backup of your Android device and stores it on your computer. This can come in handy if you plan to do something risky and want to be able to restore everything on your smartphone in case of failure.
- adb pull (path to any folder or file on device) : With this command, you can copy any file located anywhere on your phone and paste it to any folder. You can copy files from your phone to your computer. When extracting files, you can specify a save location. The files are copied to the computer folder where ADB is located. They can then be moved anywhere.
- adb push: this line is only used in cases where the phone has a custom recovery installed. This command sends ZIP and APK files from a Windows computer to an Android device. If the file you want to copy is already in the ADB folder, all you have to do is enter the name of the file.
- fastboot OEM lock: locks the device bootloader.
- fastboot OEM unlock: You can use this command to unlock the bootloader for your Android device.
List of other fastboot commands
| Teams | Purpose |
| fastboot reboot | reboot |
| fastboot reboot recovery | boot into recovery mode |
| fastboot oem unlock | reboot bootloader |
| fastboot oem unlock | unlock bootloader |
| fastboot oem device-info | check bootloader lock/unlock status |
| fastboot flash recovery | flash memory recovery in fastboot mode |
| fastboot boot | boot directly into recovery without installation |
| fastboot flash file | flash zip file from fastboot mode |
| fastboot getvar cid | show phone CID |
| adb devices | list of devices connected to the computer |
| adb reboot | restart smartphone |
| adb reboot-bootloader | reboot into bootloader, fastboot or download mode |
| adb reboot recovery | reboot in fastboot mode |
| adb get-serial no | get the serial number of the connected device |
| adb install | install the application via adb |
| adb install -r | update installed application |
| adb uninstall package_name.here | uninstall application using ADB |
| adb push (source) (destination) | copy a file from computer to smartphone |
| adb pull | copy file from phone to computer |
| adb shell (command) | run command in terminal on Android host device |
| adb backup | create a backup of your device and save it to your computer |
| adb restore | restore phone backup |
| adb sideload | click and install the flashable zip file or custom ROM on your device |
| adb logcat | show real-time phone log |
| adb start-server | launching ADB server processes |
| adb kill-server | stop adb server processes |
| adb reboot fastboot | reboot the device in fastboot mode |
Possible problems
If the firmware is not installed or the phone simply does not start after the update, pay attention to the following possible reasons and solutions:
- Damaged firmware file. The archive may have been downloaded from an unreliable source or unpacked incorrectly, watch our step-by-step video instructions. Download another version and be sure to disable your antivirus, otherwise it will remove the necessary elements.
- During flashing, the phone was completely discharged. This happens if less than 30% of the charge remains at the beginning of the operation. Do not immediately connect your smartphone to charge if it has recently been reflashed. Here you need to disassemble the phone and remove the battery (in this case there is no way to disassemble it) and after 10-15 minutes insert it again. Try turning it on. Does not work? Then put it on charge and try again after half an hour.
- Damaged cable or dirty USB connectors. The most banal, but quite common reason. The wiring has burned out, a foreign object or cable has gotten into the port - and now there can be no talk of any successful connection to the computer.
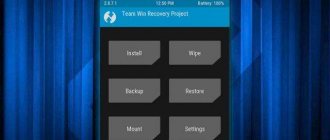
How to install TWRP Recovery on Android via a computer yourself for free
There is an opinion that installing custom Recovery on a device running Android is only possible if you have superuser rights. However, this is not true, because there are many applications that allow you to solve the problem bypassing obtaining root rights.
Via ADB and Fastboot without root rights
The easiest way to install TWRP Recovery on a mobile device is to use third-party ADB and Fastboot utilities, which can be downloaded from the official resource either in whole or in separate files.
Next, you need to act in accordance with the following algorithm:
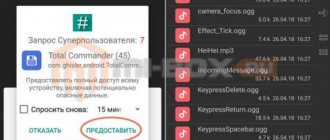
- We install the package or individual ADB and Fastboot files on the Android device, following the pop-up prompts.
- We connect the smartphone to the PC using the supplied USB cable.
- We launch the command line and go to the installed files or directly from the ADB folder.
- Download TWRP Recovery for your device, immediately moving the boot file to the folder to ADB and Fastboot.
- Enter the following commands on the command line:
And if everything was done correctly, then the user device on which TWRP Recovery was installed will definitely be displayed in the console window.
The main thing is not to forget about USB debugging, which must be done before connecting the mobile device to the PC.
To do this you need:
- Go to your smartphone settings.
- Select the “For Developers” section (if the latter is missing, you need to go to the “About Phone” tab and click on the firmware or build version number several times before going over).
- Move the slider next to the “USB Debugging” command to the active position.
- We confirm all previously taken actions with the OK command.
A prerequisite for correct installation of TWRP Recovery is USB debugging, which should be done in advance using smartphone settings for these purposes.
It is important to remember that USB debugging should be active only during the installation of TWRP Recovery, after which the command will need to be disabled using the same algorithm of actions.
Via SP Flash Tool
Typically, the desktop utility SP Flash Tool is used to install an operating system on a connected device. However, if you wish, you can also use it to load the recovery menu, guaranteeing a correct installation of TWRP Recovery.
To do this you need:
- Download the utility to your PC from the official resource and install and launch it.
- Download and install drivers for your mobile device on your PC.
- Download TWRP Recovery and immediately after launching the software, go to its settings menu, checking the command line DA DL ALL With Check Sum.
- Go to the main page of the installed software and select Scatter-loading, and then TWRP Recovery from the archived list to put the mobile device into firmware mode. In this case, if you are using a Samsung device, then you should use a combination of hot keys, while simultaneously pressing the volume control down along with the power button from the off position.
- Select the Download loader in the desktop version of the software on your PC.
- Connect your smartphone to your PC using a cable.
Step-by-step completion of all the steps listed above will allow you to start the process of installing the advanced recovery menu on your mobile device.
SP Flash Tool is another opportunity to get a recovery program for almost any Android device in Russian, and even for free
What does ADB allow you to do?
First, let’s point out why ADB is needed at all. With it you can:
- Reboot the device in various modes;
- Exchange files/folders with your phone;
- Install/uninstall applications;
- Install custom firmware (including TWRP Recovery);
- Unlock the Android pattern key;
- Execute various kinds of scripts.
The ADB tool is usually installed in conjunction with the Fastboot console application.
What is Fastboot Mode
Fastboot is a startup mode (fast boot) of an Android device, the task of which is to flash the phone’s memory, restore functionality, and destroy data associated with the gadget.
The tool operates autonomously. The program code that defines the properties and functions of the mode is stored in a separate protected memory area and does not depend on the stability of the operating system.
The developers introduced Fastboot along with the Android SDK. The debugging protocol is similar to the Windows XP Recovery Console, since previously system administrators and experienced users used this product to resolve issues related to running the platform.
Fastboot boot operates similarly to the console and implements commands from the smartphone owner that correct the operation of the Android OS. The application controls the device management process.