The range of applications of a modern gadget is unimaginably wide: it is a phone, a computer, a navigator, a wallet, a camera in one compact, convenient and beautiful case. Devices with one camera are practically no longer found, and many devices have such capabilities that they can even compete with cameras. It is very disappointing when, at the most inopportune moment, the camera refuses to do the job for its intended purpose. Why the camera does not work on an Android phone is a difficult question, but today we will try to figure it out.
Main causes and methods of control
Camera on Android - a module that includes hardware and software, connected to the device using a cable. Therefore, faults can occur at both the hardware and software levels. Without knowledge and experience, the former are more difficult to deal with, but any user can cope with the latter.
If a message pops up stating that Android was unable to connect to the camera, you should look for the following reasons:
- program failure;
- application incompatibility;
- incorrect settings;
- virus infection;
- cache overflow;
- dirt on the lenses;
- mechanical damage.
Almost all of this can be checked and eliminated by each of us. Of course, if we exclude hardware reasons that led to the fact that the smartphone camera does not work.
You need to remember how the failure manifested itself (gradually or immediately), and what preceded it: whether updates, firmware, new applications were installed, whether the gadget was scanned by an antivirus, whether it fell or was exposed to rain, and so on. Perhaps the reason will be discovered easily and immediately. In any case, this way you can narrow down your search and it will be easier to identify the cause. The main thing is to understand what causes the camera error on Android, and we will tell you how to fix it further.
Software glitch
Unfortunately, even the most advanced hardware and software are prone to failures. Software errors on Android appear quite often both in the entire system and in individual applications.
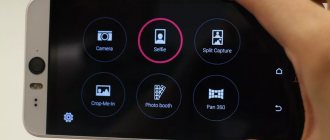
The camera may also be unstable, causing questions and confusion among users. If instead of the usual camera interface, after clicking on the icon, a blank screen is visible, that is, the camera on Android does not open, this may be just such a glitch.
There are two possible solutions here:
- reboot the gadget;
- reset to factory settings.
The first solution is the simplest and most understandable. A small glitch in the program may no longer appear after a reboot. To do this, you need to hold down the power button and select the appropriate option in the drop-down menu.
If the main camera does not work, it makes sense to return the device system to its original state after release at the factory. To do this you need:
- Enter the gadget settings.
- Find the "Restore and reset" section.
- Select the reset option.
This should solve almost all software problems. It is first recommended to save important data and transfer contacts to an external memory card.
Incompatible applications
There are cases when the rear camera began to work poorly after installing some applications; Special attention here needs to be paid to third-party ones, not from the official Google store. They may conflict with the camera or be completely incompatible with the current OS version.
As a rule, these are programs and instant messengers that edit or use photographs. For example, Viber, Whatsapp and the like.
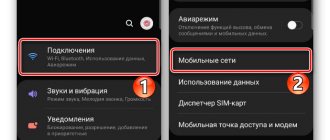
If you cannot connect the camera, close other Android applications. In this case, it even makes sense to try to disable them or remove them altogether. For this purpose it is necessary:
- Enter settings.
- Open the applications section.
- Click on the required one.
- Select the delete button.
After this, you can check if the camera is working. When checking, do not forget to switch between shooting modes; the error may be hidden in any of them.
Problematic programs should be removed one by one, starting with those that were recently installed. If you are using a third-party camera, you may have to replace it.
Virus check
Viruses can cause the failure of any module, program, and even malfunction of the OS or processor of the device. As a result, the latter does not see the camera.
A good antivirus program is always welcome. It will scan, identify threats and free the system from external intervention.
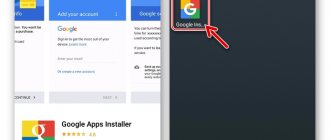
It is also recommended to select such a program on Google Play so that it itself does not become a source of infection. Good examples include Kaspersky, Dr.Web and Avast.
It is recommended to check Android periodically without waiting for problems. I think there is no point in explaining how to check a camera for a virus, since the antivirus program does this comprehensively on the entire device.
Updating and installing new firmware
While the gadget is supported by the manufacturer, its OS receives regular updates. The choice of method is determined by the user, but it is recommended to enable automatic. But even a planned upgrade does not always and not on all devices result in improved functionality, despite what is provided by the manufacturer.
If the camera stops working, the system must first be rolled back to a previous working version. You can immediately disable auto-update, because it will not be useful.
Later, it makes sense to check the next firmware version for compatibility with the stock camera. There may be a problem with the updater and you will have to install it manually yourself. It’s just important not to forget that you need to download it from the manufacturer’s official website.
If new firmware is installed, especially custom one, the result can be completely unpredictable. When a glitch is noted after the firmware is installed, it needs to be changed.
If the problem appeared after updating the Camera application itself, you need to go into the settings and check if there is an option to remove updates, and then remove them. Usually they just erase the data and then update again.
Deleting cache
As you know, the caching function speeds up the processor's work with applications. However, over time, garbage (temporary files) accumulates in the cache, and the program becomes heavier to the point that the hardware and RAM are not enough.
As a result, there is no connection to the camera on Android. It will work, but slower.
In addition, there will be difficulties with saving images. In such a situation, you need to delete the cache:
- Enter settings.
- Select the “Applications” section.
- Open "Camera".
- Click on the “Clear cache” button.
The procedure should be performed periodically, and for convenience you can use a special application. After cleaning, it is recommended to reboot the gadget.
If the Android camera displays “An error occurred in the Gallery application,” you will also have to clear the cache or even delete the Gallery data (Media storage).
Correct settings for saving photos
The wrong choice of where to save images can play a cruel joke. On the one hand, it is better to store them on an external memory card so as not to overload the memory. On the other hand, the use of SD cards has its own characteristics.
If you selected the option to save to external media, and then removed it, you will need to make the appropriate adjustments in the settings. Often the system does not understand where to load what, and writes: “No access to the camera.”
When choosing a location, the size and number of photos should always be taken into account. The card itself has a limited number of duty cycles, and this also needs to be taken into account. If there are problems with the camera, it is recommended to test external media or install one that has been tested for functionality.
Resetting the settings
Any software error can be resolved using Hard reset. Before resetting the camera settings using this method, you will have to ask how to enter engineering mode. This can be done on the official website of the manufacturer.
You may have to look in the device manual or on forums. Next you need to proceed like this:
- Turn off the device.
- Log in to Recovery using the “three buttons”.
- In the mode menu, select wipe data/factory reset.
When performing a hard reset, the contents of the memory card are not deleted, but it does not hurt to back up user data and contacts from the internal memory. You can also reset the system to factory settings using the ADB program on your computer.
Camera eye cleanliness
Dirt, dust, sand, and grease deposits on the camera lenses should not affect its performance, but will greatly reduce the quality of photographs. If spots are visible on the screen at startup or the image is cloudy, you first need to wipe the lens, and then look for serious reasons.
Do not wipe the camera with water or a towel. For this purpose, special microfiber cloths and liquids for cleaning monitors are used.
The lens should always be kept clean. No matter how sealed the module is, the entry of debris and water into the interior cannot be completely excluded, and this will lead to its failure.
If the module is damaged
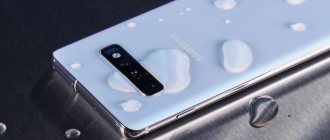
A gadget that has been hit, drowned or has undergone other hardships of hard service will not be able to be fully functional. Broken glass, scratched cases and worn-out keys can say a lot about the conditions of use and indicate possible problems with the hardware.
If the camera on Android does not start, you need to evaluate the external, then internal damage, and only after that make a decision about contacting service.
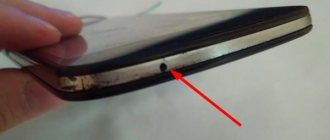
The phone camera itself is a rather fragile device, which, as a rule, cannot be repaired, but replaced entirely. Moreover, some actions can be performed independently. For example, check the connection of the cable to the board. The module must fit tightly in the connector. If there is a spare worker, you can immediately verify whether this is the reason.
If you have doubts about your abilities, it is better not to take risks and send the gadget in for repair.
Special programs
Of course, you shouldn’t rush into mechanical repairs right away, because the reason could still be software. First, you should try installing an alternative utility for the camera instead of the standard one in order to test the functionality of the old module on it. If everything works as it should in the new application, then the start of the malfunction is most likely the clogged cache memory of your device; to fix this, you just need to delete the old cache from the settings of your favorite application. To delete the cache you need
- go to “Settings”;
- select “Memory”;
- open “Application Data” and find the same utility for the camera among many others;
- Now all that remains is to click on “Erase data”;
- confirming your choice.
When the front camera does not work on Android
If the front camera on Android, or rather its icon, has disappeared, it will be difficult to take a selfie. However, this happens after an update. You should look for the icon in the application menu and drag it onto your desktop. Sometimes the program launch fails, the gadget freezes when the camera is turned on, a black screen or connection error is displayed on the screen.
By and large, the actions for resuscitation should be taken the same as in case of failure of the main one, because the anterior chamber is no different in this regard. It is recommended to check for a virus, clear the cache, and if that doesn’t help, do a factory reset or completely reflash the device.
Starting the phone in safe mode
If all else fails, try starting the phone in safe mode and testing the camera in it.
To enter safe mode you need:
- Turn off the device.
- Press and hold the power button until the logo appears.
- Press and hold the volume down button after releasing the power button.
By the way, sometimes you need to press not only the volume down button, but also the volume up button at the same time.
There is another way to enter safe mode:
- Press the power button
- In the menu that appears, click on the Power off icon and hold until the logo appears,
- As soon as the logo appears, you need to put your finger on the fingerprint scanner and hold it.
If the camera works normally in safe mode, then the reason for the camera not working in normal mode is other applications that conflict with the camera, you need to find and remove them.
If the camera does not work in safe mode, then do a factory reset or hard reset.
Let's draw conclusions
If these methods for restoring the camera do not help, most likely a serious breakdown has occurred. There are two options: repair or purchase of a new gadget. We advise you to buy Android from licensed sellers, preferably at specialized points of sale. It is advisable to choose a certified model from a trusted manufacturer. It is important to follow the recommended operating rules. Only under such conditions can you get rid of problems and not later wonder why the camera on your phone doesn’t turn on. If something breaks during the warranty period, you should not try to fix it yourself. There are service centers for this.