Nowadays, many users are actively using flash drives of various sizes and connecting them to a variety of devices. Sometimes the equipment requires that the flash drive connected to it have a certain file system, which will allow data to be read. The most common file systems are NTFS and FAT32. You can read about formatting into the first type of structure in our separate material at the following link, and we want to talk about FAT32 in detail within the framework of this material.
Format the flash drive to the FAT32 file system
The essence of such formatting is not only to change the FS, but also to completely clear the device of the information available there. Therefore, prepare in advance for this procedure, since important data will be quite problematic to recover afterwards. When everything is ready, proceed to action. Formatting can be done using different methods, each of which will be optimal in a certain situation. Let's break them all down so you can make the right choice after reading the instructions.
Method 1: HP USB Disk Storage Format Tool
One of the most famous third-party applications for formatting drives of this kind was created by Hewlett-Packard and is called HP USB Disk Storage Format Tool. The interface of this program is extremely simple, and even a novice user can understand the controls, so let's immediately see how it changes the file system to FAT32.
- After launching the program, select the desired connected flash drive from the pop-up menu at the top.
- Set the file system by selecting “FAT32”.
- Set an arbitrary volume label, otherwise formatting simply will not start.
- Check out the additional parameters and then start the operation by clicking on the “Format Disk” button.
- Confirm formatting and wait for it to complete. When everything is ready, a notification will appear on the screen.
Above you may have noticed a button link “Download HP USB Disk Storage Format Tool”. By clicking on it, you will not only be able to start downloading this software to your computer, but also get acquainted with a detailed description of its functionality. This will help you understand the purpose of all the additional options available that can be activated before completely wiping the drive.
If for some reason the presented application is not suitable for you, we recommend that you familiarize yourself with the list of similar software by clicking on the link below. There you will find reviews of solutions and get acquainted with their functionality.
Method 2: formatting in third-party programs
Programs designed to format drives offer more options than standard utilities in Windows. Some applications - HDD Low Level Format Tool or MiniTool Partition Wizard - allow you to perform low-level formatting of a flash drive to completely delete the recorded information.
Third-party programs for formatting flash drives often help format cards that were previously used in DVRs or other equipment. The main problem with such drives is overwrite protection. Therefore, only complete deep, so-called low-level formatting usually helps to restore functionality.
The simplest formatting program is SD Memory Card Formatter, developed by the SD Association. The utility will automatically find SD drives, which will allow you not to worry about erroneous deletion from hard drives. And in the program window you only need to select the type of formatting - quick or full.
SD Memory Card Formatter window
Another useful program is MiniTool Partition Wizard. The utility supports quick, full and low-level formatting. It also includes tools for identifying and eliminating errors.
Formatting an SD card in the MiniTool Partition Wizard program.
Selecting a file system type
To check errors, select check file system in the left pane.
Number of drive errors when analyzed by MiniTool Partition Wizard.
Troubleshoot formatting problems
Sometimes when you try to change the file system or perform regular formatting, a notification appears on the screen indicating that the operation cannot be completed. This is always connected with problems with the device itself, which should be solved independently. To get started, we suggest using each method above and trying different third-party formatting apps. If this does not help, restore the flash drive using proprietary software. Find all the necessary information on this topic below.
Read more: Flash drive recovery: Kingston / SanDisk / A-Data / Transcend / Verbatim / Silicon Power
Often errors occur due to the fact that the drive is in RAW format, which means it contains raw information. This problem needs to be resolved using standard or additional tools, and only then proceed directly to formatting attempts.
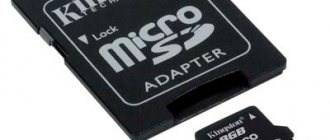
I bought a memory card with a capacity of 64 GB microSDXC format from the manufacturer Silicon-power. It was intended for the Lenovo Yoga Tablet 10 HD and sometimes for LG . I inserted the flash drive into the computer, formatted it in the default format in exFAT, downloaded the movie, inserted it into the TV (via a card reader), did not recognize it, inserted it into the tablet - a similar situation. The mood dropped, the excitement increased. I surfed the Internet on this topic and solved this problem.
Why is a 64 GB flash drive not recognized on TV and tablet?
It's all about the file system of the memory card. The listed devices happily read media with the FAT32 . NTFS or exFAT by default in Windows . Therefore, it is worth resorting to third-party programs. I made all further changes at my own peril and risk, in fact, just like you.
Step 1. High-quality format the flash drive using the SDFormatter program, downloaded from the official website.
There is no need to customize the program significantly: we leave everything by default. It is very important to double-check the Drive . Select exactly the partition that is assigned to the memory card. Otherwise, you can delete all the information from some partition of your hard drive. Next, we carry out high-quality formatting by pressing the Format .
Step 2. The flash drive is completely formatted in the exFAT32 and is ready in the second step. To do this you will need the guiformat program.
The settings are simple:
Drive – select our flash drive.
Allocation unit size – leave it at default (32768).
Volume label – name of the flash drive.
Quick Format – leave the checkbox (quick formatting).
Click Start . Formatting will go relatively quickly.
After the operations have been completed and information is recorded on the memory card, the flash drive is inserted into the tablet, and then into the TV. The results are positive everywhere, the films are running.
Disadvantages of using the FAT32 file system: the inability to write a file larger than 4 GB, the speed is slightly reduced compared to exFAT. IN
Recommendations: insert and remove a memory card from the tablet when it is turned off; do not format the card in the device.
A few words about the durability of the flash drive after such manipulations: it has been working for about a month. If I don’t write anything, it means it’s working.
Recommended viewing:
- How to organize a meeting on Zoom?
- How to use Zoom on a computer?
- Internet speed check: what you need to know
- How to change your voice in Discord?
- How to change your profile cover in Odnoklassniki?
- How to delete Instagram posts from your computer?
- Troubleshooting errors when running Office 2010 on XP
- How to update Internet Explorer 8 to version 11 for Windows 7?
- How to archive a post on VK?
- How to maximize the screen on a computer?
- How to rotate a video 90 degrees?
Method 3: formatting in proprietary utilities
SD card manufacturers have appropriate programs for formatting or restoring the drive. Typically, applications are distributed free of charge and without additional conditions. Visit the manufacturer's official website to search for the appropriate program.
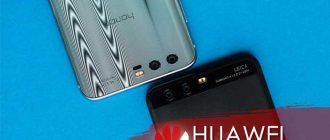
An example of such a program is Transcend JetDriveToolbox. In the utility, just select the “Format” item, specify the disk and confirm formatting.
JetDriveToolbox only works with Transcend flash drives. The program will not see other drives.
Formatting via the command line
Work in this way begins through the Start menu. Select “Run”. Perform the following manipulations with the dropped console:
- Enter the command diskpart, activate enter
- Enter the list disk command, activate enter and select a disk based on the size of our flash drive
- Enter select disk and disk number, activate enter
- Enter attributes disk clear readonly and enter. At this stage the drive will be unlocked
- Type clean and enter. This will completely clean the media.
- Enter create partition primary, activate enter. A new section will appear on the map
- Then select partition 1, press enter
- active, enter. The section is activated
- format fs=fat32 quick. A message indicating successful formatting will appear.
- Assign and enter. The flash drive will get a new name
- To check, create a new folder
This is one of the best methods for formatting a flash drive, allowing you to avoid using third-party utilities. If the formatting error persists and you are unable to work with files on the memory card, try using an additional program.
Formatting using the command line
Before you start, you need to restart your computer in safe mode.
To do this, call the command line by simultaneously pressing the + keys.
We write the command in it
msconfig
and then press .
Command line
The system configuration menu will open in front of us.
Select the “Boot” and check the box next to “Safe Mode”.
After this, you can safely restart your computer.
system configuration
After that, call the command line again and enter the command into it
format n
where “ n ” is the letter responsible for the name of the memory card.
If everything is done correctly, formatting will be successful.
If not, move on to the next points.
Hidden files
If the card is readable but cannot be formatted, it is worth checking it for the presence of hidden files like autorun.Autorun.inf - this is a hidden startup file that tells the system how to properly start the disk. It displays a colorful menu with an algorithm for further actions on the screen and replaces the icon on the desktop. Virus developers really liked these properties and they make full use of the file for their own purposes. Ordinary hidden text contains code for launching a program, which is how viruses get into the computer. At the same time, viruses that have infected removable media try in every possible way to protect themselves. Including not allowing you to format the micro SD card. It is very easy to remove such a virus. Let's try together if none of the above methods helped to get to the micro-drive:
- Open the command line (you already know how to do this)
- Finding our flash drive
- Change the parameters of the file attrib -a -s -h -r autorun.inf
- Destroying the virus on the map del autorun.inf
- Let's try to work productively.
Sometimes Anti Autorun, Autorun Guard, USB_Tool programs help identify and remove a virus. In order to protect the micro SD from re-infection, you can do one interesting thing. The bottom line is this: a file called Autorun.inf is created on the media. Newly arrived viruses will no longer settle on a drive where there is a folder with the same name as theirs. Why does this work? Because Windows OS does not allow you to create folders with the same name. That's all!
Formatting using the D-Soft Flash Doctor utility
Microsd cannot be formatted using system tools? This means you need to use additional utilities.
Using the search engine, download and install the D-Soft Flash Doctor program.
With its help, you can mount a disk image, check the status of the disk, and restore the functions of the media.
Open the program and select the desired disk (which is responsible for our media) and select the “Recover media” function:
Program interface
Depending on the size of the memory card, the recovery operation may take up to 15 minutes.
Patiently wait for completion and click
Recovery process
This completes the formatting process.