A modern mobile device is equipped with a touchscreen, accelerometer and other sensors that significantly increase the functionality, comfort and attractiveness of using the hardware and software tools of the Android operating system. These adjustment-sensitive elements require precise adjustment or reference to a custom coordinate system, otherwise the device will not work correctly. From time to time you have to configure pressure sensors, proximity sensors, brightness sensors, GPS, battery, etc. The user must know how to calibrate the sensor on Android.
Display calibration
Screen calibration refers to the adjustment of the pressure sensor to ensure correct command processing. The sensor must respond to finger touches clearly and quickly. However, performance may deteriorate over time and when this becomes noticeable, calibration is recommended. The procedure is quite simple and should be carried out:
- regularly - once every 2-3 months;
- mandatory - after sticking the protective film, if moisture gets inside and replacing the display.
Preliminary check of the sensor
If you notice that the sensor is not working correctly, you should not calibrate it right away . It might just be disabled. Below you will find some tips that will help you determine the activity of the option and configure it correctly.
Enabling the proximity sensor
- First, go to “Challenges” . There will be “three stripes” in the lower left corner, click on them.
- We are redirected to a standard page with all the items for detailed settings. Click on the section “Incoming calls” .
- Now look at the inscription “Proximity sensor” . Blue slider? This means that the function is activated and the sensor does not work for other reasons. If the slider is gray, simply move it to “On” .
Disabling the pocket lock feature
The proximity sensor is also used to prevent unwanted clicks in your pocket or bag. This feature is certainly very useful, but sometimes it does not work correctly.
If you notice that the sensor is not functioning properly, try disabling Pocket Lock . For this:
- Find the “Settings” icon on the main screen and launch the menu;
- We go down to the “System and device” section, where we click “Lock and protection”;
- Next, go to “Advanced settings” . And here we move the slider to the “Off” opposite the inscription “In Pocket” . Ready.
Disabling the accidental click prevention feature (MIUI 9)
This item will work on older versions of MIUI. In MIUI 10, the function was moved to the “In Pocket” mode.
Here the situation is almost similar. The screen goes blank when the sensor does not detect light . For example, the display will not function in the same pocket.
But sometimes, even when in the owner’s hand, the phone does not respond to touches, and Face ID does not work. In such situations, it is necessary to disable the function. To perform this operation, you need:
- Go to Settings and visit the “Lock screen and password” item;
- Go down to the “Advanced” tab;
- And uncheck the box next to the “Prevent accidental clicks” section.
Note! The sequence of items may vary slightly depending on the MIUI version and phone model.
When and why do you need screen calibration?
The user practically does not think about calibrating the screen until working with the device becomes uncomfortable. The need for calibration is quite easy to determine. So, if the sensor on Android is faulty, you need to press harder on the screen and keyboard buttons.
Also, certain areas of the screen may respond differently to touches. When the keyboard produces an adjacent letter instead of one, this is also a sign of the need for calibration. This problem slows down the work with the device and sometimes causes irritation.
Sometimes cleaning the protective glass will help fix everything. But if the problem appeared after the device fell, correction of the touchscreen on Android is required.
Even minor damage can cause the sensor to malfunction and the screen will not respond as quickly as before.
In this case, you need to remove the film from the display and check the sensitivity to pressure, the correctness and convenience of keyboard input.
How does the proximity sensor work?
Proximity sensors are divided into:
- to optical. They are based on an infrared emitter that determines the distance to an object (in our case, the ear), and when it is near or close to the phone, the screen turns off;
- ultrasonic. Infrared waves replace acoustic waves. When a reflection from an object is detected at a distance of 1–5 cm, the display goes dark. Unlike optical analogues, ultrasonic ones consume less energy.
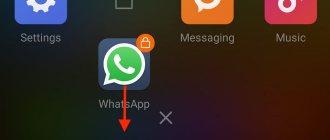
Proximity sensors are triggered during a conversation through the Phone application and calls in Viber, WhatsApp or Telegram instant messengers. This is done so as not to touch the turned on touch screen with your ear.
The trend towards frameless screens has led to the displacement of light and proximity sensors into the cutout of the front camera or earpiece. As a result, object registration has become worse.
Sensor calibration: detailed instructions
Android OS has enormous functionality, including a long list of flexible settings. Software sensor adjustment is no exception. If the sensor slows down, the user can correct the situation in two ways:
- Using special software.
- Manually using Android tools.
It is worth saying that all smartphones and tablets running this OS have an almost identical calibration algorithm. In addition, sensors have recently become more reliable and more unpretentious to operating conditions: while previously resistive sensors were widely used, today only capacitive ones are used, which are characterized by higher quality and reliability.
Manual setup
Before you begin the procedure yourself, it is worth finding out where the screen calibration is located, namely in which section of the settings you can find the function responsible for this process. As a rule, not every smartphone and tablet has an open function for screen calibration. Moreover, it is almost impossible to do this manually at home.
On some devices, screen calibration is available in the Screen or Display section menu. If your device has it, to configure the sensor, you need to do the following:
- Open "Settings".
- Enter the “Display”, “Screen” or “Phone Settings” section depending on the model.
- Place the gadget on a flat horizontal surface.
- Select “Calibration” and activate the process.
- Dots or crosses will appear in several areas of the display, which should be pressed exactly in the center and with the force that you want the sensor to “remember”.
Then you need to restart the gadget and make sure it is functional and correct input and response to screen taps. If there is no such option in the settings, then the display of the Android device is calibrated through the engineering menu.
This is a special mode in which a smartphone or tablet is able to accept special commands for fine-tuning. If the menu entry is not blocked by the manufacturer, it is almost identical for most devices, although the key combinations may differ slightly. The necessary information is in the instructions or on the manufacturer’s website. Please note that this option is suitable for advanced users.
Using special programs
When there is no calibration function in the device, and you don’t want to mess with the engineering menu, you can try to use special software. The choice of free applications in the official Google Play store is complicated only by their incredible number. However, the maximum they can do is show the display status and display the number of clicks.
At the same time, there are programs that can easily conduct a screen color test for an Android device and much more, but this requires root access. In any case, it is recommended to read reviews, pay attention to the rating, and inquire about the latest app updates before downloading. If a utility has not been supported by the developer for a long time, it is unlikely to live up to expectations.
Installing such software is no different, as is the procedure described in the attached step-by-step instructions. Some applications require root access, which can be obtained using a PC.
Contacting service
This is a last resort measure, which is often needed in case of mechanical damage to the display or if the gadget gets into water. If you can’t adjust the sensor yourself, professionals will help you. They will change it if necessary.
Other ways to solve the problem
If, using one of the applications discussed above, you notice that your sensor is unstable, then something needs to be done about it. First of all, we recommend contacting a service center. The professionals working there will carry out a complete diagnosis, during which the cause of the problem will be accurately identified. It is possible that the sensor of your smartphone has died for a long time. In this case, it will need to be replaced. For some new devices, it changes only along with the display itself - in this case, you will have to prepare for serious financial expenses.
You can also try to calibrate the sensor through the engineering menu. But only experienced users should think about this. And this method of solving the problem does not work in all smartphones. We have already talked about how to get to the engineering menu, so we won’t repeat it. Whether the corresponding menu contains an item regarding the operation of the sensor depends on the specific model of the gadget. The calibration process can be just as different. In this regard, we will not talk about it in detail.
Setting up the G-sensor
The accelerometer, or acceleration (overload) meter when moving the device, is responsible for the functionality of several important applications at once. So, without it, the pedometer, screen rotation function and even GPS in offline mode are impossible. And for game lovers, without such a function, the gadget becomes unnecessary, so setting up the g sensor on Android after replacing the display is mandatory.
However, problems do not always appear after breakdowns requiring repair.
Sometimes the functionality of the G-sensor leaves much to be desired due to software glitches, and in such cases the owner can try to figure out the problem on his own.
You shouldn’t look for such an option in the settings, but using third-party software or the same engineering menu would be useful. On some models, checking the screen for dead pixels, the operation of communication modules and the accelerometer is quite simple. If you dial *#0*# on your phone, a window will appear in which you can easily check using the corresponding button.
Using the GPS Status&Toolbox program
With this utility, checking sensor and GPS data, position and strength of satellite signal, speed and acceleration, altitude and battery status is no longer a problem. This is an almost universal program for checking the sensor on Android, although it is supported only from the fourth version of the OS.
GPS Status&Toolbox is a free application, which at the same time has flexible tools, including a magnetic compass, the ability to share location, align and set marks, as well as quickly reset and download A-GPS data for quick correction of readings.
To calibrate the accelerometer and gyroscope of a tablet or smartphone using this software, you need:
- Download GPS Status&Toolbox to your device.
- Open the program.
- Go to the “Tools” menu and select accelerometer calibration.
- The program will ask you to place the gadget on a flat, smooth surface and confirm the action with the “OK” button.
- Then the utility will ask you to specify one of three actions: “Reset”, “Calibrate”, “Average”. After selecting the second one, the G-sensor will be configured.
After completing the procedure, it is recommended to restart the device for the new settings to take effect.
Using the Engineering Menu
It is worth clarifying that the method is suitable for devices based on MTK processors. On all other models, the engineering menu is not supported. Under normal conditions, with a working device, accelerometer calibration is rarely required.
As a rule, games and other programs that work with the g-sensor have their own settings. If the gyro sensor refuses to work, you can correct the dysfunction in the engineering menu. This requires:
- Turn off the device and enter the mode, which does not work on all models of mobile devices. Find out if this is possible in the instructions or on the manufacturer’s website. Often, the desired mode is activated by simultaneously holding down the volume down and power keys. To enter the engineering menu you need to dial *#*#3646633#*#*; on some devices there may be other commands: *#15963#* or *#*#4636#*#*. For devices with MTK processors, you can use the MobileUncle Tools and MTK Engineering applications.
- By moving through the menu using the volume buttons, you should find the “Hardware Testing” section, and then select “Sensor” in it. The action is confirmed by the power button.
- Place the gadget on a horizontal surface, then go to the “Sensor Cal” section.
- There, you first need to select “Clear Calibration” to remove old data, and then select “Do Calibration (20%)” (usually required three times).
Calibration is completed, all that remains is to find and select “Reboot” and confirm the reboot with the power button.
Examples of working with applications
Power Bubble
The application has a clear interface. Main positive qualities:
- Intuitive to use.
- Distributed free of charge.
- Works well on phones and tablets.
- You can use full screen mode.
- Nice design.
- You can turn off advertising in the settings.
- If the angle is zero, a beep will sound.
- The application can be reinstalled on a removable SD card.
- Sleep mode can be easily disabled if needed.
- The corner can be fixed with a click or gesture.
- Thanks to a special display, the angle of inclination is accurately displayed in degrees.
- If necessary, you can lock the screen orientation.
To start using the application, just launch it and select the orientation type in the settings. Well, or set the “Auto” option and start level calibration.
To achieve this goal, the smartphone is placed horizontally. The calibration button is pressed for a short time. It is located on the left of the display. The touch panel displays Calibration followed by Wait. The utility will be ready for work at the moment when the display shows a zero degree value.
TouchScreenTune
This is another application for customizing the Android touchscreen. Due to it, efficiency and sensitivity will increase.
Main advantages:
- Free.
- You can create a shortcut to quickly launch the program.
- If there is a protective film on the touchscreen, the application will allow you to increase the sensitivity of the sensor.
- The application can be used to ignore even a touch from the palm of your hand. This feature is great if you use a stylus.
Clinometer
This is professional software suitable for fine-tuning sensitivity in an iPodTouch or IPhone. It can be used to solve simple problems or the most complex ones. For example, where you need to measure the tilt of a gadget very accurately.
Main advantages:
- You can download it absolutely free.
- You can run it in full screen mode. To do this, simply click on the upper and lower arrows. They are located in the middle of the smartphone display.
- It is possible to perform 2-way calibration of the touchpad. It can make adjustments on uneven surfaces. Each direction is calibrated separately. This gives the greatest accuracy.
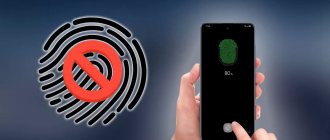
Why does the sensor trigger randomly and what to do?
This phenomenon is usually typical for a device that has been in water. If you dry the device well, the defect may disappear.
If spontaneous operation of the touchscreen is observed when the device heats up, the sensor cable begins to move away faster, which means that it needs to be replaced.
If significant heating is not observed, you can first perform a factory reset or update the firmware. In any case, diagnosis will not hurt, so you should contact a specialist.
Accelerometer in a fitness bracelet and smart watch
The accelerometer in a fitness bracelet and smart watch helps count the number of steps taken. Actually, it is the accelerometer in the bracelet and smart watch that tracks your movements even while you sleep. And software processing of its readings helps to recognize whether you are walking or running, at what speed, and how many steps in a row you took.
When you raise your hand to your face and the display automatically turns on, this is also thanks to gesture recognition using the same small but useful module.
How to check and adjust sensitivity settings
Often users need to reduce or increase the sensitivity of the sensor. Actually, this is the main point of calibration, and after the procedure the display begins to work correctly.
When the owner wants to press the screen with a comfortable force, he can change the touchscreen sensitivity parameters in the gadget settings. To do this, do the following:
- Enter settings.
- Open the Settings section.
- Then go to "Accessibility" and select "Screen sensitivity" and check the box next to one of the options.
Unfortunately, this method is not available for all OS versions. For example, it will not be possible to increase the sensitivity of the touch screen on Android 2.2 without third-party programs.
Manual calibration of the android touchscreen
Not every smartphone can implement it, since different manufacturers have their own. But who knows, maybe you're lucky.
- Go to Settings and then navigate to Phone Settings.
- Tap Calibrate Phone.
- A cross will appear with a target in the middle of the display. It will appear on a white background. Click on it 3 times.
- At this point, the calibration process can be considered complete. Now check if the touchscreen is calibrated.
Reboot your phone.
Setting up/calibrating the accelerometer on a smartphone
Android Calibration
Calibrating the accelerometer on Android is necessary, for example, if the smartphone begins to incorrectly count steps or incorrectly determine the position of the body. There are no standard programs for this, but to calibrate the accelerometer, there are special applications, but the GPS Status & Toolbox () application is considered the best option. In its Toolbox section there is a special tool called “Accelerometer Calibration”. Place your phone on a flat surface and follow the instructions.
Watch the video instructions on how to quickly calibrate your phone.
G Sensor Calibration for Gaming
Watch the video: G Sensor calibration for Android games.
iPhone Calibration
There are no tools for calibrating the iPhone, but in the case of a purely software failure, a simple reboot usually saves the day. If the problem persists, write in the comments, we will try to help.