Types of updates for Android
The main purpose of updates is to eliminate various bugs and shortcomings found in older versions of software, as well as to create programs that are more efficient in terms of performance and are protected from viruses. However, not all updates are useful. In some cases, they cause various malfunctions in the OS and can lead to the loss of user data.
Therefore, it is not surprising that many smartphone owners are interested in how to disable auto-updates on their devices.
According to their intended purpose, all updates for mobile devices are divided into two types:
- For applications downloaded from Play Market and Samsung Apps. They are produced quite often and weigh relatively little (on average 10-15 MB). However, if a large number of programs are installed on the phone, they may arrive on the gadget every day, which will negatively affect traffic.
- For Android. They come out no more than 3-4 times a year and take up more than 50 MB. They allow you to eliminate errors from the previous version of the operating system, as well as improve its performance and functionality.
Do I need to store updates on the device system?
Quite often, Android users experience low memory. And then the question arises: what should you get rid of first, and what should you never touch?
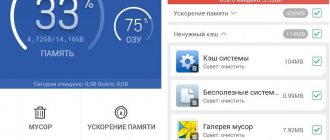
The Cache folder is not important, so deleting it will not lead to malfunctions of the device. It stores temporary system update files. The folder can be deleted if the user does not intend to update the system.
If the update has already been installed, temporary files will disappear from the gadget cache and will no longer take up space. However, it is worth remembering that each new software version weighs more than the previous one, and so on increasingly.
Why update apps?
Mobile application developer companies are constantly working to improve their product in order to make it more functional, interesting, fast and easy to use. That is why updates for applications already installed on a mobile device periodically appear in the Play Market.
The main reason why you need to update utilities is the imperfection of the software. Creators are rushing to share their developments before others get ahead of them. However, software often has many bugs and errors that slow it down. Over time, releasing updates, these shortcomings are corrected, offering an improved version of the utility. In addition, many applications can be attacked by viruses that are launched with the aim of stealing passwords, personal data, etc. In turn, the developer, in addition to improvements, strives to increase the level of security.
Setting up Android update
By default, programs begin updating when Wi-Fi is turned on. On mobile traffic, updates are not downloaded, because it has a limit - a specific number of gigabytes per month. Most Android users are happy with this approach: they turn on Wi-Fi, the application is updated, and you don’t have to worry about the relevance of the programs. But if you want to completely control how the latest update will be loaded, you need to make additional system settings.
The first thing you can do is set a limit on background processes. It will help fix the situation when the system freezes due to the simultaneous updating of several applications.
- Open settings, section "For developers".
- Scroll down to the Background Process Limit option. Click on it to change.
- Set the value that suits you - for example, no more than 2 processes at a time.
If you want to disable auto-updates altogether, the easiest way to do this is to use the Play Market settings:
- Launch Play Market. Call up the control menu and go to settings.
- Click on "Auto update" and select "Never".
Some applications are updated without the help of the Play Market, so following the above steps will not be enough to completely disable auto-update. To fix this flaw:
- Open your phone settings, go to the “About device” section.
- Select "Software Update".
- Uncheck the "Auto-update" option.
After turning off auto-update, you will have to update programs manually:
- Open Play Market, call the control menu.
- Go to "My Apps & Games".
- Open the "Installed" tab.
- Click “Update” next to the application for which you want to download and install the update.
Manually updating programs
By downloading the latest news and versions of your favorite programs manually, you can reduce traffic consumption and simply speed up the operation of your smartphone, because the background processes will not constantly be downloading data. Manual work with updates is suitable for those users whose phones have too many applications installed, and the phone’s resources do not allow them to perform many background operations.
Also, constantly enabled updates quickly reduce the battery charge and make the gadget work slowly. After disabling the installation of new data, you should periodically carry out updates yourself. You can do this as follows:
- Go to Google Play;
- Click on the menu icon in the upper left corner of the application;
- In the list that opens, select “My applications and games”;
- Go to the “Installed” tab;
Fig.8 - viewing and updating installed applications manually
An “Update” button will appear next to the software for which an update is available. You can start the process of downloading a new version of the utility for one application or for all at once. Just click "Update All" at the top right of your open store tab.
After clicking on the “Update all” button, the process of downloading and installing the latest program data from the store server will begin. This may take a long time, depending on how much software is on your gadget.
For each program, the process of installing new components through the Google Play Market will begin:
Fig.9 – installation of new components
The advantage of this method of working with applications is that you choose the installation time of the components and they will not start downloading at the wrong time, when there is little traffic on the phone or a low network connection speed.
Another update method is to monitor system messages in the running application window. When a developer releases important security or functionality updates, and the user ignores them, immediately after launching the software, a window will appear notifying them of the need to install a new version of the game/utility. In this case, just agree to the installation, check your Internet connection and download the developer data package so that the program works stably.
Even if you have turned off automatic updates, the Play Market will periodically notify you about the availability of new versions of games and utilities. One or more messages will appear in the notification center with information about new features of the program and a button for installation.
Fig. 10 - notification center in Android
Please note that if the Google Play window does not have a button for updating specific programs or all installed data, you should install new components for the store itself:
- Go to the device settings;
- Open the “Applications” - “All” - “Play Store” window;
- Start the update process and also delete the cache to prevent errors.
Fig. 11 – Play Market update
Uninstalling updates for Android applications
Fortunately, the Android operating system provides a mechanism using which you can remove an update that was installed on your phone using the Google Play service. To do this, you need to open the Android settings and go to the “ Application Manager ” section or simply “ Applications ” if you have a standard shell.
After this, you will see a list of all installed applications on your Android smartphone. Here you need to find the application whose update you want to remove.
Once you open the desired application, you will see a screen with information. Here you need to click on the “Uninstall updates” button, which will be located immediately below the name of your application.
After this, a warning will appear indicating that the system is about to remove updates and restore the original application. Click on the “Yes” button to continue.
After this update, the applications will be removed and the application information screen will appear in front of you again. Here you can see which version you have rolled back to.
Install the old version of the application
This is a fairly long process, but it is suitable for cases where a specific version is needed, since the method above installs the extreme one. If a person needs a specific one, then he will have to completely remove the old program, and then install a new one by downloading an ARK file from the Internet.
It is worth checking Internet resources before downloading this or that program. Numerous viruses can be freely located on an unknown resource that will ruin the operation of the phone. To prevent this, you need to choose reliable sources.
The first step in order to install the old version via the Internet is to prepare the device. First you need to check that you can download unknown sources. To do this, in the settings we find the “Personal Data” item, and from there we go to the “Security” section. In this section, check the box next to “Unknown sources”. This step will allow you to download any file from the Internet.
Then you need to “roll back” the desired program, that is, return the very first version. This was discussed above. You can also watch this video
After all the steps, you can begin directly installing and searching for the ARC file.
We find the required application on any reliable resource. Using the example of the website "4PDA" you can show the process.
Note! The algorithm itself may differ from the resource.
Next, go to the page with the received versions and select the desired option.
Now on the website we find the “Past Versions” block and select the one we need. Confirm the download and download the program.
Next you need to open this program. Click on the installed ARK file in “Downloads” and confirm the download process. After installation, you should reboot your device and check for the version.
Standard means
While third-party applications manually installed from the Google Play Store or using an APK file cannot be rolled back to a previous version without uninstalling the existing one, some standard solutions provide this option. This applies exclusively to proprietary software pre-installed on the device at the time of purchase and first launch of the device.
- Go to the standard “Settings” application, find the “Device” section and tap on the “Applications” line.
- After waiting for the list to load, click on the button with three dots in the upper right corner and select “Show system processes”. On older versions of Android, just go to the “All” page.
- Once in the section with a complete list of installed software, select one of the standard applications whose updates you want to remove. As an example, we'll look at Google Play Services.
- Once on the main page of the application, use the menu button in the uppermost corner of the screen and click on the “Uninstall updates” line.
This action will need to be confirmed, after which the procedure for restoring the original version of the program will begin. As a result, all updates downloaded since the first launch of the smartphone will be deleted.
- In some cases, when uninstalling, an error may occur due to the use of the application. For example, in our case it was necessary to deactivate one of the services in the “Device Administrators” section.
This method may be useful if you use a smartphone with a lot of pre-installed software that is automatically updated, for example, to new, more demanding versions. In addition, this approach allows you to restore Google services after an unsuccessful update.
Complete removal and re-download of programs
If you still need to remove updates from a program that is not a system program, you will have to resort to a little trick. The fact is that only the latest version of the application will always be available on Google Play, and even if you delete it and try to download it again, the program with the latest updates will still be downloaded. But there is a way out here too!
You can download any version of the program from third-party sites and install it not from Google Play, but through an apk file, allowing installation from “Unknown sources”. But at the same time, there are a large number of sites where you can download verified files, for example, the same trashbox. As a result, the procedure will be as follows:
Let's find out the application version:
- You need to find out what version of the program is installed on your smartphone in order to download one version lower from the trashbox (after all, it will not have the same updates);
- To do this, go to the “Applications” tab and find what you need in the list;
- Click on it and in the “Version” tab see what is written.
Removal and download procedure:
- Now you need to remove the program and download one version lower. First remove the previous application completely from your smartphone;
- On your phone, you allow the installation of apk files from third-party sources. If you don't know how to do this, read our separate article;
- Go to the trashbox website or a similar one and enter the name of the application in the search;
- Choose the version you need and download it to your smartphone;
- Install the program and check its functionality.
Attention ! Do not update the application via Google Play, otherwise you will also have the latest version downloaded with all the updates. In this case, we recommend turning off automatic updates. How to do this will be written below.
Reset
It’s worth noting right away that this method is only relevant if you were unable to “roll back” updates from system applications using the previous options. Yes, this method is only for system applications! If you have nothing to lose from the information on your device, you can do a complete reset on Android, as a result of which all data will be deleted, and the system will reinstall the standard versions of applications that came from the factory.
Information about a full reset of the settings in the Android operating system is described in a separate article, so you can read it here. Please note that all data will be lost, so if you have important information, it is better to backup the data.
Uninstalling any system application update
- In the “Settings” of your smartphone, you need to go to the “Applications and notifications” section. Please note that the name itself may vary slightly depending on the generation of your Android and the interface shell.
- Find in the list and select the application in which you want to remove updates. We use Google Play as an example.
- Click the "Stop" button to stop the application.
- Now in the upper right part of the screen, click the “Ellipses” button, where you will see the “Uninstall updates” function.
- After clicking, you must confirm your intention by tapping on the “OK” button.
This way you have removed the app updates and you will now have the original version.
Uninstalling any third party app update
In this case, the program is uninstalled and reinstalled from unknown sources.
To remove, follow these steps:
- Launch Settings, then go to Applications, then find and select a specific application. In our example, this is WebMoney Keeper.
- Click the "Delete" button.
- Next you need to download any version of this program. Considering the danger of possible malware, we highly recommend using trusted portals for downloading and installation. For example, Trashbox.ru or the foreign and very popular resource APK Mirror.
When to uninstall a software update
Software is developed by ordinary people - this means that the human factor is present here too. Errors pop up everywhere, even among attentive and responsible developers. The next application update may contain bugs and shortcomings:
- The program starts to glitch.
- New or old features do not work correctly.
- The application consumes a lot of RAM resources and overloads the processor, leading to excessive heating of the device.
- The program code causes the smartphone to crash or reboot.
In such situations, it is necessary to give the developers time to correct all errors. During this time, to make the application convenient to use, you should return the previous version. To do this, you will have to learn how to remove an update on Android.
Rolling back any firmware or Android update: video
Unfortunately, in some situations the system does not update correctly. Despite this risk, it is possible to restore the software in the shortest possible time. Be prepared for the fact that failures may be caused by accidentally pulling out the cable or a power outage, or completely draining the device’s battery. In this case, you will need to think about how to return the factory Android firmware. How can this situation be corrected? What's the best thing to do?
- Your personal computer must have drivers for your mobile phone or tablet.
- The program intended for updating must be installed and running.
- Connect the device with a cable to the PC.
- You should find an option in the program to restore the previous version of the Android operating system. To do this, you need to go to “Advanced features” or “Recovery after an update error”.
- The program can download the version of the operating system you are interested in and begin recovery, after which you can use the official firmware.
Agree, the answer to the question of how to return the old firmware to Android
.
What should you do if you tried to perform a custom update and performed the actions in Recovery mode? In this situation, you must use the same mode. You must go to a special menu or use programs from Google Play. To activate Recovery mode, you need to use the “Power” + “Volume Up” buttons, but for this the device must be turned off. So, what will be the next steps in order to understand how to return the native firmware to Android?
?
- You must enter Recovery mode.
- Select
wipe data/factory reset to reset settings. - You must select
wipe cache patrition to erase cache. - Try installing your native operating system via
install zip from sdcard , selecting the appropriate firmware.
In addition, this method allows you to understand how to return the previous Android firmware
.
How to return the official Android firmware by resetting the OS?
You can go through the following scheme: Menu - Settings - Recovery and reset - Reset settings.
After this, the device will inform you that all information will definitely be deleted, so you need to click on “Erase everything” and confirm the planned action
Please note that in some situations the names of the items may be different, but the scheme of actions is similar. Then all data will be deleted and the mobile device will be rebooted
It is important to note that only complete completion of the circuit will allow you to return the official firmware by performing a reset to factory settings. There is another way to correct the situation
Moreover, it is the simplest and does not even require searching for items to reset settings. So, you must go to the dialer and dial a digital code, and there are several options for this: *2767*3855#, *#*#7780#*#*, *#*#7378423#*#*. After this, all data will be deleted
There is another way to correct the situation. Moreover, it is the simplest and does not even require searching for items to reset settings. So, you must go to the dialer and dial a digital code, and there are several options for this: *2767*3855#, *#*#7780#*#*, *#*#7378423#*#*
. After this, all data will be deleted.
The most important thing is to understand that all personal data will be deleted without the possibility of recovery. In this regard, it is recommended to take care before updating the firmware to synchronize the data, transfer it to other devices and protect yourself from the loss of personal information
Conclusion
Restoring the device is possible even in case of serious problems caused by incorrect firmware
The most important thing is to try to go through the described schemes
There are probably several people who would delve into this issue after they tried to independently return the version of the operating system to the previously installed one. But, if faced with any difficulties, we would decide to read online to figure out what these difficulties might be associated with. And then it turns out that there are many nuances that need to be foreseen in advance.
In addition, from the huge number of foreign names and abbreviations, instead of understanding the process, the information in the head turns into mush. And every sentence you read adds more and more misunderstanding to the overall picture.
Well, let's figure it out together!
Ban updates
In some cases, smartphone users may need to disable updates, for example, to save mobile data. It's quite easy to do this:
- go to the Play Market and open the menu on the left side of the screen;
- select the “Settings” line and click on “Auto-update applications”;
- in the proposed list about or “Only via Wi-Fi”.
You can also check or, conversely, deactivate the “Notifications” function. When it is turned on, your smartphone regularly receives notifications about the release of a new version of an application.
Cancel updates
If for some reason a patch download starts without notification, the update can be aborted. The easiest and fastest way to remove an application update on Android is as follows:
- open the notifications tab and find a specific application;
- then a long press on it opens a menu in which select the line “About the application”;
- in the window that appears, click “Erase data”, after which the download will be interrupted.
To continue to avoid these types of unauthorized downloads, you must turn off automatic software updates in the Google Play menu.
Disabling auto-updates for apps and games
By default, Google Play offers to automatically update every app you install. But, as mentioned above, this causes certain problems when using a budget device with slow memory. On such devices, auto-update should be disabled. But how to do that? You probably remember that you were asked about automatic updates only when you first used Google Play. Later, this item magically disappeared from the pages of games and programs. All this is for the sake of speeding up the download and installation process, as well as to make each page easier and, accordingly, speed up its loading. You can now find this item in another way:
1. Open Play Market.
2. Pull out the curtain with the main menu from the left edge, then click on the “ Settings”
».
3. Tap on “ Auto-update apps”
».
4. Here you can disable this feature by checking the box next to “ Never”
».
5. If you do not want to receive notifications about updates, then a corresponding subsection has been created for you in “ Settings”
"
Available updates
checkbox .
This is how easy it is to disable updates on Android. But do not forget that from time to time you need to install new versions of programs and games, as developers regularly improve their stability and functionality.
For all applications
This function implies completely disabling such a parameter in the system as automatic installation of new versions of applications. That is, this method removes all automatic updates. The user will have to independently regulate the process.
System applications do not fit into this category.
The algorithm of actions to disable this function is as follows:
- First you need to go to the Play Market itself and also check your authorization. Without authorization, the user will not be able to proceed to the next steps;
- Click on the three stripes that are located in the search block on the left side. These strips will help bring up the main menu;
- Next, the full potential of a person opens up. Click on the “Settings” item;
- After this, you need to find the “Auto-update applications” section and select “Never” in it.
After such manipulations, no program will be able to update without the proper permission of the phone owner. This function is convenient when there is not enough space in the phone’s memory or a person does not need newfangled versions of standard programs.
Disable updates for a specific application
In order not to constantly enable and disable the option that we described above, you can deactivate updates for specific applications. Let's say you have installed an old version of WhatsApp and don't want it to be updated, although a new version is available for it on Google Play. You can disable this specifically for WhatsApp:
- Go to Google Play and find the required program in the list. In our case it is WhatsApp;
- Click on it to go to the product description page. Next, click on the three dots in the upper right corner and uncheck the “Auto-update” item;
- This completes the setup process. Even if other apps update automatically, WhatsApp won't, no matter what version you have installed on your smartphone.
You can also get to the list in another way:
- In Google Play, in the left corner, click on the three dots to make a menu appear and select “My applications and games” in it;
- Next, go to the “Installed” tab and find the required application in the list;
- Click on it and you will be taken to a page with a description of the application. Here all you have to do is remove automatic updates and that’s it.
How to disable auto-update selectively
How to disable auto-update of one or more programs? Very often, users do not want to completely block the entire system, but do this with only one piece of software.
For this procedure you need:
- go to Google Play;
- In the menu sections, select “My applications and games”. The easiest way to find this item is in the menu of a Samsung smartphone or tablet;
- open the tab of the software you need and find the task window at the top;
- Uncheck the “Auto” box.
After this, only the files that you have selected will be updated, and not all at once. This is very convenient if you have necessary files that you need to automate on a daily basis, and not just a few times a month.
We will talk about how to roll back an update, why you cannot install application updates on Android or why applications do not work in one of the following articles.
Please note that initially setting the correct parameters and indicators when working with Google Play Market services will help you avoid a lot of difficulties and problems that many users experience in the future. It is for this reason that before you start using your new smartphone or tablet, you should definitely read the additional instructions. This will save you a lot of time, effort and money.
Many smartphone owners ask the question: “How to update the Android operating system?”
. But there is another category of users. They are trying to roll back the update. Thoughts about this arise after you realize that the device, after receiving a new firmware version, is extremely unstable. So I want to get back the previous version of the operating system. Below you can read about how to perform a system rollback.
Modern electronic gadgets are very software-based. In many cases, the device is tailored for a specific version of the operating system. For example, if a laptop was sold with Windows 8 pre-installed, then with a high degree of probability you won’t be able to install “7” on it unless you replace the hard drive. A similar situation is observed in the case of Android-based smartphones. Only in some cases can you cope with installing a very old version of the operating system if the device came with Android 5.0 or 6.0.
Not all users know about this, but even mobile components work with the help of drivers - in this regard, they are no different from PC components. To save money, processor manufacturers write drivers only for specific versions of the operating system. So it turns out that some Snapdragon 820 is simply not recognized by the old Android 4.2.
However, a rollback involves installing the version of the OS that was previously installed on the device. And manufacturers, it would seem, should not interfere with this. But it's not that simple. Rolling back the system would be easy only if a copy of it was stored in the device’s memory. But Android devices do not have such a function - the update completely erases all data about the old version of the operating system. This is due to the fact that there is not very much built-in memory in smartphones and tablets, and no one wants to occupy it with unnecessary load. That is why it is very difficult to rollback on Android; it is better not for an untrained user to do this.
What version will be after the updates are removed?
The version of the software product with which you purchased your phone will be restored.
Let's look at the example of Google Play Market itself. If the manufacturer installed version 10.0 of this application at the factory, and while using the device, updates were made to 11.0, then to 12.0, and then to 13.0, then after the rollback, 10.0 will be restored, and not the penultimate 12.0. And if after this the user updates the program again, version 12.0 or later will be installed.
Why are they returning the old version of the application?
Developers update apps to add new features and fix bugs. But sometimes unpleasant surprises happen: after an update, you don’t like the application, won’t launch, or work incorrectly.
How to roll back an Android update to the previous version
Users who want to know how to roll back an Android update will face a very serious problem. And this problem is that in order to return the previous version of Android, you need to flash your phone or tablet by downloading it again.
Incorrect installation of the firmware can lead to fatal consequences for a mobile device: starting from banal glitches and minor problems in its operation, and ending with complete failure of the device. And in the latter case, you most likely won’t be able to solve the problem yourself; you will have to take your smartphone to a service center for repair, and the services of such services cost quite a bit of money.
Therefore, if you are an inexperienced user, then you should consider not rolling back the latest Android updates. If the new version of the operating system does not cause any glitches or lags, and the only reason for the rollback is non-acceptance of the design or functional features, then it is better not to change anything and try to get used to the new version of the OS. You'll see, after just a few days of active use you will get used to it!
If after the above information the desire to return the previous version of Android has not disappeared, then let's get down to business. And first of all, we will consider several very important points of the preparatory stage.
Before flashing the firmware, it is important to make a backup copy of your current operating system. This is done so that if the new firmware turns out to be “crooked,” the device can be restored by returning it to its original state. In addition, you need to make a copy of your personal data. Instructions can be found in the video below.
Before performing the firmware operation, you should charge your device, since if during the process the battery charge drops and it turns off, you will not be able to turn it on without contacting a repair service
Android firmware via PC
And finally, the most important step is installing the firmware. In order to properly flash a smartphone you need: firmware and a program for flashing, or use Recovery.
One of the articles on the site has already discussed the method of flashing Android phone firmware via a computer. The article is very extensive and there is no point in duplicating it completely. You can get acquainted with it at the link:
A summary of the instructions for rolling back an Android update using flashing via a PC:
- You need to find the correct firmware version for your phone. The best way to do this is on the popular 4PDA forum. There are firmwares for all popular brands: Samsung, Honor, Xiaomi, Huawei, Lenovo, Nokia and others. To quickly find the firmware you need, enter your phone model in the field:
- On the firmware page you need to download the firmware itself, as well as the necessary programs to install it;
- In addition to the attached files, the page contains instructions that must be read and followed, otherwise you may damage your mobile device.
Flashing your phone via Recovery
You can also flash the firmware without using a computer, using only your phone and using the Recovery function.
Via TWRP
TWRP is a custom recovery installed by default on some smartphones. It is with its help that Android will be rolled back to the previous version. Since this Recovery is found only in a small number of devices, you need to download it yourself. The easiest way without root rights is to use ADB and Fastboot .
So, the first step to installing TWRP is to start a computer or laptop running the Windows operating system. Now we load the Minimal ADB and Fastboot package onto it, containing the ADB and Fastboot utilities necessary for operation. Run the downloaded file and follow the installer’s simple instructions.
After installation, go to the selected directory and check for the presence of two applications: ADB and Fastboot.
We return to the phone and turn on the “USB Debugging” . How to do this is described in detail in the previous method. After that, connect the device to the computer using a USB cable.
On the PC, launch the command line as administrator (Start menu - “cmd.exe”). Enter the command cd Path_to_folder_with_ADB into it. For example, the folder with programs is located at the root of drive C, then enter the request cd C:Minimal ADB and Fastboot and press “Enter”. Next, we check the visibility of the smartphone utility by entering the adb devices .
At the next stage, download the TWRP Recovery image file specifically for your phone to your computer. To do this, go to the official website of the developer, look for the desired device model and complete the download.
Transfer the downloaded file to the folder where the ADB and Fastboot applications are located. For clarity, we recommend changing its name to “twrp.img” .
Open the command line and enter the request adb reboot bootloader . After pressing the “Enter” key, the phone should go into Fastboot mode, which will be indicated by the corresponding picture on the screen.
Now you can proceed directly to installing custom recovery. At the command line, enter the command fastboot flash recovery twrp.img , where twrp.img is the image file with TWRP, which was renamed earlier. Upon successful completion of the procedure, a corresponding message will appear on the PC screen.
Next, reboot the phone in normal mode by entering the command fastboot reboot . After this, you can proceed to flashing the device. First of all, we download the archive with the firmware to the computer, which does not need to be unpacked. Then we transfer the necessary files to the memory card and insert it into the phone. It is important to choose a folder that contains a simple and understandable name in English.
Now go to the “Recovery” menu by simultaneously pressing one of the following pairs of buttons :
- Volume down + Power;
- Volume up + Power;
- Home button + one of the volume keys + power button;
Next, in the “Recovery” menu, perform the following actions :
- Click on the “Wipe” item.
- Move the “Swipe to Factory Reset” slider to the right. This action starts cleaning the phone's file system.
- After completing the procedure, click on the “Back” button.
- Click on the “Install” button.
- Select the storage where the files needed for flashing are located and click “OK”.
- We find the desired archive with the firmware, and then check the “Zip file signature verification” box.
- We start the firmware installation process by moving the “Swipe to Confirm Flash” slider to the right.
If the installation is successfully completed, a corresponding message will appear on the screen. All that remains is to reboot the device by clicking the “Reboot System” .
Via update menu (OTA)
The next method involves using the update menu (OTO). The advantage of this method is that you do not need any cables or wires. Since the update is installed over the air, rolling back to the previous version is done in the same way. First, let's look at the simplest instructions , and then move on to more advanced ones:
- We download the archive with the required firmware to the smartphone.
- Let's go to the phone settings. The Xiaomi smartphone is used as an example, so the procedure may differ on other devices.
- Go to the “About phone” section.
- Go to the “System Update” tab.
- Click on the “three dots” located in the upper right corner of the screen.
- Select the “Select firmware file” option and specify the path to the pre-downloaded archive.
- The system will ask for permission to reboot the device. We provide it and wait for the procedure to complete.
In most cases, the system does not allow you to roll back to a previous version, so we recommend using an alternative method. It requires a computer, as well as the ADB Run utility installed. First, activate the USB debugging mode on the phone and connect the device to the computer. Then turn off the smartphone and go to the “Recovery” menu. From here we go to the section “apply update from ADB” . The firmware file must be moved to the folder with the ADB utility.
Now we launch the ADB Run utility on the PC and enter the command “7”. Press the “Enter” button and enter the number “1” in the input line.
Enter the command “adb sideload archive_name_with_firmware.zip” and press “Enter”. Immediately after this action, the flashing process should begin, upon successful completion of which a corresponding message will appear on the screen.
Via Titanium Backup
Before moving on to the instructions, we note that this method is only suitable for smartphones with root rights. If there are none, then use one of the previous methods. So, first of all, install the Titanium Backup application on your phone. For security reasons, we recommend installing through Google Play and not using third-party sites for this.
We launch the program and go to the “Recovery” tab, and then select “OS recovery with data”.
The rollback will be performed to the firmware originally installed on a specific device.
Features of rolling back the Android version
It is possible to roll back Android to an earlier version if you know that it was on your smartphone. But if you just want to downgrade your operating system, you may not be able to do that because your phone's components may not be supported by the older software.
Another feature that needs to be taken into account: if you roll back the update, your data stored on your smartphone will be lost. Rolling back the Android version is equivalent to resetting to factory settings.
Also remember that rolling back an update is more difficult than updating Android. The update occurs automatically and smoothly. To roll back you need to perform more steps.
Installing application packages
To install an app package, select "Download APK package" for the desired app in APK Mirror and the file will be saved locally on your device. Next, you need to make sure that you have the APK MirrorInstaller app installed on your phone. You can get it from the PlayStore or install it from the APKMirror site - that's fine, but the PlayStore is easier.
Once APK MirrorInstaller is installed, you can try opening this APK Bundle file. You can do this through a notification you may have once the download is complete, or you can navigate to the download folder in your file browser. If you have been using Chrome, you can also access it through the three-dot menu -> Downloads.
Opening an application package file from APK Mirror.
When prompted, open the file using the APK MirrorInstaller app. APKMirrorInstaller will give you a bunch of details regarding the app you're installing, like what architecture and DPI you need, but you can ignore most of that, it's just there if you know you need to change something in the installation to suit your needs. device. The default settings will most likely be fine.
Installing an application package using APK MirrorInstaller.
Click "install application". In the latest versions of Android, you will be prompted to allow the APKMirrorInstaller app as a source for installing apps in the form of a simple toggle (shown above). While you shouldn't enable this setting for any app, it's okay to do so for APKMirror. But it is needed to protect against applications that can install malware.
On older versions of Android (up to Android 8.0 Oreo - consider upgrading for your own safety if your phone is that old), you'll have to manually enable a separate switch to install apps from unknown sources. This is usually found under Settings -> Security, or you can search the Settings app for "Install apps" or "Install unknown apps"
In Android 8.0 Oreo and later, this is treated as a per-app permission. Your phone may indirectly ask if you want to change this for a given app, prompting you to enter settings and toggle the Allow from this source setting, at which point you can return to the setup screen and continue. In earlier versions of Android, such as Nougat, you will have to manually toggle the global setting that allows installation from "Unknown sources" in Settings (Settings -> Security -> check or slide the switch for Unknown sources.).
Once permission is granted, you can head back to the APKMirror app which will continue the installation process, or you can start over by trying to launch/install the app you downloaded from your browser or file manager
APKMirror will prepare the installation, after which your phone will ask again if you want to install the application. Click "Install" to continue and you're done. When the APKMirror installer finishes installing the app, you will be prompted to open it, but you must use the version you installed.
If you encounter any problems during this process, the APKMirror installer will let you know, and a large warning will pop up if the app installation fails for any reason.
How to update the application manually
Everything is quite simple. If a person, after turning off auto-update, does not know how to update a particular program, then he will learn it very quickly. It is enough to do the following:
- We go to the Play Market service and look for the application that we want to update;
- Click on it;
- Let's go to its main page. If the utility can be updated, a green “Update” button will appear next to the “Uninstall” button. If the utility cannot be updated, there will be an “Open” button;
- Click on the “Update” button and accept the terms;
- After this, the update itself will begin. We are waiting for the end;
- Then, in the main menu of the program, you can open “My Applications”, and through it, in the “Updates” tab, find the one that was installed previously.
Delete current version
Update 1: 2021/03/05 1:11 pm PT by Rain Hager Updated for 2021
This guide has been updated for Android 11 to clarify that Google's Advanced Protection program will prevent sideloading of apps.
First, you need to uninstall the app in question, and sometimes this is easier said than done. Most third-party apps can be easily uninstalled, but the system apps that come with your phone cannot be uninstalled. The best thing you can do in these cases is to remove any updates that may be on top of the original application (we'll get to this later).
System or otherwise, the easiest and most versatile way to uninstall an app is through the Settings app. It's possible to uninstall third-party apps or updates in other ways, such as long-pressing app icons in some launchers or through the Play Store, but this method should work on almost all Android devices. Feel free to skip this part if you have a different method you prefer to use.
Go to the Apps section in Settings in Android 10 (although it will look similar in earlier versions).
For stock versions of Android 8.0 Oreo and later (including Android 9, 10 and 11), go to Settings -> Apps & Notifications and either select the app if it's in the recently opened apps list or select See all ## apps" and search for it. In Android 5.0–7.1, including Nougat, Marshmallow and Lollipop, this list is available through Settings -> Applications. For earlier versions of Android or more complex programs, this workflow may be slightly different, but an option related to apps is usually somewhere on the first screen of the settings menu, after which you may have lists of apps sorted by tabs. .
Show system apps option in Android 10 app info list (left), single app info (right).
You may also need to enable the option to show system apps if the app you want to roll back came with your phone. In this case, you can usually display these apps via the three-dot menu in the top right corner of the full apps list page (though they can also be in a separate tab).
When you've found the app you want, tap it to open the app information screen.
On the corresponding "Application Information" screen that should appear, you'll want to do two things. First, select Force Stop to prevent the app from starting while we're fiddling with it. (This isn't always required, but it's better to be safe than sorry.) Note that when troubleshooting, it can sometimes be useful to record the current version by scrolling down the app info panel (after clicking "More" on some Android versions) and taking a screenshot with the current version number or even just write it down. However, this is not necessary.
Once stopped, we need to determine how to remove the current version. For third-party apps, it's as simple as selecting "Uninstall" next to the "Force Stop" button. Follow the simple instructions from there and the app should disappear.
System apps have a slightly different workflow because they cannot be completely uninstalled.
For pre-installed system apps, you'll need to instead select the slightly hidden "Uninstall updates" option from the three-dot menu in the top right corner. A similar message will appear informing you that the factory version will replace the currently installed update and all data will be deleted. Remember: you probably won't be able to go back to an earlier version of the app than this factory version.
If the app doesn't work
After updating programs, it happens that some of them simply stop working. The most accessible option is to clear the cache, reinstall or delete the latest application update on Android. To perform the second step you need:
- open the “Settings” tab and select “Memory”;
- then click on the line “Application data”;
- Find and select a specific application, and then click “Erase data.”
Perhaps after these steps the program will work. If the efforts made do not help, you can try to reflash the device, download a backup copy, if available, reinstall the program or reset the settings to factory values. In the article, we looked at how to cancel an application update on Android.