How to make a regular contact picture
You can set an image for a specific person through the gallery or contact settings. In the first case, open the image storage and follow the recommendations of the step-by-step instructions:
- Open the desired image.
- Now click on the “ three dots ” at the top or bottom of the image.
- In the list, click on the line “ Set picture as ”. The name of the item may differ, but the meaning should remain the same.
- From the proposed options, select “ Contact photo ”.
- The system will open a list of available phone numbers from which we select the right person.
- Adjust the photo to the desired size and click “ OK ”.
To check, open the phone book and make sure the picture is installed correctly. It is worth noting that the presented method is only suitable for smartphones with an operating system lower than Android 8.0. If your phone has Android 9 or higher, then use this guide:
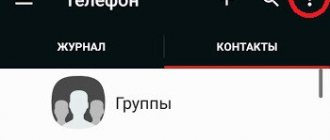
- Open the phone number directory by clicking on the icon on your desktop.
- Then click on the number for which you want to set a picture.
- Click on the button responsible for editing . It often has an image of a pencil or pen and can be located at the top or bottom of the display.
- Now, opposite the future picture, click on the camera icon . The system will prompt you to select a photo from the gallery, or take a photo right now. In the first case, simply find a pre-prepared picture and click on it; in the second, you take a photo of the desired person.
- Then adjust the image to the appropriate size. To do this, move the square frame until the most favorable moment.
- At the end, save the changes with the “ Ok ” button or check the box.
If you need to take images for all numbers, follow the instructions for each caller separately. It is most convenient to use the first method for these purposes, but if this option is not available, you can download a special application from Google Play.
Possible problems
When using the first three methods, you must select the standard “Gallery” and “Contacts” applications. If you install a picture using another application, it may not install.
When using the latter method, remember that not all devices support the listed applications. Your operating system may need to be updated.
Setting a picture to a contact allows you to always quickly recognize them when they call or send a text message. This can be done in several of the above ways.
tell friends
Similar posts How to set a ringtone for a call on Samsung: in detail
How to put music on an iPhone call: set a ringtone
How to put music on a call: complete instructions
How to trim video on Android phone: all solutions
Comments - 0:
How to put a contact's photo on full screen on Android
Not all phones display the person's image on full screen when making a call. This causes some inconvenience for many users, for example, with vision problems. There is no option in the settings that is responsible for displaying the image on the entire display, so Google Play come to the rescue . The highest quality and most popular program is “Full Screen Caller ID”. We suggest you consider a brief instruction on how to use the software:
- Open the application.
- When you launch it for the first time, the system will launch an animation showing the main features of the utility.
- Next, click on the “ Accept ” button and allow overlay on top of other windows. This is necessary to display the call while working with other applications.
- Now in the window that appears, select “ Use as default ”. With this action, the program gains access to making and receiving calls.
- Then click “ Allow ”.
- And finally, on the last slide, click “ Done ”.
Now the software setup is complete, which means you can proceed to linking photos. For this:
- In the application itself, go to the tab with the person’s profile icon.
- Open the page with the desired contact.
- Click “ Assign image ”.
- The system offers to set an image from the camera, select from the gallery or Facebook.
- Select the appropriate option and click “ Save ”.
After this, we check that the image is installed correctly and make a test call.
How to remove a photo back from a contact's screensaver
The process of deleting a contact photo is no different from installing it. First open the phone book, then:
- Go to the page with a specific number.
- Click on the pencil icon or the “ Edit ” button.
- Click on an already installed photo.
- Select " Delete Photo ".
- Save the changes with the " Ok " key.
Now make sure that the picture of the selected profile has disappeared. If you need to return it, use the instructions presented above.
The contact is located in the phone memory
On the Android system, photos are reproduced only in a situation where the contacts are in the device’s memory, and not the SIM card. This can be checked by transferring all contacts to the phone memory:
- Go to the address book, click on the optional menu.
- Select “Copy contacts”.
- We select that the contacts need to be copied from the SIM card.
- Specify the location to save the selected contacts.
- We make a call and check the availability of a photo for this contact.
Special Applications
There are many programs available on the Play Store that replace the standard phone book in a smartphone. Most of the utilities are free, but there are also paid options. One of these applications was described above, so we will not include it in this list. It also allows you to make calls, add contacts and change the background design.
True Phone
QR Code
True Phone Phone, Contacts and Call Recording
Developer: Hamster Beat
Price: Free
Immediately after installation, a message will appear on the screen indicating that you must grant permissions to the program in order to continue working. Meet this requirement by granting access to calls and enabling overlay on other windows . Then click on the “ Start ” button and look through the main features of the software. The top panel contains the “Favorites”, “Phone”, “Groups” and “Contacts” tabs. To install the image, go to the last section. Now we find the desired number and click on the background image . A window appears on the screen asking you to select a photo source: gallery or camera. Find a pre-prepared picture and click “ Ok ”.
Simpler
QR Code
Simpler: Dialing, Phone, Call Blocking
Developer: Simpler Apps Inc
Price: Free
The application is completely free, so let's install and open it. When launched for the first time, the user is shown the main features of the program, which can be skipped using the “ Start ” button. After clicking, a window will appear on the screen asking you to allow the program access to contacts and phone calls. Although the utility is free, it requires registration. It is most convenient to log in through Google or Facebook. Access to the phone book is now open. Let's install a photo on the contact screen:
- Go to the page with the number.
- Click on the “ three dots ” in the right corner of the display.
- Select “ Edit contact ”.
- Click on the camera image and select a picture from the gallery, or take a photo right now.
- At the end, click on the checkmark.
The selected number is now equipped with a photo.
Truecaller
QR Code
Truecaller: Caller ID & Call Recorder
Developer: Truecaller
Price: Free
After downloading, open the software. When you start it for the first time, click on the “ Start ” button, then in the window that appears, click “ Set as default ”. Using the service is possible only after confirming your phone number, so we indicate it and wait for a robot call. There is no need to pick up the phone, the system will do everything on its own. Next, create a profile by logging in via Google or Facebook. We allow the program to be displayed on top of other windows and proceed to setting the image:
- Go to the page with the number.
- Click on the icon in the form of three dots.
- Select “ Edit ” from the list.
- Click on the camera image.
- Upload the photo and click on the checkbox.
The image for the selected number has been successfully uploaded.
How to install a photo through “Galleries”
If all the photos are in different albums, the easiest way is to put the image for the subscriber through the “Gallery”. For this:
- Open "Gallery".
- Select a photo.
- Click on the three dots in the lower right corner of the screen. Below it is the inscription “More”.
- In the menu that opens, select “Set as contact photo.”
- Find a contact in the list and click on it.
- 3 applications will appear at the bottom. Check the “Remember selection” checkbox. To install a photo on an Android contact, you will need “Cropping”.
- Crop the photo to a square and confirm the action by clicking the “Ok” button.
Why is the contact photo not displayed when calling?
There are several reasons why a contact photo is not installed or is not displayed when calling. The most common of them is due to the fact that the number is stored not in the phone, but on the SIM card. To transfer a specific profile to your smartphone’s memory, do the following:
- Open your phone book.
- Go to the options menu. This is done differently depending on the smartphone model. But often, to open a special section, you need to press the touch key in the form of three stripes.
- Next, click on “ Import and Export ” or “ Copy ”.
- Select " Import from SIM card ". If you have two SIM cards, select the one with the desired number.
- Then mark the contacts to import and confirm the transfer.
Also, the image may not be displayed during system failures, then a simple reboot of the device will help.
Ordinary method
To put a picture on a contact in Android, you can use several methods. Most devices offer this feature as standard settings. There are two options for changing the photo:
- through the "Gallery";
- through “Phone Book” or “Contacts”.
To add a photo to a contact in Android through the “Gallery”, open the menu on your phone and find the corresponding application in it. There may be faster access to it, depending on the features of the Android device and user settings. It is assumed that you already have photographs or pictures in your smartphone, from which you can choose the one that you are going to put on an incoming call from a specific subscriber. Having found the desired image, click on the button that brings up additional options. Among the large list of functions, such as “Move”, “Copy”, “Rotate” and others, there should be an option “Set to ...”. When you click on this option, several more choices appear. Typically, the user is asked to set an image on the lock screen, desktop and a number from the phone book. By selecting the last option, you will automatically open a list of subscribers in your phone, where you need to select the desired name and save the changes made. When you call a subscriber and receive calls from him, the set image will appear on the screen.
The second method is even simpler than the first. To add a photo to a contact in Android, you need to do a few simple steps:
- Open the list of numbers on your phone in the usual way.
- Find the phone number you are going to link the photo to.
- Enter the contact change mode by clicking on the corresponding button – “Change”.
- The menu that opens contains settings with which you can add new subscriber numbers or delete old ones, attach additional information, etc. However, you are interested in the image, so select the option you want.
- The system will automatically launch the gallery or file manager of the Android gadget, which contains all available images.
- Mark an individual picture and save changes.