Importing (Exporting) contacts
Let's look at an example of importing contacts from a SIM card. Contacts from a memory card are imported in the same way.
- In the Contacts app, select Manage Contacts from the top menu.
- Select “Import and export contacts” -> “Import from SIM card”.
- Select the location where you want to move your contacts (phone, Google account, or Exchange Active Sync).
- In the list of contacts that appears, select those (check the boxes next to them) that you want to import and click “Save”. If you want to import all contacts, select “Select All” in the top bar.
Exporting contacts (the reverse procedure of importing) to a SIM card or phone memory is performed in the same way (from the “Manage contacts” menu -> “Import and export contacts” -> “Export contacts to ...”).
Features of transferring information to a SIM card
Before you transfer contacts from your phone to a SIM card, you need to take into account the main nuances of this process.
- A SIM card can accommodate a limited number of numbers. Old SIM cards contain no more than 100 entries. For new ones, issued no more than 3 years ago – up to 250 entries.
- When transferring the phone book to the SIM card, only the name and number of the subscriber are saved. It will not be possible to record: photos, notes, birthday data and other additional information.
- If several numbers are associated with one name in the gadget's phone book, when transferring data to a SIM card, separate entries will be created for each number.
- Only the first 6 characters of the subscriber's name, including spaces, can be saved to the SIM card.
Before transferring all the saved numbers from your phone to the SIM card, you should put things in order in the list of subscribers: delete irrelevant numbers, clear the phone book of duplicates, shorten usernames that are too long. If this is not done, the directory may not be copied completely, or using it after transfer will be a rather difficult process.
Copying contacts
- In the Contacts app -> Manage Contacts, select Copy Contacts.
- Select a location (phone or account) from which you want to copy the contacts.
- Then (in the menu that appears) select the location where you want to copy them.
- In the window that appears, confirm the copying procedure by clicking “OK”.
Tags:
Contacts December 8, 2013 | Comments (0)
Importing contacts means adding contacts from another device or the internal memory of a smartphone, and exporting means transferring existing contacts to the device’s memory or somewhere else. Not quite clear? Then it’s a little simpler: using import, you enter into the memory of your device or link to your Google account the telephone numbers available, say, in the memory of your smartphone (they can be “packed” into one file for convenience), and using export you can transfer numbers or create file to transfer to another device. Escorting contacts can be compared to a backup: transfer the file to another file and, in case of problems, restore a copy from it.
The section for importing/exporting contacts can be found on any Android smartphone. Let's take Xiaomi as an example. To find the required item in the menu, you first need to open the contacts section; this can also be done using the “Phone” application.
Next, click on the three dots at the top of the screen.
Select “Import and Export” from the menu.
Choose to import or export contacts depending on your needs.
Pay attention to the “Send contacts” item - it allows you to share them using various services.
But whether there is a need for this is a moot point.
Hello dear readers. How to transfer contacts from an old phone to a new one? How can I save my contacts from my phone in order to later transfer them to a new one? Similar questions come to mind for many phone users. Today I will try to give you a comprehensive answer to them. The article contains many illustrations, so I warn those who do not have unlimited traffic
Importing phone numbers and process features
In order to transfer contact phone numbers of your family, acquaintances and friends to a newly purchased SIM card from your old SIM card, you must first transfer contacts from the old SIM card.
This procedure is almost no different from the one described above, however, the only difference in this case is that the user needs to specify other sources of the file and other final destinations. In general, this process looks like this:
Open the phone book or directory, which contains all the phone numbers in the address book. Find there and click on the drop-down list of parameters button. Select the import/export item from the entire list that appears (or settings, if the import/export item is not available in the version). Therefore, you need to select the button to export phone numbers to a SIM card. In the new window that appears, mark those contacts that need to be transferred
It is also important to take into account that even in modern SIM cards their capacity for contacts is limited to 250 numbers. After all phone numbers have been selected, you must click on the Export button
However, if the phone numbers contain a photo, music, notes or anything else, all this will not be saved during the transfer
After all phone numbers have been selected, you must click on the Export button. However, if the phone numbers contain a photo, music, notes or anything else, none of this will be saved during the transfer.
Transferring contacts for subsequent recovery.
In the modern world, the mobile phone has greatly accelerated and simplified the lives of not only business people, but also ordinary residents of the earth. The phone, the contact directory, stores the numbers of our loved ones, relatives, friends and business partners. Sometimes, the loss of the mobile phone itself is not as expensive as the irretrievable loss of the list of contacts with phone numbers in its directory. Contacts can be lost, for example, when resetting the phone to factory settings, when flashing the phone, when the phone itself is lost, in case of a failure, children can accidentally delete etc. Therefore, sooner or later everyone begins to think about how to protect their phone contacts from these misfortunes.
There are several ways to transfer phone contacts to save them and then restore them at the right time. But, after saving contacts, we also need to restore them at the right time. And this due to the fact that there are several different operating systems ( Android , WindowsPhone , IOS ) presents a certain problem. The problem can be easily solved. We will save contacts in a format that is supported by all of the listed mobile operating systems, namely in the .vcf format - vCard .
Transfer contacts (export) from your phone in vCard format
vCard is a special format for exchanging business cards. Has the extension .vcf. This format is supported by major mobile operating systems. These are Android , IOS , WindowsPhone , as well as other modern mobile phones on other platforms. This format allows you to transfer contacts without losing information . If we export contacts to a SIM card, and then import them to a mobile phone in a new phone, then often the full name of the contact is shortened to a certain number of characters. In addition, information about e-mail is lost, addresses are lost, etc.
Export (transfer) contacts from android.
To export contacts in .vcf format from the Android platform, go to the Contacts . Next, go to the context menu. This is done differently in different devices. But as a rule, the transition to the context menu is carried out by clicking on a button in the form of three dots or three stripes. In the context menu (again, it’s different for different devices - options, additionally) follow the link “ Export contacts ”. The following window will open, where we select the location where you want to transfer the contacts, and in some devices you will be offered a choice of formats in which the contacts will be exported. After export you will receive a file with the extension .vcf
Export (transfer) contacts from Google.
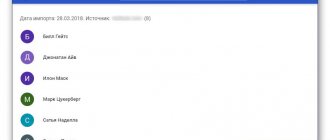
On Android, if synchronization of contacts with Google , then they are stored on their servers in the user's profile. To manage your contacts on Google, go to the “ Google Contacts ” service at contacts.google.com. Here on the left there will be a menu in which we click the “ More ” button. The menu will open and then click the “ Export ” button. If you are in the new service interface, you will be prompted to switch to the old version (at least at the time of writing this was the case). You can also immediately go to the old version by clicking the “ Return to old version ” link in the menu of the new version. In the old version, check the boxes in front of those contacts that you want to transfer to another medium and then click the “ More ” -> “ Export ” button. You can also select all contacts at once by checking the box in the top line. All this can be seen in the screenshot below. Next, a window will open in which we just have to select the format of the exported contacts and click the “ Export ” button. The contacts will be downloaded by the browser in vCard to your computer.
Export (transfer) contacts from WindowsPhone.
WindowsPhone syncs contacts with their cloud service live.com . To use this service, you must have a registered profile on microsoft.com. To transfer contacts, we need to go to their service at profile.live.com and click on the menu button (see the picture below) and select the “ People ” service. Manage ” -> “ Export contacts button in the menu . A window will open on the right where we select “ All contacts ” and the format (unfortunately, there is only one option for the export format - “Microsoft Outlook CSV”) and click the “ Export ” button at the top.
As for the upload format, contacts exported in this way can be imported into Google contacts and uploaded from there in vCard , so that there are no problems with their further restoration directly on the phone.
Export (transfer) contacts from iOS.
For iPhone , to transfer contacts from your phone, you first need to enable contact synchronization with the iCloud . After synchronization, go to the page www.icloud.com and select the “ Contacts ” section there. A page with a list of contacts will open. To upload contacts, click on the gear icon in the lower left corner. From the menu that opens, select “ Export vCard ”. iCloud will be downloaded in one .vcf file.
Restoring (importing) contacts on your phone [vCard]
Above in the article, we learned how to transfer contacts from your phone to another medium to save them. Now we need to find out how to restore them if necessary. I will also show you how to restore contacts using the example of the above-listed operating systems and services. In principle, a more or less prepared user will be able to do this without any hints, but we may have completely unprepared people on our site, so let’s start.
Import (restore) contacts to android from vCard.
To restore contacts to Android, we need to import them from a vcard file with the extension .vcf. To do this, go to “ Contacts ”, click the context menu button and select “ Import contacts ” from the drop-down list. Next, select the location where you store your backup contacts. In my case it is an SD card. The system itself will find the file, if there is one (usually it is stored in the SD cardSystemPIM path). Select it and click ok . (in the example Android version 5.1.1 on a Sony phone).
Import (restore) contacts to Android from Google.
There is nothing complicated here. You can simply enable synchronization with Google and enable contact synchronization. To do this, go to “ Settings ” -> “ Accounts ” and select Google (it is assumed that you have an account and have already added it to your accounts). Click on your account and select what should be synchronized on the phone. In our case, this is “ Contacts ”. We activate them, click the context menu button in the upper right corner and select the “ Synchronize now ” item.
Import (restore) contacts into iOS.
On iOS devices, contacts can be imported in several ways. Let's list them, and let's dwell in more detail on one of the easiest ones:
- Import via iTunes
- Import via iCloud
- Import via CopyTrans Contacts (a service for exporting and importing contacts to an iOS device)
- Import using applications from the AppStore (Excel Contacts, Contacts Backup - IS Contacts Kit, etc.)
- Import from vcard - .vcf
The easiest way is to email yourself a vcard with contacts and open it in mail on your IOS device. And whether it’s an iPhone or iPad, they themselves will offer you to add contacts to the directory.
PS About WindowsPhone recovery, I hope dear readers will add in the comments. There, to import contacts from other services, they need to be in .csv format, i.e. excel tables . Otherwise they will not be imported correctly. And there is no point in describing this whole matter. The article turned out to be very long. Perhaps I will write about importing contacts into WindowsPhone in a separate article.
If your SIM card supports it, you can import SIM contacts to your iPhone. Learn how.
iPhone doesn't store contacts on the SIM card. If you want to transfer contacts between iPhones, you can use iCloud to backup or transfer content between devices.
Using Google
Another interesting way to save contacts on a SIM card and phone is to use standard Android settings and Android contacts. To do this you need to do a few simple steps:
- Open the section with contacts and phone numbers on your phone.
- Find in the menu an item that mentions importing saved data (depending on the model and operating system version, the name of the function may differ slightly).
- Specify the copy source as contacts from your phone's phone book.
- Specify the SIM card as the final destination for transferring all contacts.
- Indicate the appropriate numbers and the necessary people by checking the boxes.
That's all - all that remains is to approve the elections and start the procedure for importing contacts and files.
At the same time, it is also necessary to emphasize that the sources of information when copying contacts can be either specialized files in the phone memory or a removable SD card, or the accounts of the owner of the telephone device in the Google service. In the second case, the user may also be required to provide additional authorization, as well as synchronization.
In the process of importing contact information from Gmail to the phone's SIM card, it is extremely important to indicate the necessary and necessary contacts, as this will prevent copying data from instant messengers, the mail itself, as well as all other third-party services that are somehow connected with Google
Import contacts stored on a SIM card
- If your iPhone isn't using the SIM from your old phone:
- Make sure that the SIM card from your previous phone can fit into your iPhone.
- Remove your iPhone SIM card and replace it with the SIM card from your previous phone.
- Tap Settings > Contacts > Import SIM Contacts.
- Wait for the import to complete.
- If you swapped SIM cards in step 1, remove the SIM card and replace it with your iPhone SIM card.
- Open Contacts and make sure that the contacts are imported.
The contact information imported from a SIM card depends on how your previous phone stored information on the SIM card. For more help with importing contacts from a non-Apple phone, check the manufacturer's website, app store, or contact your carrier.
iPhone doesn't store contacts on the SIM card. If you want to transfer contacts between iPhones, you can use iCloud to backup or transfer content between devices.
Google account
Almost all firmware of Android gadgets are somehow tied to Google. The services of this search engine can also be used to import contacts to a new device. If you don’t have a Google account, you need to create one. The best way is to register a mailbox. This can be done on the official website of the search engine.
Contact transfer process:
- Let's go to the standard settings of the Android platform on the old gadget.
- Open the “Accounts” item.
- Find your current Google account and click on it.
- In the synchronization window that appears, move the switch to the active position opposite the “Contacts” line.
- Click on “Options” and then on “Synchronization”.
Now on your new mobile gadget you need to log in to your Google account. After some time, the phone book should be updated, and contacts from the old smartphone will appear in it. It is also worth clarifying that this method only works with numbers saved in the phone’s memory.
How to copy contacts from an Android smartphone to another Android smartphone or computer
Thanks to a special application from Google, you can copy selected contacts to other devices via email. This method is most suitable for transferring contacts between devices that you do not want to associate with a common account.
- On the source smartphone, launch the Contacts application. If it is not installed, download it from Google Play.
- Inside the application, log into the account to which the desired contacts are linked, and then select them.
- Click the Share button, then select Gmail and send copies of your contacts by mail.
Contacts in the form of a single VCF file will be attached to the letter. The recipient can save this document on their computer or smartphone. To add the entries stored in the file to the phone book of another Android device, just open the received VCF document using the Contacts application.
Contact Developer: Google LLC Price: Free
Using the Super Backup app
- Download and open the application.
- Before copying, in the “Options” and “Settings” menus, select the path to save the file - memory card.
- Go back to the Contacts section and Back up phone contacts.
- Give the future vfc file a name and click OK. The name can be anything, it is needed so that you can quickly select the desired file in the future.
- Information can be uploaded to Google Drive, transferred via mail, Bluetooth, Wi-Fi Direct, or simply moved the memory card to a new phone.
- On the new device, find the file you need, tap on it and save the transferred information.
Easy Backup, Move Contacts Transfer/Backup, MCBackup, Phonebook Backup & Transfer and others will also help you copy data. If you want to protect yourself in case your SIM card or phone breaks, the following method will save all your information online.
How to copy contacts from an Android smartphone to another Android smartphone or iPhone
Method 1: Using a computer
The web version of Google's Contacts app allows you to save selected contacts on your computer as a single file, which you can use to copy them to any iOS or Android device. It is not necessary to link devices with a common account. But this method will be convenient only if you have a computer at hand.
- Launch a browser on your computer and open Contacts.
- Log in to the account to which the desired contacts are linked.
- In the menu on the left, click “More” → “Export”, and then “TO OLD VERSION”.
- Mark the contacts you need, then click on the “More” button and select “Export”.
- Complete the process using system prompts.
As a result, a document with contacts in the form of a VCF file will be downloaded to your computer.
If you are copying contacts on Android:
- Send the file to the target device, for example via email.
- Open the received document using the Contacts application.
If you are copying contacts to iPhone:
- Launch a browser on your computer and sign in to Contacts on the iCloud website using the Apple ID to which you want to copy the entries.
- Click on the gear in the lower left corner and select “Import vCard”.
- Specify the path to the contacts file and confirm the import.
- Open the Contacts mobile app on the target iPhone and refresh the contact list by swiping from top to bottom.
Method 2: Using a Google Account
By connecting a new Android smartphone or iPhone to your Google account, you can immediately copy all the contacts linked to this account on your old device to the gadget. Unlike the previous method, you cannot choose which contacts will be copied. But you don't need a computer for this.
First, open the settings on the source smartphone, find the connected Google account and make sure that contact synchronization is activated.
If you are copying contacts to an Android smartphone:
- Go to the settings of the target device and open the section dedicated to accounts.
- Add a Google account to which the necessary contacts are linked.
- Go back to the accounts section in settings and select Google.
- Open the added account and sync its contacts with your device.
If you are copying contacts to iPhone:
- Go to your iPhone settings and tap Contacts → Accounts → Add Account → Google.
- Add a Google account to which the necessary contacts are linked.
- Open the added account and sync its contacts with iPhone.
Export contacts to Google
Set up a Google account on your phone
If you can go to PlayMarket, it's already done. Download the Contacts app from PlayMarket. Go to the “Contact Management” section (the path is described above). Click "Copy to Google" (note that you can only move numbers from the phone's internal memory, not from the SIM card). Now you can open a Google account and sync information on any device
Now you can open a Google account and sync information on any device.
Additionally, we will describe a method for those who decide to save a backup copy on their computer. This also allows you to transfer contacts to a new smartphone, but the main thing is that you will always have access to information on your PC, even without an Internet connection.
How to copy contacts from iPhone to another iPhone, Android smartphone or computer
The Contacts web app lets you save selected contacts to your macOS or Windows computer as a single file that can be copied to any iOS or Android device. There is no need to link smartphones with a common account. But this method will be convenient only if you have a computer at hand.
- Launch a browser on your computer and sign in to Contacts on the iCloud website using the Apple ID from which you want to copy the entries.
- Select the desired contacts in the list.
- Click on the gear in the lower left corner and select “Export vCard”.
The selected contacts will be saved on your computer as a VCF file.
If you are copying contacts to iPhone:
- Launch a browser on your computer and sign in to Contacts on the iCloud website using the Apple ID to which you want to copy the contacts.
- Click on the gear in the lower left corner and select “Import vCard”.
- Specify the path to the contacts file and confirm the import.
- Open the Contacts mobile app on the target iPhone and refresh the contact list by swiping from top to bottom.
If you are copying contacts on Android:
- Send the file to the target device, for example via email.
- Open the received document using the Contacts application.
Via Bluetooth
When importing data in this way, entries from the phone book are transferred between devices in the form of a file with the .vcf extension, saved on MicroSD or in internal memory. Next, open it and save the information to the phone.
Procedure:
- Activate Bluetooth on both devices.
- Mark contacts, click “Transfer”, then “Bluetooth”.
- In the list of equipment available for connection, find the gadget to which the numbers will be transferred and click on it.
- Confirm the appointment and wait for it to finish.
- Find the “Bluetooth” folder in the internal or external memory, in it there is a file with the .vcf extension and click on it.
We recommend: How to change the power button on Android
- Specify the account in which the entries will be created. This could be a Google account or the gadget's internal memory.
- Wait for the process to complete.
A quick option that has no restrictions on the number of numbers and allows you to transfer all their information, including additional information.
How to copy contacts from iPhone to another iPhone
Method 1: Using the Contacts mobile application
The Contacts app allows you to share selected contacts via instant messengers, SMS and other services. This method is most suitable for copying single contacts to devices that you do not want to associate with a common Apple ID with the source device. You don't need a computer for this.
- Go to the Contacts app on the source device.
- Click on the desired contact, then “Share contact”.
- Select a convenient service and use it to send a contact to another iPhone.
- Repeat the process for the remaining contacts you want to share.
Method 2: Using a shared Apple ID account
By connecting a new iPhone to your Apple ID, you can copy to the gadget all the contacts associated with this Apple ID on your old iPhone. Unlike the previous method, you cannot choose which data will be transferred. But this method copies the entire phone book at once.
- Make sure the same Apple ID is connected to both devices.
- Go to settings on the source device and click on the profile name at the very top.
- Select iCloud and make sure that the switch next to “Contacts” is green.
- Scroll down and tap “iCloud Backup” → “Backup.”
- Make sure that in the iCloud settings on the target iPhone, the switch next to “Contacts” is also green.
- Launch the Contacts app on the target iPhone and update the data by swiping from top to bottom.
- Please wait a few minutes for the synchronization to complete.
Transfer Contacts
This is already an exclusive mobile application, and the participation of a personal computer is not required to transfer contacts. The program, like Mobileledit, comes without Russian-language localization, but the problem is solved by searching for a localization language on thematic forums and websites. Judging by user reviews, localization as such is not necessary here, because it is quite difficult to get confused in the utility interface.
The application must be installed on both smartphones. On the old phone, select all or some specific contacts and click on the “Save” button (“Export”, “Transfer”, etc.). On the new device, you need to select the import source, that is, the old model and click on “Import”. After a couple of minutes, all previously selected contacts will appear on another gadget.
One of the main distinguishing features of the application is that it works with all popular platforms. The utility transfers contacts from devices running the Android, Windows, Blackberry and iOS operating systems. And in any direction and in unlimited quantities.
The program is freely distributed (Free), but its free availability ends at 75 contacts. If you need to transfer more, you will have to pay a subscription of around 70 rubles.
How to copy contacts from an Android smartphone to a SIM card or vice versa
You will most likely find options for importing from and exporting to a SIM card in the contacts application preinstalled on your device. If not, install Google's Contacts app. Select “Export” or “Import” in its settings depending on your purpose and follow the prompts on the screen.
If for some reason you are unable to copy contacts using the pre-installed program and application from Google, look for alternatives on Google Play. For example, try the application “SIM cards and contacts. Broadcast".
SIM Cards and Contacts Transfer Developer: Biometric Solution Price: Free
Why should you keep contacts on a SIM card?
It would be reasonable to keep the contacts of your interlocutors on a SIM card in several cases:
- In case of alternate use of several smartphones.
- To prevent the addition of new and unnecessary phone numbers.
- In the case when a mobile phone user needs to clear all existing data in order to subsequently restore contacts without the Internet.
- Each time the user contacts service centers.
- If the user needs an ordinary push-button telephone, in which there is no transfer of contacts via the Internet or wireless network.
And, of course, this is necessary in case of replacing the SIM card.
Part 1: How to Import CSV Contacts from Email Account to Your iPhone
There are many different scenarios that you need to import contacts into iPhone. The traditional solution is to import CSV contacts into the email address synced to your iOS device. Here you can get two examples to import Outlook and Gmail Contacts to iPhone. Just read and learn.
Section 1: Import CSV Contacts from Gmail to iPhone
Step 1
Export existing contacts
Step 2
Import CSV Contacts to Gmail
Return to the Google Contacts page. Select "Import" in the left pane. Select "CSV or vCard File" and then "Select File" to import CSV contacts into Gmail. You can use the Find Duplicates or Merge All functions depending on your needs.
Step 3
Import contacts from Gmail to iPhone
Open the Settings app on your iPhone. If you're using iOS 8/9, tap "Mail, Contacts, Calendars" and then "Add Account." Select your email service provider and fill out the required information. Click "Next" to move on. Enable the Contacts option to import CSV contacts to iPhone. Later, you can see the CSV contacts in the iPhone Contacts app.
Note. For iOS 10/11/12 users, you can tap Settings, Contacts, Accounts, and Add Account instead.
Section 2: Import CSV Contacts from Excel Spreadsheet to Outlook on iPhone
Step 1
Save as .csv file
Open the worksheet containing the necessary contact information. Select "Save As" from the File drop-down menu. Set the destination folder. Then you need to select CSV (*.csv) as the output format. Select "Save", "OK" and "Yes" to get the CSV file in Excel.
Step 2
Import CSV Contacts to Outlook from Excel on iPhone
Select "File" in the top left corner of Outlook. Select Open and Export, then Import/Export. Select "Import from another program or file" from the list. Then click "Next" to continue.
Select Comma Separated Values and Next. Follow the onscreen instructions to import CSV contacts into Outlook. Don't forget to check the box before "Import 'MyContacts.csv'". If necessary, map the columns of the CSV file to the Outlook contact. Later, you can import CSV contacts from Outlook to iPhone by following similar steps mentioned above.
Transferring contacts through the phone functionality
There are several alternative ways to import contacts. The most commonly used options are:
- Use your Google or Apple account to synchronize your database across multiple devices. To do this, you need to go to your phone's mail and use the import function in the application menu. The phone book will be copied to the account database. After connecting a new device through the account management manager, you can synchronize data in its user database.
- Sending by email. You can simply send yourself a file with your contact database in CSV format, and then access this mailbox from another device. After downloading the information, update it on your new phone.
- Using bluetooth. You need to turn on both devices, go to the bluetooth menu, find the device of interest in the list and distribute a file with the necessary information to it. After that, export the phone book using the received data.
If other methods do not work, you can try saving the user list to your phone's SIM card, and then insert it into a new device and synchronize the information. If there is a lot of data, this procedure will have to be performed several times, sequentially saving blocks of transferred data to the card. In a similar way, you can use an SD card for this procedure, selecting its memory as storage.
We only use the phone
Accessories for electronic books. . The following applications are available. Set an alarm with the following options. To create a new alarm, select New Alarm from the alarm app. If you skip this option, unless you select a day, the alarm will ring every day. Save the alarm by selecting "Save Alarm." Once you select a specific saved alarm, you can edit or delete it. When the alarm sounds, you have the following options: Long touch with one or two fingers to turn off the alarm. Read the time with a short tap of two fingers.
- Fill in the Alarm Time field to enter four digits.
- The first pair of digits marks the hours and the second pair of minutes.
- Select the days on which the alarm will ring in snooze mode.
Today, any state is an active participant in global trade. Every day, millions of tons of cargo cross borders. In these transactions, one party acts as a seller, the other as a buyer. Knowing what imports and exports are for a particular country can say a lot about its welfare.