Basic setup
Despite the fact that Android is the common OS for a million different smartphones, many manufacturers tweak and decorate the operating system in accordance with their vision of beauty. Therefore, the sequence of initial setup steps may differ slightly in different smartphones. There is no need to worry about this, just follow the instructions on the screen and you won’t miss. Now let's turn on and let's go. 1. If the device was purchased in a store, then after installing the SIM card and when you turn it on for the first time, you will be greeted by a welcome screen, where you will need to select the main interface language. Everything is simple here: in the list that appears, look for the one you need and click “Next”.
2. Following this, the system usually offers to connect to the desired Wi-Fi network so that the smartphone can communicate with the outside world and can quickly update the necessary updates. Everything is simple here - select your home network, enter a password and you're done. If something happens, you can skip this step and connect to the network later.
3. Full use of a smartphone is possible only if you have a Google account. If you already had an Android smartphone or previously created an account with Gmail or YouTube, simply enter your information and then agree to the terms of the license agreement.
4. If there is no account, then click “Create a new account” and go to the registration menu. Here you need to come up with an email address, a password and, if desired, enter your personal data. You should not skip this step, since without a Google account many services on your smartphone will not work.
Popular pure Android smartphones Google Pixel 4a from 10,360 UAH. Google Pixel 4a 5G from 13,330 UAH. Google Pixel 5 from 22,699 UAH. Nokia G20 64GB from 4,199 UAH. Google Pixel 3a from 5,499 UAH. Nokia 3.4 64GB/3GB from 3,499 UAH. Asus Zenfone 8 128GB/8GB from 16,980 UAH. Google Pixel 3 64GB from 7,920 UAH. Nokia 5.4 64GB/4GB from 4,073 UAH. Google Pixel 3 XL 64GB from 7,858 UAH. Nokia G10 32GB/3GB from 3,099 UAH. Motorola Edge 128GB/6GB from 11,999 UAH. Google Pixel 4 64GB from 12,900 UAH. Google Pixel 3a XL 64GB from 6,371 UAH. Google Pixel 4 XL 128GB from 19,459 UAH. Google Pixel 4 XL 64GB from 17,580 UAH. Nokia 2.4 32GB from 2,799 UAH. Google Pixel 2 XL 64GB from 5,794 UAH. Google Pixel 4 128GB from 14,299 UAH. Nokia X20 128GB/8GB from 10,494 UAH.
5. Next, most modern smartphones will offer you to transfer data from your previous handset to it or restore it from the cloud. The data transfer manager differs from smartphone to smartphone and is endowed with different functions from simply transferring previously installed applications to completely copying the system. Therefore, decide what exactly you want to return and what to leave in the past, and follow the instructions on the screen.
6. Almost there. Android will now prompt you to activate the necessary Google services. Usually, all items are checked, but you can uncheck unnecessary ones (for example, enhanced geolocation or sending anonymous system data to Google) and, if necessary, enable them later in the settings.
7. The last point is smartphone protection. In this menu, you will need to create a password/PIN code and add a fingerprint (if your smartphone has a fingerprint sensor). This will not take much time: you will need to touch the sensor in different places several times with the right finger and the impression will be ready. This will take a maximum of a minute, but in the future it will save a lot of time and nerves when unlocking the screen, contactless payments and authorization in banking applications.
Additional setup
After completing all the manipulations, Android will greet the new owner and offer a short introductory tour of the system. Essentially, the setup of the smartphone is complete, and now you can use it. However, we recommend devoting another 5 to 10 minutes of your time to in-depth customization of the system for yourself.
Updating the system
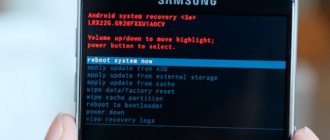
Even if you have a brand new smartphone, it's still worth doing. During the time that the smartphone was lying on the counter, the manufacturer could have time to roll out a whole pack of important and not so important system updates. As a rule, system updates are placed in a separate item in the smartphone settings (“About the system” or “System”), which is located at the very bottom of the list. Click on it and look for the “Software Update” item.
Unbox your device and sign in to your Google account.
Unpacking your phone or tablet is a pleasant experience. In the box, you may find an installation guide or quick start guide that will tell you whether you need to insert the SIM card that will be included in the box into the phone.
If your phone has a rechargeable battery, you will need to insert it. You should have enough money to go through all the steps to set up your new Android device, but if you're close to an outlet, you can plug in and start charging the battery.
When you turn on your phone or tablet for the first time, Android will walk you through the initial steps to get started. You will be asked to sign in to your Google account or create a new one. This lets you sync your device with Google services for email, calendar, maps, and more.
During setup you'll be able to link other services like Facebook, but you can add them later if you just want to access your phone as quickly as possible.
You'll also need to answer a few basic questions about settings, such as the language you use and whether you want to turn on location services. Location services are required in many applications to provide driving directions and display reviews of local restaurants. Information is collected anonymously.
Install the necessary applications
Most smartphones come with basic apps like Gmail, Skype or Facebook Messenger installed out of the box. However, such “starter packages” vary noticeably from manufacturer to manufacturer, and it often turns out that instead of the programs you need, the desktop is filled with some incomprehensible rubbish. Many people immediately after purchase pay extra to the store’s specialists for installing additional software, but this does not seem entirely reasonable to us. Since they install mostly free applications on their smartphones like Instagram, TikTok, FBReader, Pocket, VLC directly from Google Play.
Popular smartphones on Android 10 Q
Xiaomi Redmi Note 9 Pro 64GB from 6,499 UAH. Xiaomi Redmi 9 64GB from 3,899 UAH. Xiaomi Redmi 9T 64GB/4GB from 4,695 UAH. OnePlus 8 128GB from 11,559 UAH. Xiaomi Mi 10T 128GB/6GB from 9,899 UAH. Xiaomi Poco X3 NFC 64GB from 6,149 UAH. Samsung Galaxy S20 FE 128GB/6GB from 14,052 UAH. Google Pixel 4a from 10,360 UAH. Xiaomi Redmi 9A 64GB from 3,099 UAH. Xiaomi Mi 10T 128GB/8GB from 10,999 UAH. Xiaomi Poco M3 64GB from 4,299 UAH. Xiaomi Redmi 9 32GB from 3,299 UAH. Xiaomi Redmi 9 NFC 64GB from 4,299 UAH. Samsung Galaxy A51 128GB/6GB from 6,649 UAH. Xiaomi Redmi Note 9 Pro 128GB from 6,725 UAH. Xiaomi Mi 10T Lite 128GB from 8,399 UAH. Xiaomi Redmi 9T 64GB/4GB NFC from 4,444 UAH. Samsung Galaxy Note20 Ultra 5G 256GB from 26,999 UAH. Samsung Galaxy A71 128GB/6GB from 9,999 UAH. Xiaomi Redmi Note 9 128GB/4GB from 4,599 UAH.
Then why not do it yourself? We look for the Google Play icon in the menu or on the desktop, click on it and enter the name of the desired application in the search bar. Then we go to it, select “Install” and give it the necessary permissions to use the smartphone. And so we repeat the process for each application. Everyone has their own list of “needs,” so it’s difficult to give any recommendations. If you don’t know what you need, then be sure to look at thematic recommendations on Google Play itself or Google “the best apps for Android.” The main thing is not to rush to fill your smartphone to capacity, then you will forget what you installed and why, and the smartphone may slow down.
Installing the necessary applications and utilities
To do this, open the Google Play application, if you have previously logged into your Google account, then there will be no problems, otherwise, after opening the application, you will see a window with logging into your account. After this, the world of the universe of Android applications will open before you. Do you want to download Telegram or WhatsApp? Simply click on the search bar at the top and use your keyboard or voice input to type “WhatsApp” or “Telegram”. The results of your request will appear in the application store, select the application from the list, and then click the “Install” button. After installation, the application icon will appear in the phone's application menu, some phones, in addition to the main menu, offer an internal menu with a list of all applications, so if you do not find the icon in the main menu, go to the secondary menu. On Samsung phones, it opens when you swipe up on the desktop.
Most of the basic apps on smartphones are not very functional and take up unnecessary space, so some of them can be safely removed.
Basic applications are available in the Google Play store, most of which are free (for example, "antivirus"). To install, enter the name of the application in the search bar and proceed to download and install.
After successful installation, the application is ready to use.
Upgrade your home screen
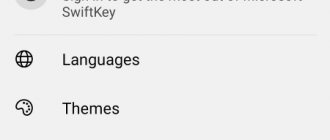
Getting to the desktop after the first launch, the user sees only those utilities that the manufacturer decided to draw your attention to. Naturally, you can customize it for yourself and display only those applications that you really need on the main screen. In addition, you can add special widgets to Android (weather, clock, exchange rates, player, etc.) that allow you to interact with the application directly from the desktop. Applications are added to the desktop by simply dragging the icon to the desired location. To add a widget, you need to click on an empty area of the screen for a few seconds, then in the menu that appears, click on the “Widgets” section and select the one you need from the general list.
Calibrating the screen and top curtain
If your device doesn't respond as expected or takes too long to touch, you may need to calibrate your screen. This can be done in several ways - in the settings, using special tools or through the engineering menu. Before calibration, check that nothing prevents the sensor from working correctly (the screen is clean, the protective film is applied evenly, the system is not overloaded).
Some phone manufacturers are now building screen calibration tools into the operating system. To use it, select the "Display" or "Screen" option in settings.
If there is a “Screen calibration” item in the menu. - select it, and then follow the instructions on the screen, usually - tap several times in different places on the screen.
To calibrate through the engineering menu, you must select a specific combination corresponding to the brand of the phone manufacturer.
In the menu that opens, select the “Sensor Calibration” menu, reset the touch screen settings before calibration (for subsequent correct settings).
If the previous methods are not suitable, special tools (for example, Touchscreen Calibration) are installed, including for automatic calibration.
Typically, the status bar of a smartphone displays the current time, notification icons of installed applications, network signal, battery level, etc. When you open the curtain, an expanded list of the most frequently used functions appears: network connection, flashlight, auto mode, etc.
To change the feature list, open the control slider, click the edit button, and move the feature buttons as needed.
Changing the wallpaper
The desktop of a smartphone should please its owner. Especially at first. Wallpaper is an integral part of it and this is what the eye catches first. Instead of scouring the web and manually selecting them, install an app that will update your backgrounds automatically. For example, Wallz or WallHub. It is likely that you already have a similar wallpaper application on your system. Search for "Wall" or "Wallpaper" in the title.
Insert the SIM card
If you want to check the speaker/call quality directly in the store or have ordered a smartphone and are waiting for it to be delivered, make sure in advance that the SIM card is of the appropriate format. Almost all modern devices work with nanoSIM, so micro, and especially the mini-analogue, will not work. If the SIM card does not “unfold”, contact the mobile operator’s communication store to get a new SIM card.
We talked about SIM replacement in detail in this article. To find out what type of SIM card you have, we recommend going here.
Customizing the notification shade
The curtain for notifications and quick settings is the best invention of mankind since penicillin and the internal combustion engine. It allows you to quickly turn on/off geolocation, NFC, Wi-Fi, flashlight, auto-rotate screen, and basically anything in one click. Therefore, it would be logical to configure it immediately after the working screen. To do this, drag your finger from top to bottom across the screen until the curtain comes out. An icon resembling a pencil will appear in the upper right corner next to the gear icon. Click on it and go to the curtain settings menu: here you can change the order of the quick access icons, add the ones you need or, on the contrary, remove the unnecessary ones.
Setting up a blocking
The safety of personal data comes first, so after purchasing a new smartphone, you need to secure it by locking it. It is suggested to do this at the stage of the first launch of the device using:
- Pattern, PIN code or password.
- Built-in fingerprint scanner.
- Facial recognition technologies.
The first option is found in all modern phones without exception. A fingerprint scanner and Face ID can be found even on budget models, but there they do not work as quickly as we would like. We recommend using several types of locks, and at the same time setting a PIN code on the SIM card. There is also a security system called Smart Lock.
Setting up display settings
Basic display settings often suit only a small number of users. Instead of being disappointed in the phone because of the “wrong” colors or large font, go to the smartphone settings and look for the “Screen/Display” section. First of all, we advise you to play with the color mode and temperature; these parameters can radically change the impression of your smartphone. Also in the settings you can set the desired brightness (or enable automatic brightness change) and font size. In the same section, you can configure the inclusion of a special night mode, which prevents exposure to blue light, which is especially negative when using the phone before bed.
Adjusting battery consumption
How often you charge your new smartphone will greatly affect how you use it. Therefore, we strongly recommend that you go to the settings menu, find the “Battery” item and do a little magic there.
Popular Android smartphones with good battery
Xiaomi Redmi Note 9 Pro 64GB from 6,499 UAH. Xiaomi Poco X3 NFC 64GB from 6,149 UAH. Xiaomi Redmi Note 9 Pro 128GB from 6,725 UAH. Xiaomi Poco X3 NFC 128GB/6GB from 7,099 UAH. Samsung Galaxy A21s 32GB from 4,099 UAH. Xiaomi Redmi 8A 64GB from 3,079 UAH. Xiaomi Redmi Note 9S 64GB from 4,999 UAH. Samsung Galaxy A31 64GB from 5,499 UAH. Motorola Moto G9 Play 64GB from 3,999 UAH. Motorola Moto G9 Plus from 5,999 UAH. Samsung Galaxy M11 32GB from 3,550 UAH. Samsung Galaxy A21s 64GB/4GB from 5,499 UAH. Asus Zenfone 8 128GB/8GB from 16,980 UAH. Samsung Galaxy A02s 32GB/3GB from 3,730 UAH. Vivo Y30 64GB from 4,499 UAH. ZTE Blade A7 2021 64GB from 2,899 UAH. ZTE Blade A7 2021 32GB from 2,491 UAH. Blackview BV9100 from 5,599 UAH. Doogee S88 Plus from 6,799 UAH. ZTE Blade A7 from 2,349 UAH.
In the parameters, the first thing you need to do is set the lower charge threshold, when reached, the energy saving mode will turn on. In some shells you can set this value with an accuracy of one percent, but most often it is a fixed value like 10%. You also need to decide whether to use the Battery Manager or Adaptive Battery features. The first will identify programs that consume excessive power and offer to limit their operation. In the second case, the system itself will monitor which applications you use least often and limit such background processes to extend the life of the smartphone on a single charge. The names and principles of operation of these features may differ slightly depending on the shell and version of Android, but the principles of their operation are general.
Tweaking Android
To fully customize your smartphone, we suggest you configure the following parameters as you wish, after which you will be even more satisfied with your new product.
Setting up the launcher
Getting to the desktop after the first launch, the user sees only those utilities that the manufacturer decided to draw your attention to. But you shouldn’t leave the main screen like this, because you can change it to your taste and put programs that you consider necessary on the first page. In addition, Android allows you to add widgets that can reduce the number of steps you have to take to get to the desired function in any application.
Applications can be added to the desktop using the usual drag-and-drop method - hold down the required icon and drag it to the desired location. To add widgets, you will need to hold your finger on an empty area of the screen, click on the “Widgets” section and select the desired widget from the list.
Setting up the dock bar
As a rule, most shells have a so-called dock bar - a place on the desktop where frequently used applications are located for quick access, for example, a phone, instant messenger, browser, camera. It can also be customized by moving the icons of the most important programs here.
Usually this can be done both from the desktop and from the application menu (the latter may not be available in some shells and launchers): you need to hold down the required application and simply drag it to the bottom of the screen.
Changing wallpaper
The desktop of an Android smartphone should please its owner. Wallpaper is an integral part of it and this is what the eye catches first. To make your device delight you, you need to choose wallpaper to your liking, if the standard ones do not suit you (and this happens quite often).
To change the wallpaper of the home screen or lock screen, just hold your finger on an empty space on the desktop, click on “Wallpaper” in the menu that appears, then find and select the appropriate image, decide where to install it and then confirm the action.
Setting up the Android notification shade
The status bar displays the clock, network signal strength, battery charge, and other indicators and notification icons. If you pull it down, you will see quick switches for frequently used smartphone functions, for example, Wi-Fi, Bluetooth, flashlight and others, but their number depends on the shell. By default, the switches are configured as the manufacturer sees it, but you have the right to choose their location yourself or completely disable unnecessary ones.
To customize quick settings, you need to pull out the curtain (once or twice - depending on the firmware) and click on the pencil icon and move the switches as you like. You can disable elements by simply clicking on them or dragging them to the area below.
Screen Settings
The default screen settings often suit only a certain number of users. And before you get disappointed in your phone because of the “wrong” colors or large font, check to see if the settings contain the same items that can be changed.
Most shells provide screen calibration options. To do this, find in the list of available screen settings something similar to “Screen calibration” or use the search and then select the mode that suits your liking.
To change the text size and image scale on the screen, find the items of the same name in the Settings application and set the value that will be most comfortable for you. If you have good eyesight and the device display is large enough, you can safely set the values to minimum or close to minimum.
In the same section, you can configure the inclusion of a special night mode, which prevents exposure to blue light, which is especially negative when using the phone before bed.
You should also set a waiting time that is comfortable for you, after which, if inactive, the smartphone screen will be locked.
In addition, most manufacturers add various “goodies”, the use of which should improve the user experience. You should go through all the points and activate the elements you need.
Sound settings
In addition to selecting the volume and sounds of an incoming call, alarm clock and various notifications, you should turn on vibration when calling (it is not clear why it is disabled by default), so as not to miss a call, message, or simply not to oversleep work/study. You can also choose which sound effects to leave or disable for various actions, for example, when dialing a number in the dialer, locking the screen, tapping the screen, and others.
Setting Do Not Disturb Mode
Do Not Disturb mode is a very convenient and highly customizable feature. It can be turned on either manually or automatically at a specified time or in a certain place. You can configure several different rules at once. When the mode is turned on, you are asked to choose which sounds to turn off, which notifications to leave or not show any, as well as messages and calls from which contacts to let through with sound. You just need to set it up once and no longer worry about whether a random call will wake you up in the middle of the night.
Setting up notifications
In new versions of Android, developers have done a good job on the notification system. Now they can be configured very finely, for example, moving down or completely disabling certain notifications from one application, while leaving others or even increasing their priority. Similar parameters can be useful in instant messengers: remove notifications from some channels completely, turn off the sound for others, and place personal messages at the top of the list and notify about this with sound.
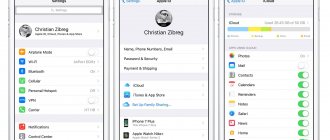
Setting up accounts
If you have mailboxes in other services or more than one Google account, then you can easily add these accounts in the appropriate section in the settings. Now all your mail will always be at hand. Also, if necessary, you can disable synchronization for some accounts.
Battery settings
In the battery parameters, the first thing you need to do is set the lower charge threshold, when reached, the energy saving mode will turn on. In some shells you can set this value with an accuracy of one percent, but most often it is “5%”, “15%” or “20%”. You also need to decide whether to use the Battery Manager or Adaptive Battery feature. The first will identify programs that consume excessive power and offer to limit their operation. In the second case, the system itself will monitor which applications you use least often and limit such background processes to extend the life of the smartphone on a single charge.
Well, in addition, you can choose the style of the battery icon in the status bar and whether to show the remaining charge percentage, and if so, then next to the icon or inside it.
As you can see, Android has a lot of parameters that it is advisable to configure immediately after purchase. But, unfortunately, most users neglect this and then negative reviews about the smartphone appear on various forums, review sites and similar resources, such as “the screen turns yellow”, “no vibration for an incoming call, missed a very important call”, “inconvenient curtain ", etc. As a rule, this happened because the owner was too lazy to go into the settings and change the parameters to his taste, or gave this matter to a sales consultant who configured the device in a way that would be convenient for him.
In this article we have presented things that are quite obvious to an experienced user, but not all of them are and these people need help. Don’t be afraid of the abundance of settings and put this matter off until later, because if you take a closer look, it becomes clear that everything is intuitive and quite simple.
It is also worth remembering that some of the above parameters may be missing, moved to other sections, or new ones added, depending on the manufacturer and the installed shell. Share in the comments what settings you think need to be changed first after purchasing a smartphone.
We additionally save energy consumption
In addition, battery consumption is greatly affected by screen brightness, conversations and the use of wireless networks and additional services. The general recommendations here are: turn off Wi-Fi, mobile Internet, Bluetooth, NFC and geolocation when you don’t need them. And in the screen settings, check the box next to “Auto”. Then the smartphone will adjust the brightness depending on the lighting around it, and not constantly shine at 100%.
Basic Actions
Setting up your phone is divided into two stages. The most important thing cannot be missed - it is done when you first turn on the device and after each reset to factory settings. The following actions are usually performed here:
- Language is selected;
- Wi-Fi network is selected;
- Turns mobile data on or off;
- Enter data from your Google account;
- The current date and time is confirmed.
Sometimes this whole thing is supplemented by entering data from other accounts - Samsung, Cyanogenmod and others. So, let's take a closer look at the initial setup process:
Step 1. Typically, setting up your phone begins with choosing a language, which is logical. You will be offered a list of languages supported by this version of the operating system, from which you need to select the one that you understand. In our case it will be Russian. After selecting it, click the “Next” button, which in this case is shown as an arrow.
Step 2: Typically, the next step is to connect to a Wi-Fi network. Choose the one that is home for you. You can skip this step by clicking the “Next” button. But it is recommended to do this only if a SIM card with connected mobile Internet is inserted into the smartphone.
Step 3: Enter the password for your home Wi-Fi network and click the Connect button.
Step 4. It is quite possible that a connection check will start next. It is possible that the device will also provide the opportunity to update the firmware. The smartphone may also offer to transfer data from another device running Android. This is done using an NFC chip. If you don't need it, click the "Skip" button.
Step 5. Full use of your smartphone is impossible without creating a Google account. It is most logical to enter data from the account that you used on your previous device. If you do not have such an account yet, then click on “Or create a new account.” It is not recommended to skip this step, as otherwise the Play Market will not work.
Step 6: Enter your Gmail email address, click on the “Next” button, after which all that remains is to enter the password, again then clicking on the above-mentioned button.
Step 7: Click the Accept button. By doing so, you agree to Google's privacy policy.
Step 8. Next, the system will prompt you to download the applications that were installed on your previous smartphone. To do this, select the brand of the device you used, check the programs you need (you can leave a checkmark next to the “All applications”) and click the “Next” button.
Step 9. The system will prompt you to activate Google services. It is recommended to leave a check mark next to all items and click the “Next” button.
Step 10. Next, the system can introduce you to the main interface elements. Just click the "OK" button.
Step 11. Wait for all applications that were used on your previous smartphone to download and install. This can be a very lengthy process.
At this point, the initial setup can be considered complete. It should be noted that depending on the device manufacturer, the completeness of your actions will differ. Our example concerns only the “bare” version of the operating system. If you have a device from Samsung or some other company, then you may be offered additional actions. For example, you may need to set the time and date, create an account in additional services, and activate a place in Dropbox or other cloud hosting.
We use mobile traffic wisely
Although mobile operators are handing out increasingly generous monthly packages with mobile traffic, it would be a good idea to monitor it. Step one - go to the system settings, look for the “Network and Internet” item, then “Data transfer”. There we will find the “Set traffic limit” menu, in which you can specify how many megabytes the smartphone can download before you are shown a notification. After reaching this limit, mobile Internet will be disabled.
It would also be a good idea to limit application updates via the mobile network. To do this, open Google Play and click on the icon with three vertical stripes in the upper left corner. An additional window will open in which you need to select the “Settings” menu. In it we look for the item “Auto-update applications” and select “Only via Wi-Fi”.
Summary
The prospect of setting up a smartphone yourself scares many buyers, but in reality there is nothing difficult about it. Android has come a long way from a clumsy “bucketroid” to an extremely convenient and well-thought-out operating system, so reading these instructions will most likely take you even more time than the setup itself. The main thing is don’t be afraid to “do something wrong” (it will be difficult) and don’t panic if you can’t find the right item in some menu. As we have already said, each smartphone manufacturer tweaks Android in accordance with its own ideals of beauty, so some menu items may be called a little differently than in the text, or hidden in another section.
date and time
The date and time set on the device may be incorrect. The current date and time can be adjusted in the special “Date and Time” menu item.
To do this, simply enter the current values in the selected menu item. The date and time can be adjusted in a simpler way by selecting the “Automatic detection” menu item - the date and time will be synchronized with the time from the network.