How to properly set up the camera on Xiaomi and Redmi phones
Now let's start practicing. Below are specific instructions, diagrams and recommendations, following which you can achieve great photos.
Restoring your camera to default settings
First, let's carry out a general setup that affects only the main parameters. This can be done in two places:
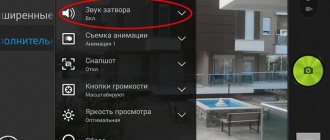
- We visit "Settings", in which we choose "System applications". Click on the camera tab. A list of all parameters opens.
Entrance to cell No. 1 - Let's go straight to the application "Camera» – "Modes". Click on the gear in the upper right corner.
Entrance to cell No. 2
Further:
Choice of quality and exposure
- In the “Photo Quality” , select “High” . Due to this, the photo will not be compressed, which will increase its brightness and detail.
- Parameters such as contrast, saturation and sharpness require separate testing by the user. Only you can choose the ideal setting for these elements based on display quality and personal preference. The average level is considered optimal .
- Particular attention should be paid to “Exposure Mode” . You can choose from average, center-weighted and point. With average metering, the brightness of the frame is distributed evenly. With center-weighted - in the center of the image with smooth attenuation towards the edges. If you select the spot mode, the brightness will capture 1-5% of the matrix of the total image.
These are quite complex and subtle settings. For a non-professional photographer, spot or center-weighted metering is suitable.
If you want to automatically restore default settings, visit the items: “Camera” – “Settings” – “Restore settings” .
Resetting the camera
Setting up the main camera
We set the three points above and proceed to deeper settings. An experienced user can select “Manual Mode” and independently specify the ISO level, white balance and shutter speed.
Manual setting
Setting ISO is a painstaking process that must be adjusted to suit each photo and lighting conditions. For example, in sunny weather and in a well-lit room, the ISO should be lowered. If the photo is taken with a lack of light, on the contrary, set this indicator to the maximum numbers . The picture will be a little blurry, but devoid of “noise”.
Exposure also directly affects quality. With an instant camera shutter, the photo turns out to be detailed . If the shot is delayed for a few seconds, a strong stream of light enters the frame. As a result, the picture is of high quality , but with reduced detail.
Unfortunately, you won't be able to adjust the shutter speed yourself. This is equivalent to a system procedure. Accordingly, you need access to system files.
The default white balance is in Auto mode, but the user can select an individual value. Again, you need to consider the lighting conditions , location and number of objects in the photo. The picture should not be red or bleached - this indicates an ideal balance.
A less significant parameter is "Flicker" . This mode helps to photograph very bright objects, such as light bulbs, lanterns, and sunlight. The default is “50 Hz”. It is advisable to set it to "Auto" .
Setting up the front camera for selfies
The same settings are suitable for the front camera as for the main one. You should also pay attention to Beauty mode . This is a special addition for high-quality selfies. It allows you to hide imperfections on the skin, make your eyes brighter, and your facial features expressive.
Owners of phones with dual cameras will definitely find portrait mode . By activating it, you can blur the background. Only the object in the foreground will be clear.
How to turn on the flash for photos
On Xiaomi and Redmi phones, the flash turns on very easily:
- “Camera” application ;
- In the upper left corner, click on the lightning bolt image ;
- Several modes are displayed. “Off” – flash is disabled; “On” – the flash is always on. “Auto” – the camera itself determines the conditions for which backlighting is necessary. “Background” – the camera turns on as a flashlight, which allows you to illuminate specific objects in real time and take photos at the same time.
Turning on the flash
Selecting Aspect Ratio
There are two options here: 4:3 - normal ratio , and 16:9 - widescreen . With normal, the entire matrix is captured. For example, the main camera is 48 megapixels. The image will be obtained with exactly this resolution.
In wide aspect ratio, the camera ignores the top and bottom edges of the photo. This is ideal for viewing photos on a computer monitor or laptop. Also, 16:9 resolution is suitable for modern phones with a waterdrop notch or unibrow.
Selecting Aspect Ratio
To determine which aspect ratio suits your device, take a photo with two options. View the finished photo on your phone and computer.
Setting up the camera to shoot video
To get bright and detailed video, you need to choose the right quality. To choose from:
- SD is the worst option. It is recommended to use it only for shooting long videos when there is insufficient memory. Frame resolution: 640x240 px (minimum), 720x576 px (maximum).
- HD – average. It features an acceptable image and a small file size. Is the maximum for outdated low-cost phones. Frame resolution: 1280x720 px.
- Full HD is the most optimal quality. It can shoot most modern entry-level and mid-level smartphones. Frame resolution : 1920x1080 px.
- 4K is the best. The videos are of excellent quality, but take up a lot of space on the device's storage. Mostly flagships shoot in 4K. Frame resolution: 4096×2160 px.
We recommend choosing Full HD. You will get high-quality video with good contrast, saturation and brightness. At the same time, it will not take up all the free space on the smartphone.
Video format
In focus mode, set CAF . This is an automatic focus that is suitable in most cases. If you plan to shoot in low light with bright elements (such as a flashlight), set the focus to touch . Otherwise, the focus will automatically switch to the brightest objects, ignoring the central objects.
Don't forget about stabilization. Many Xiaomi and Redmi phones do not have it. Therefore, we use a tripod to make the picture smooth.
Criterias of choice
Before purchasing, you should pay attention to the input and output interfaces. Most often, a rear view camera is connected using cables with RCA connectors and a power socket. If the accessory is designed for 5 V, then you need to make sure that there is a 4-pin jack socket on the mirror. The rear view camera must be compatible with this device.
The higher the resolution of the image received from the camera, the clearer and more visible small objects will be. When choosing a mirror based on the size of the display, you should focus on convenience. For example, a device with a six-inch screen is suitable for viewing videos and photos, but viewing behind the car may be difficult due to the reduction in the usable area of the mirror.
How to improve the quality of your photos
In addition to the standard settings, you should adhere to the following recommendations:
- Shoot only in good lighting conditions . Choose sunny days for outdoor photography. If you need high-quality photos indoors, use good artificial lighting.
- Don't forget about stabilization . Sudden movements when shooting lead to blurred images. Can't buy a monopod or tripod? Then turn the phone very slowly when recording video. Be sure to rest your elbows on a hard surface.
- Initially, purchase smartphones with good optics. If you are considering a phone as a full-fledged camera, only flagship models are suitable for you. You shouldn’t expect great photos from a public sector employee.
Google Pixel 2 Camera (APK)
To improve the quality of your photos, you can try third-party photography apps. For example, Google Pixel 2 . This software is downloaded from third-party services. The XDA Developers site is ideal for downloading.
- Download the application in an apk file;
- Install in the standard way;
- Set up the camera following the prompts on the screen.
Google Camera
A great alternative is Google Camera . There is a separate article where we describe in detail how and where to download the application, how to set up the Google camera and for what purposes it is suitable. Follow the link above and get acquainted with useful material!
What do you shoot most often?
Myself
31.79%
Environment
68.21%
Votes: 173
Video materials
We invite you to watch the video instructions for setup.
Secrets and lifehacks of mobile photography.
In Xiaomi smartphones you can find a large number of camera settings, even if we are talking about initial models. Some camera settings say absolutely nothing to the user. For example, do you know what “Mirror Mode” is?
“Mirror mode” is a function that allows you to mirror the image captured by the front camera. Let's say you took a photo with the front camera - in normal mode, the inscriptions behind your back will be read backwards. Enabling this mode will allow you to mirror the image, that is, the inscription on the image will be normal.
To enable this mode, launch the camera.
Open settings by clicking on the gear.
Enable or disable the mode as necessary.
You can also select the mode only when a face is recognized.
Post Views: 9
Is it possible to install lenses?
Yes, to improve the quality of photographs and creative amateur photographers, it is possible to install fisheye lenses and macro lenses. Of course, it will be installed only for one of the cameras. You can take photos like this.
Here are the detailed tests:
- Aukey lenses on Xiaomi Mi A1 - fisheye test
- Aukey lenses and Xiaomi Mi A1 trying out macro
Conclusion
The Xiaomi Mi A1 camera turned out to be very cool for a mid-price smartphone. Yes, once again it was not possible to avoid “childhood diseases” and various software problems, but this camera nevertheless combines everything necessary for most users. Moreover, after comparing the Mi A1 cameras with cameras installed on smartphones with a higher price tag, it becomes noticeable that they are only slightly inferior to more expensive modules.
At the end of the article, we invite you to independently study the images taken by the main camera of the Mi A1 and draw your own conclusions about their quality. In the end, your personal impression of the quality of the images is no less important than the thoughts of various experts and critics on this matter, no matter how professionals in their field they may be.


